This post was originally meant to be a collection of first drafts for Frieren Vol. 2, similar to what I did with Oshi no Ko recently, but I ended up taking long enough to write it that most of them are now more like second drafts; at any rate, here they are. I came up with 6 decklists, though a number of them are effectively just variations on the same theme.
Like always, translations for the Japanese cards can be found on Weiss Tea Time; this time, I guess they’ve already been moved to the archive.
Table of Contents
Plussing 0s
Before building any decks, I went through and made a list of plussing 0s, so I’ll include that here:
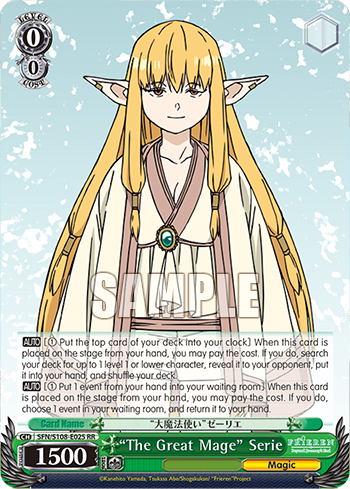
- JCs:


- Oversizes:
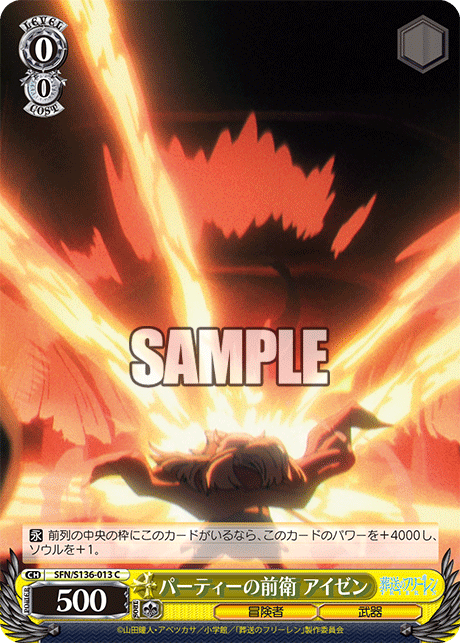
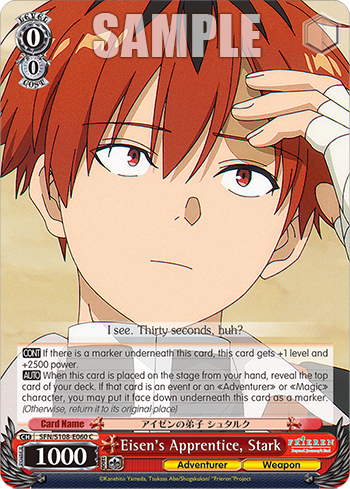



- 1.5k field counter (could turn other cards into oversizes, potentially):


- 3.5k that coinflips to stock (both an oversize and a coinflip, sort of):

- Coinflips:


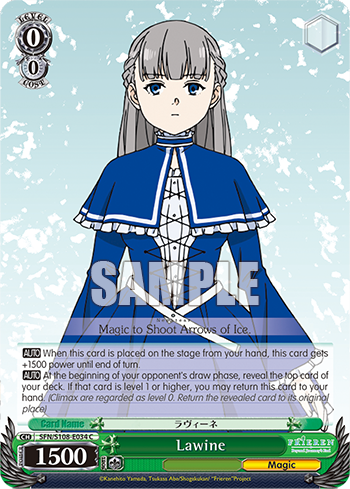
- Runners:
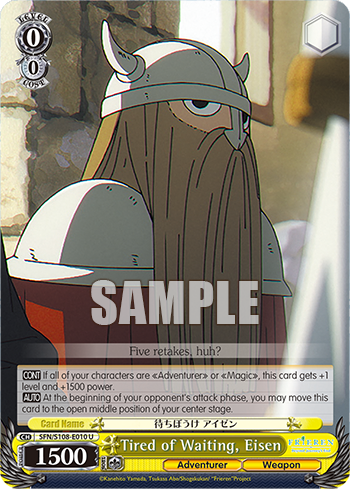

- Cleancuts:


- Aqua riki (only hits on one specific event):

- Clock or stock twindrive (doesn’t plus hand, unless it makes you trigger a climax I suppose, but is free stock if you use the clock option):

- Rikis (not turn-1 attackers, but still plussing 0s):


TD Topend
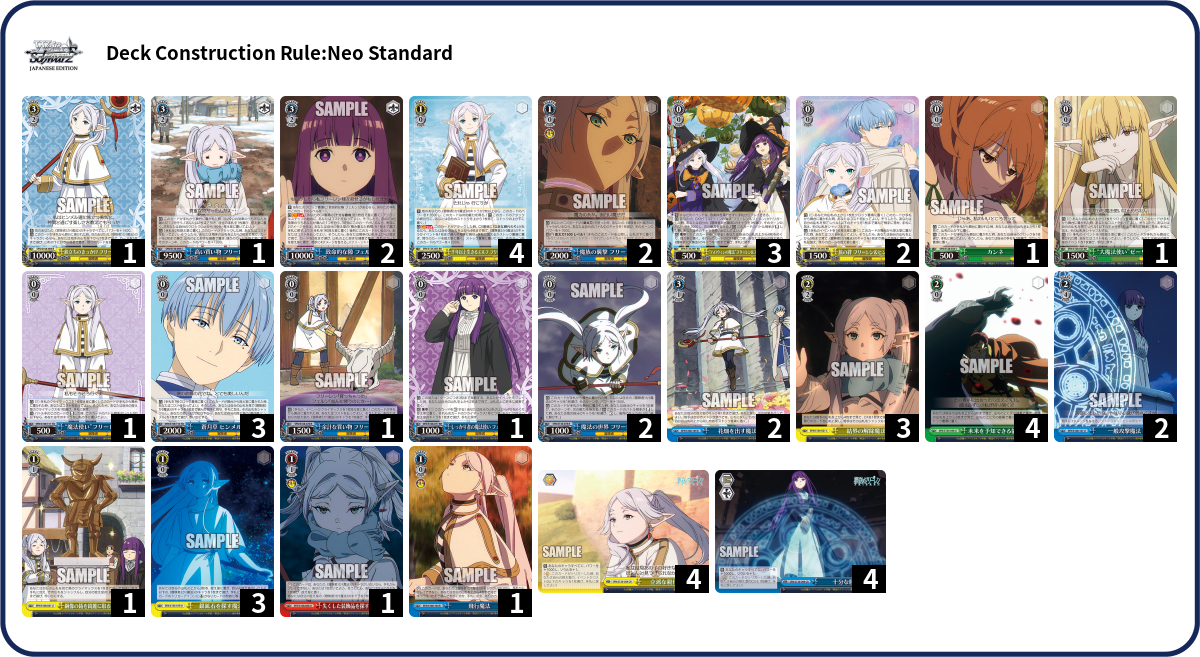
To start with, I’m just updating the deck I ran with set 1, with the TD finisher. I do still think that finisher is pretty good (and just fun), on account of how easily and cheaply it comes out (with hexproof to boot). For reference, here’s my current set 1 decklist (very similar to the list that I made a deck profile on last year):
Deck Log: 375Q7
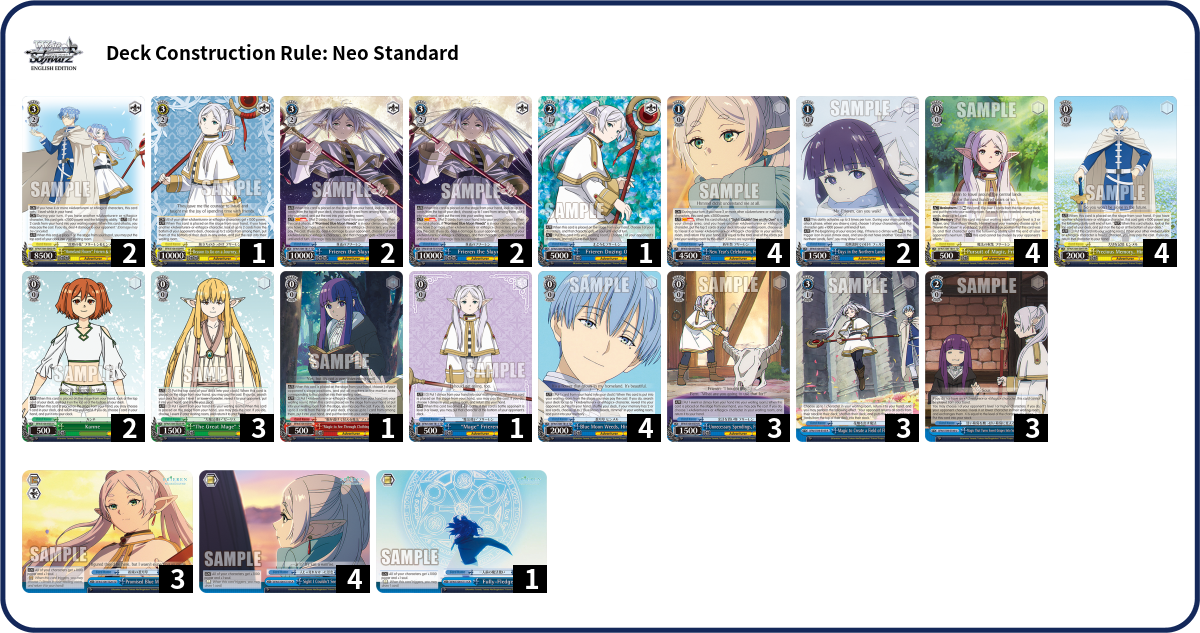
(On a side note, the name of this deck, 蒼月草のフリーレン, is just a play on the similarity between the Japanese name of the Blue Moon Weeds (蒼月草, sougetsusou) mentioned in the pants climax’s name, and the Japanese name of the anime itself, Sousou no Frieren; putting them together, you get Sougetsusou no Frieren.)
And here’s my upgraded set 2 list:
Deck Log: 62DXV
EncoreDecks: JqGhs33i0
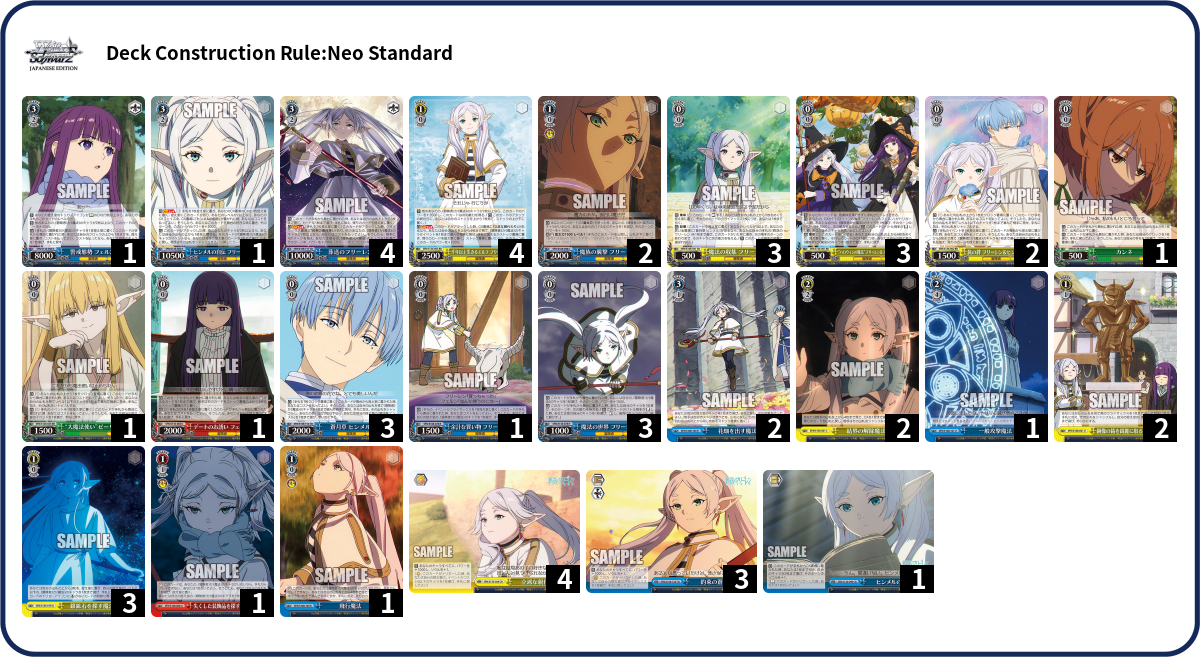
The biggest upgrade, of course, is the level 1 combo.

I previously ran the book combo because of the repeatable plussing from the backrow and the easy selection into level 0s, but it was still fairly scuffed: book isn’t a particularly good trigger, the backrow’s plus is low-quality and its power pump is unreliable (plus it’s a weak attacker), and it’s difficult to adjust how much you mill.
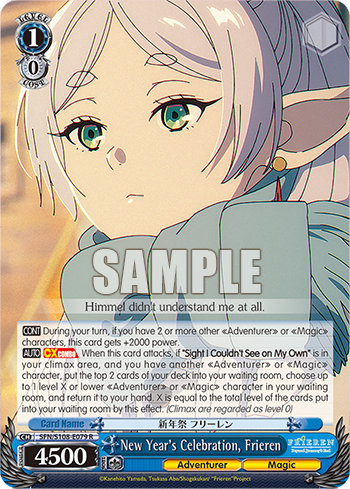

In contrast, the focus combo is hugely pushed. It’s 6k cross-turn (which was the biggest draw of the set 1 pants combo, I believe), it can prevent climaxes from being buried in stock, it’s got controllable deckspeed, it can grab events, it can choose whether to get stock or hand, it can swing at 9k (if you opt for the stock), and it’s on focus. Now, I haven’t played focus before, so I don’t know how it feels in practice, but it seems like an amazing trigger, and this deck is one that can likely take advantage of it quite well. For one thing, a lot of the sculpting needed for the endgame is costless characters and events (in particular, the stockshuffle event, which can provide additional sculpting on the finishing turn, and the draw brainstorm, as well as the blue Himmel if you don’t already have that in memory). So while you do need to find a level 3 combo or two over the course of the game, which focus can’t get you directly, I don’t think it’s too likely that you’ll trigger a focus and wish it was a door.


And of course, the big selling point of focus is that it can grab events. I ended up cutting the grapes event for deckspace (and the focus combo should hopefully mean that you tend to end up with a bit more stock than before anyway), but the stockshuffle event is a very good target later in the game, since it can select into characters that focus can’t (in the main phase, to boot). Having easier access to it made me feel comfortable cutting it down to 2 copies (though I still wouldn’t want to go down to 1).
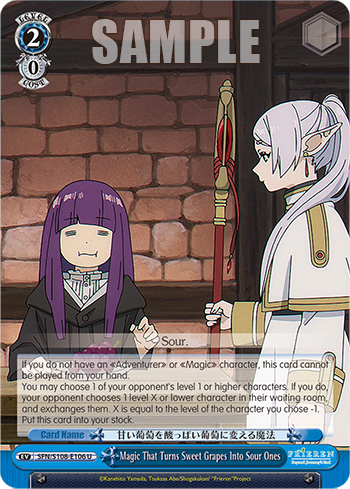
Naturally, I also added some events to the deck that I wasn’t running before; one of those is the 1/1 that searches a yellow climax:
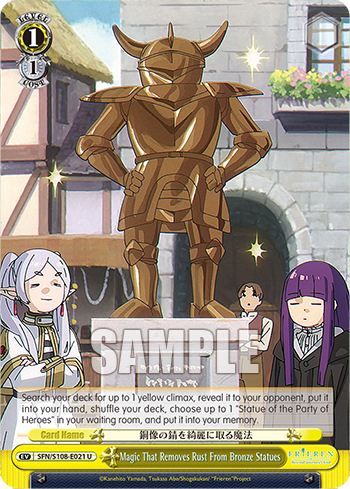
Finding the climax is often the hardest part of looping a level 1 combo, so it’s very nice that this event allows both the focus trigger and potentially the combo itself to effectively select into a climax for next turn. (That climax does need to be in the deck to be searched out, of course, but most of the time it is.) And since the combo mills, it’s often not particularly bad that you’re pulling a climax out of your deck. In this deck, the level 1 climax is the only one that’s yellow, but that’s the one you most need selection for; it’s easy enough to find the level 3 climax on the finishing turn anyway.
(This event can also put a specific character into memory, but that’s not worth the deckspace if you’re not running the choice finisher from set 1.)
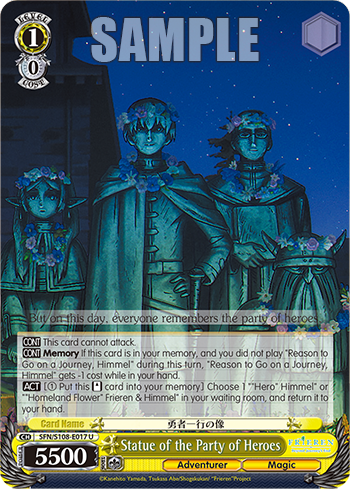
There are also a couple of events here that are primarily there as one-ofs to be grabbed if you trigger a focus:


Notably, the level 1 combo’s stock manipulation means that if you trigger a climax, it’s likely to be the top card of your stock at the end of your turn, no matter when it was triggered. (Though that does mean you have to take hand rather than stock from subsequent combos.) This means that, if the climax you triggered was a focus, you can potentially salvage a 1-cost event counter and then use that to pay the climax out before refresh, even if you ended at 1 card in deck. There’s only one 1-cost event counter, but it’s a decent one, at least. And if you trigger a focus on the first or second attack and grab it, you can aim to end at 2 cards rather than 1, and then decide whether or not to draw depending on whether or not there’s a climax in those two cards (at least if the opponent fronts on their first attack).
The use case for Flight Magic is fairly similar: you can leave more cards in deck, at least if you’re not too worried about the opponent siding or removing your characters or whatever, and then decide whether or not to use the event depending on whether or not there’s a climax left. This also applies to the situation where you’re leaving more than one card in deck because you simply can’t mill enough: if you trigger a focus (or see Flight Magic off the combo), then you can get a bit of extra milling on the fly, so to speak.
Now, the 1/1 event counter, being red, is very much off-color; this means that the deck has to run the new RR brainstorm, to allow you to play events without color. That’s not exactly a problem, though, particularly since moving off the book combo opened up a backrow slot.

This brainstorm also has an interesting ability that lets you assign 1k power and an optional memory kick ability when you trigger a climax or another copy of the brainstorm. It’s not particularly reliable, of course, but it could be a nice way to deny certain abilities, or to completely remove a useful card like a level 1 combo or a climax swap (though it might be fairly hard to tell whether that will help or hurt the opponent). I suppose this means that you’ll ideally want to attack last into the card that you’d most like to memory kick, or most need power against; though you also tend to want to attack with non-combos before combos, and with combos where you want the power from getting stock before ones where you’re more likely to get hand, in case you trigger a climax early (to maximize the chance that that climax is already on top of any triggers from non-combos or extra stock from the combo, since those can’t be moved to the bottom of the stock to avoid burying the climax, the way that triggers from combos can).
In addition to the two event counters, I’m also running two 1/0 2.5k backups.
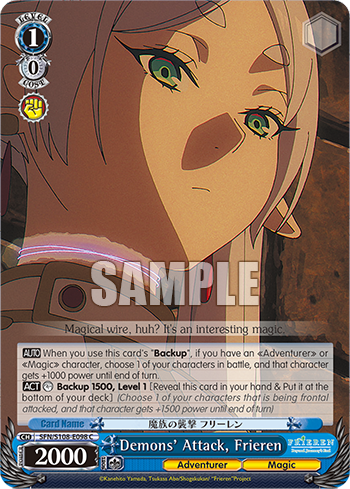
Since the level 1 combo sits at 6k cross-turn, it could actually be worth it to back it up; indeed, that might be one of the best ways to loop it. And having this 2.5k backup, rather than just a 2k backup, just reinforces that, though I suppose the fact that it goes to the bottom of the deck might be awkward if you end at 1 card in deck, which is quite likely. (Unless that 1 card happens to be a climax, in which case it’s basically an upside rather than a downside, letting that climax get into refresh.) If there are multiple lanes that you want to back up in, you could wait until after refresh to use the backup, but of course that’s not always the case.
Since this is a costless character, you can grab it off of focus, which could be nice if you expect the powerline to be relevant. You could also grab it off the 1/1 event counter, I suppose, and then use it on the next attack. (Or, if you used it previously and didn’t shuffle since then, grab it off the bottom of your deck with Flight Magic or the draw from the 1/1 event.)
There’s also the 1/0 salvage event, which can help both with looping the combo and with getting it in the first place.

Since the maximum level you can salvage off this event is determined by the number of non-soul-triggers milled, it’s extremely likely (a 99.5% chance in first deck) that you’ll be able to grab the level 1 combo if it’s in the waiting room, and it’s guaranteed if the combo was milled by the event and you didn’t refresh as a result. I’m generally a fan of this sort of “mill and salvage a character of X level or lower” type of event (particularly when they’re on-color), and it’s even better when the level 1 combo can actually grab it, giving it a lot more potential to help loop the combo or just generally get you some main-phase selection for lower-level characters later in the game. The mandatory mill can be a bit awkward at times, though, particularly if you’re looking to play multiple of these events and then also combo afterwards (and maybe brainstorm as well).
I’m only running 3 of them, but it’s possible that the 4th copy would be worth it for the increased consistency in setting up and looping the level 1 combo.
On the topend side of things, another upgrade to the deck is a bit more decompression in the form of the 2/2 barrier removal event, which can remove a climax from the opponent’s deck if there’s one in the top 4 cards.

The level 3 combo is cheap, but it only gives you three extra instances of damage, so it’s nice to have a way to use any extra resources you might have to increase your chance of killing. And with the combo being a burn 4, decompression is always welcome. (Unfortunately, since this event can only remove climaxes, you can’t use it to refresh the opponent to enable a stockshuffle if they’ve got a small deck that’s not literally 1 in 1.)
In general, I feel like it’s better to play this event before the stockshuffle: the hope is that they’ll be uncompressed enough afterwards for a burn 4 to have a decent chance of sticking, which necessarily also means that they’d be uncompressed enough for the barrier removal event to have a decent chance of whiffing. But if even their deck plus stock is quite compressed, and you’re going for more of a hail mary to begin with (or perhaps you only need a single instance to stick), it might be better to stockshuffle first; that way, the decompression from removing a climax (if you hit) is concentrated in the deck rather than spread across both deck and stock. Also, the closer they are to refresh, the better it is to stockshuffle first, since a climax that’s put into the waiting room has a better chance of still turning into a cancel (and thus you’d like to maximize the chance of putting it into stock instead). In particular, if the opponent only has 4 cards in deck, there’s no reason to use the barrier removal event first, since it can see the entire deck regardless (so if it whiffs, that’s actually the best-case scenario).
I also put in the burn 3 event. I’d briefly tried it in set 1, but that 4-stock cost felt too steep to be worth it; my hope is that the new level 1 combo will make it more reasonable.
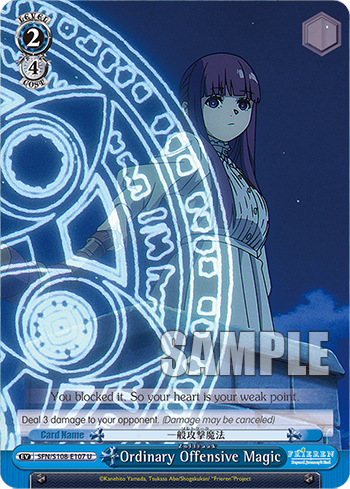
While of course this event simply provides an extra instance of damage, it’s also notable that it can refresh the opponent if they only have a few cards in deck (either all clean, or with a climax on the bottom), to let you stockshuffle the next deck.
I’m only running a single copy of this event; in this deck, a 1-of event is still fairly accessible, and it’s not so essential that I want to guarantee it doesn’t get lost. There’s also some amount of overlap in functionality with the barrier removal event: if there’s a climax in the top 3 cards, they’ll both remove it, though of course the barrier removal event is better in that case (being cheaper, as well as keeping any non-climaxes above the climax in the deck). And they’re both useful in the case where there’s a climax 4 cards down, though in different ways.
One quite noticeable addition here is a third climax combo, in the form of a 1-of book and 1-of book combo.


I’d already cut the finisher climax down to 3 in my previous list, with the idea being that it’s not difficult to find anyway, and the backrow let an empty book still at least replace itself with a draw (which might be more worthwhile than trying to find the climax swap). While this deck no longer has that book-support backrow, this is the new type of book, so it draws a card on its own; and more importantly, its combo requires very little sculpting and can be a useful thing to threaten. Specifically, if you’re level 2 and your opponent leaves 1 clean card in deck (as is quite common), you can use this combo to turn that into 4 clean damage. Or if they have 1 climax in 2-4 cards and you have the barrier removal event, you can still turn that into a bunch of clean damage. And the climax does give soul (unlike RWBY’s Pyrrha combo) so you can likely still take advantage of that clean damage even without direct lanes — though there’s a distinct possibility that you’ll have one or two of those anyway, and you do still have to worry about antichange backups. The soul being modular can also help you swing for the right number(s) to maximize the guaranteed damage and/or get their clock into refresh, though soul triggers can potentially mess that up. You also have to hit the top check; luckily, that does count events, so it’s not too likely to whiff, but it’s definitely possible.
I cut the early play healers for space, but I think it’s still important to have a healer of some sort, since getting hit to 3-6 can be pretty bad even if you’ve got a number of cards left in deck; between the check 3s and brainstorms, you can easily end up refreshing, at least if you’re not already set up. The new set has a card that can both heal and bounce, so I put that in to combine those two tech cards into a single slot.

In the plussing 0 slot, I switched from the JC to the cleancut giver.
With the book combo, the JC was an important attacker even at level 1, helping to loop the combo and swinging at a somewhat reasonable power line; but with the focus combo, the goal is to get triple, to make the opponent have to contest a full board of 6ks, so that’s less important (though of course, you can cleancut a combo at level 1 if the situation calls for it, potentially putting the cleancut ability on another combo). Also, this deck now has 6 brainstorms, which makes it very likely that there’ll be a good target to cleancut at level 0. And while the cleancut giver on its own only gets to 2.5k, if you also have the Himmel ruijerd, you can assign the cleancut to it and pump it to a fairly respectable 3.5k.
A more minor change was in the rikis: I changed two of them to the new yellow riki, while keeping one of the previous green one.
The main reason for that was their second abilities: the yellow riki’s ability to ditch an event to check 5 for a character is a lot more useful in the early game when you normally play rikis, but the green riki’s event swap does have some use, so I wanted to at least keep it as a 1-of. This deck ended up without too much yellow that you actually want to level, so the color is also fairly significant (but not so much that I feel the need to have all the rikis be yellow).
Similarly, I opted to change the climax swap to the new Fern one; the idea there is simply that this deck feels like it appreciates any bit of decompression it can get, which in this case is the ability to put an extra clean card into the opponent’s stock before stockshuffling them.

Other Possibilities
Between the burn 3 event and the book combo, I felt comfortable cutting the bottom-deck moca.

The point of this card was to enable a stockshuffle in the case where the opponent has a compressed waiting room and only 1 or 2 cards in deck. The burn 3 event can also do that (unless there are 2 cards with the first one being a climax, I suppose), while the book combo can be used as an off-finisher to give you some guaranteed damage if they have a small deck with no climaxes (and you can stockshuffle to potentially turn a small deck with climaxes into a small deck with no climaxes). For that matter, if they have 1 card in deck and it’s a climax, the barrier removal event can also refresh them. So while there might still be some cases where the bottom-deck moca could be useful, it no longer feels worth the deck slot to me.
I’m sad that I wasn’t able to find room for the green future sight event.

Still, at the end of the day I’d prefer level 0s and 1s when it comes to improving the midgame level 1 loop, and it doesn’t seem too likely that this event would help a ton with extending the finisher. Maybe it could tell you whether to play the barrier removal event before or after the stockshuffle, or something like that, but for the most part you don’t have a lot of decisions to make in terms of the deck’s offensive capabilities (beyond whether or not it’s beneficial to stockshuffle).
(As a side note, this event doesn’t have “Magic” in its name, which could come up if you want to play it with the RR pants combo from set 1; it does seem like it’d be well worth including in that deck regardless, though.)

I put in an antichange backup at one point, but then changed my mind and took it back out again.

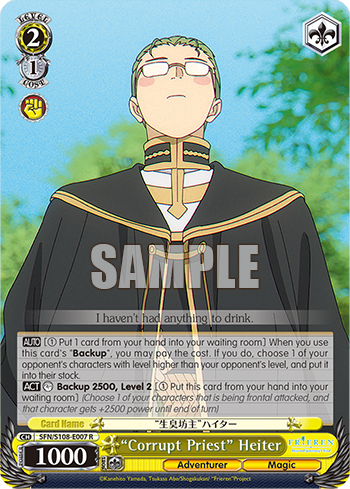
If there was a level 1 antichange, I’d be a lot more tempted (especially since a 1/0 antichange would be salvageable off a focus trigger), but it just seems fairly unlikely that a level 2 antichange would come up enough to feel worth the slot: you need to sculpt into it, you need to be level 2, and you need to have a board that can enable you to actually use it. This deck isn’t particularly good at sculpting in the midgame or at staying at level 2 for an extended time, and while it does have a bit of board presence, it’s still just level 1s. Encouraging the opponent to side your level 1 combos can be nice, but that doesn’t feel worth cutting something that can help you loop them in broader circumstances. Neither of the available antichanges are great for this deck, either: it’s fairly likely that you don’t actually want to sac anything for the red one, and you probably benefit less from saving stock with the yellow one than your opponent does from the stock it gives them.
It might be nice to include the neg-soul event.

While it has some of the same issues as the antichange backup, you can salvage it off a focus trigger, and if the opponent sides your level 1s, you’re likely getting approximately the same effect for free. It also tends towards being used later than an antichange would, giving you more time to select into it; for one thing, it’s realistic to use it after your finishing turn if you failed to kill (perhaps if you hit a lot on some brainstorms and thus ended up with extra hand), particularly if you already survived your opponent’s finisher the previous turn and just need to survive some vanilla swings on the followup. If you do find it a bit earlier in the game, though, there’s also some potential to use it when the opponent is still at level 2, if you expect you’ll have extra hand next turn, for example to entirely remove a swing for 2. (And who knows, maybe the 1k power could come up.) It’s nice that it gets around hexproof (since you choose your own character rather than the opponent’s), but note that it can only choose a character in battle, so you can’t stack two of them by putting one on a lane where the opponent hasn’t attacked yet, for example.
8 Focus
The second deck I want to make is one with the focus finisher; this is just a cool package that I wanted to build the moment I saw it.



It does seem like a pretty good finisher, but it requires more resources and sculpting than the pants topend (though the events can at least help with that a bit with their alarm abilities, if you have extras or can grab them back out of clock).
While there might be an argument for running a level 1 combo with better sculpting because your topend requires something like 6 specific cards in hand, I suspect it’s still best to just go with the focus level 1 combo once again. That also means that you can run the new Himmel early play and have his EP condition be good rather than bad:

In addition to just being a pretty good EP, this card can also serve as a third lane on your finishing turn if the opponent is already at level 3 (or perhaps 2-6) and you don’t need the 3/5 event. Notably, since it’s yellow, you can potentially grab it with the 3/5 event’s alarm (that you might have been holding onto, but then clocked because it’s no longer necessary). There are a few other options for that “third-lane” slot, but I don’t think any of them are better enough than the Himmel to make up for not also being EP healers (or for being significantly more expensive).




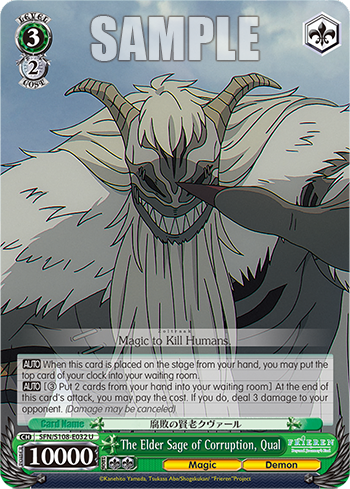
The name of this deck is “Magic That Looks Cool”, because that seems to be the primary purpose of the spells depicted on the two events associated with the finisher. (OK, in-universe they’re presumably meant to be powerful offensive spells, but practically speaking they were just there to help make it a proper fight scene.) And in general, the “cool” factor is part of the draw of this finisher, doing some unusual stuff like playing events during the attack phase and throwing a card straight into level, as well as getting to use the 3/15 event (which has the highest printed cost of any card in the game).
Deck Log: 4PKDD
EncoreDecks: Rbg7yqGmd
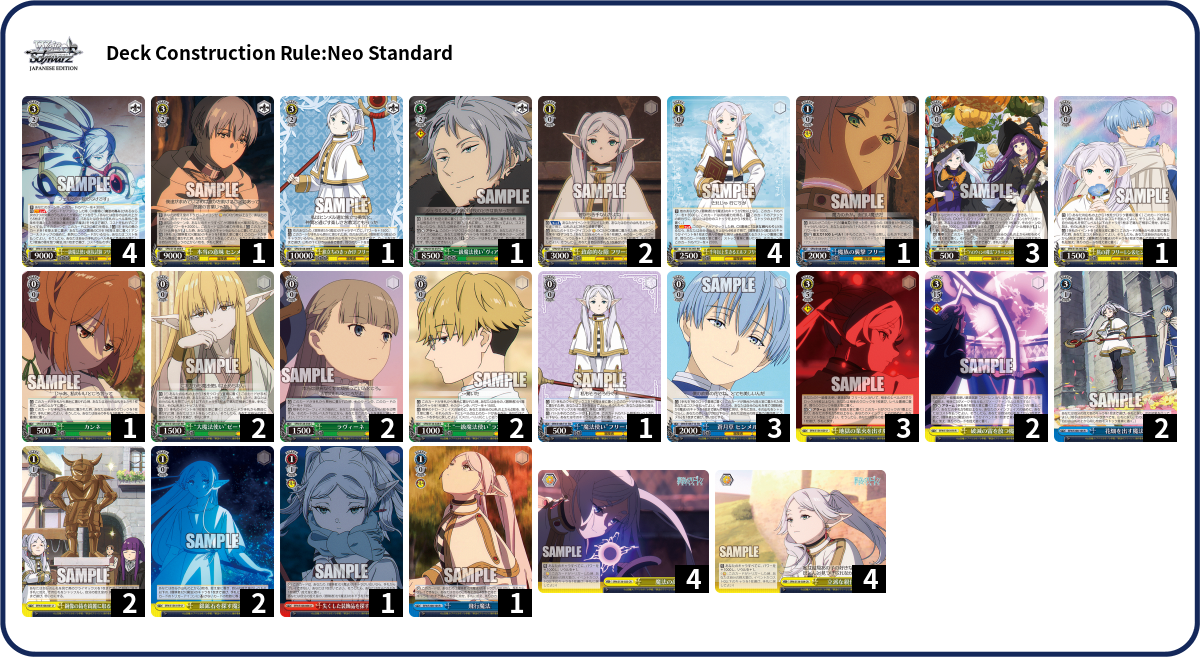
Since this deck also has the focus level 1, a lot of it is the same as the previous deck, and you can see my logic for why I included those cards back there. This topend doesn’t dig for its own climax, so I don’t feel as comfortable running the 1-of book instead of the 4th finisher climax. There’s also just a bit less deckspace in general, since it needs to include more endgame events (though since they can contribute to looping the level 1 combo, it doesn’t feel too bad to cut down on other stuff with that purpose).
I went for three of the 3/5 event and two of the 3/15 event, because the 3/5 event has a more useful alarm ability (in particular, it could be quite useful for looping the level 1 combo), so it seems better to have extra copies of that, though not so much that I’d want to run it as a 4-of (it’s very easy to not be able to use an alarm, perhaps because you simply don’t want to clock).
If you don’t value the alarm ability that much, I could potentially see cutting the 3/5 event down to 2 or even 1, because this deck has a lot of event access and you don’t always need it anyway; on the other hand, I wouldn’t feel comfortable cutting the 3/15 event down to 1, because without it you don’t have much of a finisher. I do feel confident about being able to find it consistently as a 2-of, though. (Incidentally, if you don’t have the 3/15 event in hand on your finishing turn, you can potentially just hope to trigger a focus and grab it that way, though obviously that’s not something you want to rely on if you can at all help it.)
Both of these events need you to have at least 5 hand after clocking to be able to use their alarm abilities, so they’re not too useful for coming back in a game where you’re just struggling for resources, but it’s a lenient enough condition that it shouldn’t cause much trouble normally. It’s something to watch out for if you put a lot of cards into stock off the combo, I suppose (though the bigger thing to watch out for in that case might simply be having enough playables next turn).
This deck doesn’t need blue (since the brainstorm can let you play the stockshuffle event without color), so I opted to have the second color be green for the double bouncer, since the finisher is quite vulnerable to tap counter or memory kick.

That said, it’s also possible to plan to choose the encore-step ability with two copies of the combo to play around one of them getting tapped or removed; that means that you lose out on the 3-5 event (unless you had 11 stock to begin with and could play it during the main phase), but some amount of the time that’s true for the double bouncer as well, if you need to spend sculpting or stock that would otherwise be used for a third combo (or perhaps need to ditch the third combo or the event for the second bounce).
For green fix, I went for 2 of the green riki and 1 of the yellow one rather than the other way around (still keeping the 1-of yellow riki since it could be salvaged off the 3/5 event’s alarm ability, most likely if you’re looking to clock up to level 3 and go for the finish, though there’s a slight chance that it ends up in the waiting room at level 0), and I also used green plussing 0s.
Specifically, I went for 2 each of the Lawine and Land coinflips; with this list, they have very similar chances of hitting in first deck (55.1% for Lawine, 49.4% for Land). Even though Lawine has a slightly higher chance of hitting, I’d prefer one Lawine and one Land (or two Lands) over two Lawines, to have a better chance of at least one of them hitting (even if there’s a smaller chance of both hitting). And in the rare case where you end up with 2 Lawines and a Land, you can start with one Lawine and then decide whether to do the Land or the other Lawine next depending on whether or not it hit. With one Lawine and one Land, the Lawine is just as likely to hit regardless of which order you use them in (unless the Land refreshes you, I suppose); I’d default to using the Land first, again to maximize the chance of at least one of them hitting, but using the Lawine first does mean that the opponent doesn’t know the top card of your deck.
Beyond that, Lawine swings bigger, but Land has the option to pump something else. Land provides a bit of deckspeed, but sometimes you don’t want the mill; meanwhile, Lawine shows the top card of your deck to your opponent, but also to you (which could be useful if you have one of the event counters). So overall they feel quite interchangeable, and having a split also means that even if you only need one of them, there’s a possibility that you could draw both and have a choice of which to use.
I went with the blue climax swap rather than the red one (or the green one) for this deck.
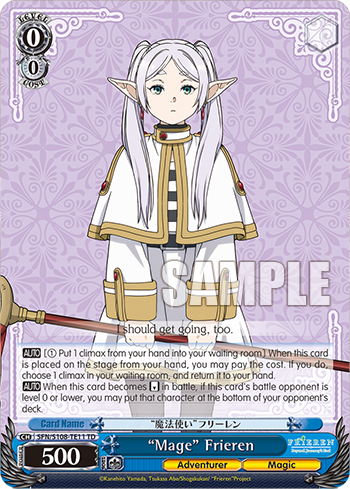

Since this finisher has smaller chunks of damage than the TD one, it feels less necessary to try to absolutely maximize decompression; and the blue climax swap also being a bottom-deck bomb can sometimes come up. While it’s a bit tempting to run the green climax swap for that extra bit of green, I generally don’t like having my only climax swap be from deck when I don’t have a different way to grab a climax from the waiting room, since a deck climax swap can’t access climaxes that got stuck in stock (perhaps as a result of a stockswap or stockshuffle). Plus, if you need a climax that’s not in the waiting room, you can potentially just use the climax search event anyway.
Despite not needing it for the finisher package, this deck still runs the Himmel ruijerd; it’s very helpful for sculpting into the level 1 combo quickly (which is important since I feel that triple is significantly better than double, making the opponent have to answer 6k in all 3 lanes rather than just 2), and it also provides a costless way to clock yourself up (while being able to search a character of any level, as well).
On the other hand, this deck doesn’t need the draw brainstorm, and so it instead runs the 1/0 that lets you clockswap and pump 1k & a soul when you play a focus, and check 2 rearrange when you use an event (only once per turn, but it’s the new version of once-per-turn that lets you choose when to use it).

I initially figured that I’d aim for a second brainstorm as the other backrow, but in a couple practice games, it felt quite awkward that you have to fill your hand with endgame pieces; the idea is that this card will make that more manageable. The most obvious thing it does is let you use the events’ alarms more freely (since you can easily get them back afterwards, so long as you play a climax), including on your finishing turn if you’re already level 3. There’s also the potential to stash a level 3 combo in clock at level 2, so it’s available in the waiting room at level 3, to be grabbed off the 3/5 event’s alarm or the stockshuffle event, for example. And sometimes it can just be a bit of free sculpting (though the same could be true of a second brainstorm, if it’s used to get a level 1 combo that goes on to generate stock).
One interesting interaction with the rearrange when you play an event is that you can do it after playing the 3/5 event during the attack phase (if you didn’t use it earlier), though I suppose a lot of the time that’ll be before any triggers anyway (and thus not that different from using it in the main phase). Still, if you’re trying to kill from below 2-4 and thus use it on the second attack, it could help you decide whether to front or side on the last attack, perhaps. (Or you could use after playing the 3/15 event instead, I suppose, if that fails to kill, and hope it lets you cancel on 2 instead of 1 to slightly increase your chance of surviving.)
8 Bar
Moving away from the focus level 1 combo for a bit, my next deck is 8 bar.
Deck Log: 1AFLT
EncoreDecks: nTEUwEgvN
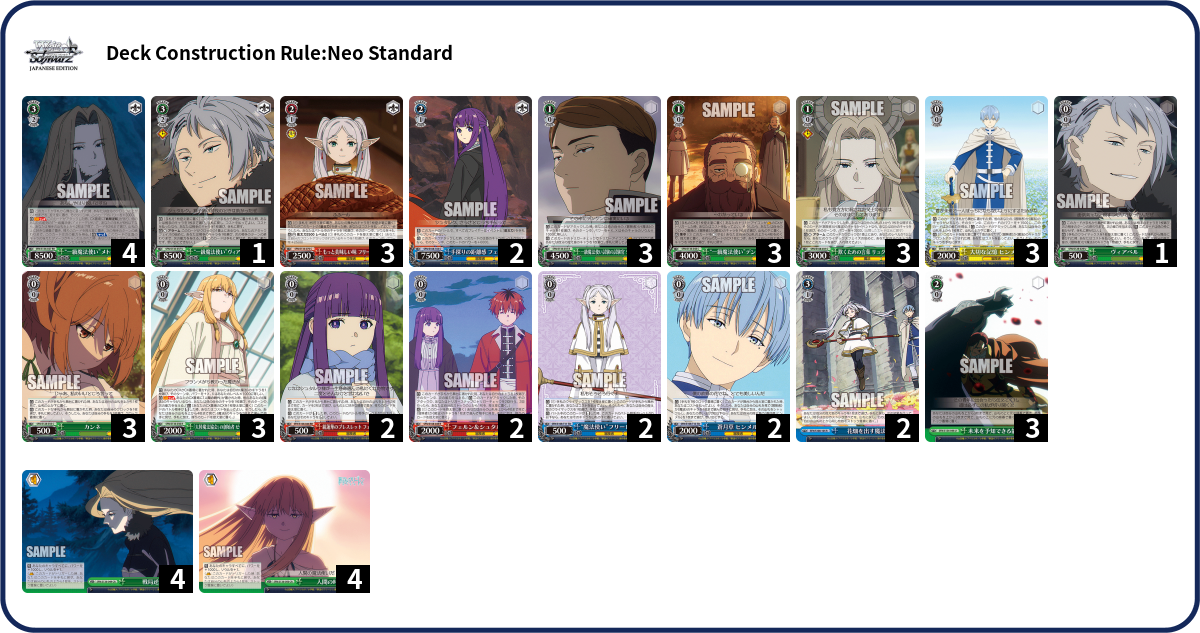
There were two things that made me want to build this deck. First off, it’s neat that the plus-soul backup helps the level 3 combo be effective.


This is already a combo that likely requires you to survive at least part of your opponent’s finisher, since it does a significant portion of its damage on the opponent’s turn, so the fact that it also requires you to cancel isn’t much of a downside; you probably need to do that anyway. (Now, the fact that Methode needs to stay on the board definitely is a downside, and one that the backup probably doesn’t help with.) The plus-soul backup plays into the goal here, helping you survive by making you very likely to cancel the attack (notably in contrast to the minus-soul event from this set or the money counter from the previous one, which also help you survive but make you less likely to cancel).

Also, since the combo requires no resources beyond those required to play down the characters and climax, the plus-soul backup is fairly easy to afford. The goal here, I’d say, is to have triple combo plus double backup, which requires a total of 7 stock and 8 hand (including 6 specific cards); that isn’t happening every game, but is still very much doable. You could also go down to double combo and single backup, which only needs 4 stock and 5 hand (and a third attacker); you can never do single combo, though. If you have double combo, you can potentially use the 2/0 event to determine whether you should attack with a combo or non-combo first (and even if you have triple, it could be useful for determining if you should side).
The other thing I wanted to do with this deck was run the Denken brainstorm.

Turning excess bar triggers into heals seems very nice, particularly when it comes stapled to your brainstorm. It’s a bit sad that it can only heal characters, and the fact that they go to the bottom of the deck could be bad (though it could also be good), but those are hardly dealbreakers. Of course, you’d still generally prefer to cancel with your climaxes, and to hold onto some of them to actually play, but this can provide a bit of a buffer to make it so that triggering more than you want isn’t too much worse than cancelling.
Also, in the edge case where you trigger a bar on your finishing turn and that takes you over 6 hand, you can use this to ditch it even if you have nothing to heal (or even if healing isn’t worth putting a clean card on the bottom of your deck), to let you still do any subsequent level 3 combos.
The deck name, “The Real Treasure Was the Food We Ate Along the Way”, is just a way to reference the bar (treasure) triggers alongside the plus-soul backup’s emphasis on food. And of course, Frieren has from the beginning been a show about the journey rather than the destination.
Since the brainstorm’s heal ability is only activated by bars, that means that this should be an 8-bar deck. There are two advantage combos on bar, which are both fairly similar.
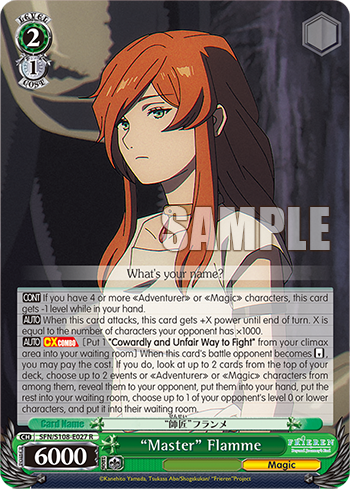

While Flamme’s ability to potentially remove the opponent’s backrow is kind of nice, the fact that there isn’t an easy way to keep her on the board feels like a dealbreaker to me (and her plussing is pretty limited as well). The Serie has no such issue, being able to hang around in the back row (or just be easily replayed if you end up attacking with her). You do need to find a different character to get reverses with, though.
Notably, the Serie combo only ever references the «Magic» trait, and not «Adventurer», and so there are a number of cards that are off-trait for her but not for anything else. There are only two that I’m running in this deck, though, the two Himmels. You can still give them the on-reverse ability from the combo, but not the power; and you can’t do the combo with nothing but Himmels and a single Serie on the board, or grab the Himmels off the combo.
Between Himmels, events, and climaxes, there are a total of 18 whiffs for the combo in this deck; the chance of seeing at least two «Magic» characters in 4 cards is still 87.2% in first deck, though; and if you’re doing the combo at the bottom of your deck, you can potentially grab cards that you healed off with the brainstorm’s ability.
One of those Himmels is the JC, a card that seems like it works quite well with this deck, outside of the trait issue. It’s a reasonably good attacker, particularly at level 0 but even into level 1; it can potentially let you attack with the level 0 combo and then get it back (if you don’t otherwise have a third attacker, for example); it can dig for bar triggers; and it can potentially deny a crash to ensure you have a reverse target for next turn.
The other primary attacker I’m running is the level 1 Genau.

Honestly, there isn’t much in the way of off-combo plussing that I could find; this Genau is nice when he works, but needs a fair amount of support. So I’m also running a few cards that can help him trigger a bar:



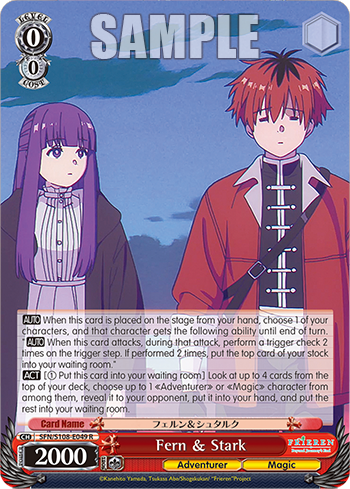
The 2/0 event checks 3 cards and doesn’t take up a stage slot, but of course it only works at level 2. The Kanne and the Fern & Stark only add 1 more chance to find a bar, but they have other utility on top of that. And the red Fern doubles as a good target for the combo’s on-reverse ability at level 0 (or generally if the opponent has a level 0 on board). If you don’t see any bars with the 2/0 event, you could potentially use the Fern & Stark to mill through them (particularly if you see a character you’d like in hand), effectively giving the Genau 5 chances to trigger a bar. Alternatively, if you see 2 bars in the top 3, you could still give Genau the twin drive ability with the Fern & Stark, but not mill (maybe just using them as an attacker), and then choose whether or not to blind stock on the first bar to ensure Genau triggers both, since his salvage ability is not limited to once per turn. (There’s also a chance of that happening without the 2/0 event, of course, but it’s less likely.) You probably need to make sure that you’re not refreshing as a result, though, since both Denken’s heals and Genau’s salvages won’t happen until after both triggers have finished resolving (though the fact that the twin drive makes you pay out a stock afterwards means that that will be in the waiting room, at least).
Another option for increasing the odds of hitting Genau’s salvage is to simply play another copy of him, but that only adds one more chance to trigger.
Since I likely want to play down a small level 0 character to help Genau hit, I’m also playing Lügner to aim to efficiently turn that into a more respectable attacker that has a better chance of getting a reverse (or helping someone else to do so).
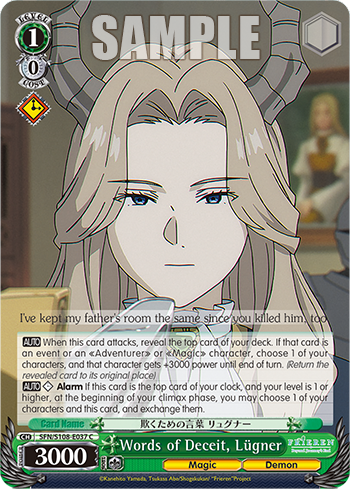
This also means that you might want to leave a non-climax on top of the deck if you have the option, to guarantee the 3k pump. Kanne in particular works well with Lügner, letting you put him on top of your clock while also checking the top card (though you do need to have an idea of whether or not you’ll play Kanne if you’re deciding whether or not to clock Lügner).
So the ideal front row tends to be something like one Genau, one Himmel JC, and one Lügner (who swapped with a utility card, probably Kanne or Fern).
The awkward part of that is that none of them swing super big on their own, though you do have a number of power pumps, so it’s not too big a deal. You tend to want to put the combo ability on the character that you’ll attack with last, in order to keep the climax around for all three attacks (though there can be cases where it’s nice to sac the climax earlier in order to modulate soul; just keep in mind that you also lose the 1k from it for any subsequent attacks). Meanwhile, you tend not to want to attack last with Genau since he can only pump something else, and you also tend to want to attack earlier with Lügner if you have a guaranteed hit on the top check; so that means that with this setup, Himmel tends to get the combo ability, despite not being able to be pumped by Serie. Attacking with him last is fairly nice, honestly, because you can decide whether or not you want to use his top check to dig for a bar trigger based on whether or not you have the bar you want for next turn; or if you’re going to refresh off the combo, decide whether or not you want to have the card you see on top as an option to grab, or just trigger it.
Since the level 0 combo requires a reverse, this deck also has a few different cards that can help prevent the opponent from denying that. First off, there are two different Wirbels with similar roles:


Both of them can prevent one of the opponent’s characters from running to a different slot or bouncing back to hand; the level 3 alarm can also prevent it from going to memory. This is useful against stuff like runners, oboros, and JCs, which could otherwise remove your reverse target entirely. Notably, both of these effects last until the end of the opponent’s next turn, so they can also be used to annoy standby decks, or even prevent certain abilities from being used on the opponent’s next turn (though it’s probably not too likely that those cards will be on the stage at this point, so that’s a fairly niche application).
The level 3 is also a double bouncer, which could be useful on the finishing turn; in particular, the combo needs to survive into the opponent’s turn to get its burn, so this could be used to remove a wall that might otherwise prevent that.
And the level 0 also lets you ditch a climax to salvage a character, which is this deck’s only main-phase ditch outlet to the waiting room before level 3. (You can potentially use multiple brainstorms to convert an extra climax into a heal, but that still relies on triggering a climax.)
The other card that helps ensure reverses is this level 2 Fern that prevents events or backups during its battle:

This can prevent the opponent from using a sac counter to deny the reverse (though you do need to either attack with it first, side or direct in previous lanes, or have multiple of them); it can also simply prevent the opponent from using backups for power, and is fairly big across from level 3s, so it also works as a target for the combo ability when you simply need power. (And even if it’s not across from a level 3, it’s still bigger than your other attackers at level 2.)
Since you also can’t play events or counters during this Fern’s battle, it doesn’t work as a way to threaten the plus-soul backup, but this deck doesn’t threaten that particularly well at level 2 anyway.
You do need blue to be able to play this card (and to play the stockshuffle event, since of course this deck isn’t playing the brainstorm that would let you play it without color); this deck doesn’t have much blue, which is why I’m running 2 of each blue card, allowing them to be levelled without losing access to them entirely.
Two climax swaps is also pretty nice in an 8-bar deck, since it’s not unlikely that you’ll end up with the wrong climax in hand, though of course ideally you also get the right one and can then ditch the wrong one to heal. Also, the blue climax swap being a bottom-deck bomb means that it can be used to remove a level 0 JC in the front row.
If you don’t have any of these options available, or you’re facing something that gets around them, there’s also the possibility of playing multiple copies of the level 0 combo, and assigning the on-reverse ability to multiple lanes. That way, even if one gets denied, you can hopefully still use another one.
There are a lot of cards here that I’d like to have at 4 but just don’t have room for (most notably the 2/0 event and the Genau); I could easily see some of these cards being cut and others being bumped up, or the numbers being adjusted, but for now, I’ll give this a shot.
Though on the subject of counts, I do want to bring up the fact that I’m running Kanne at 3.
There are a few reasons for this. One is that she can help set up alarms, in particular the Wirbel one that might be important for getting a reverse. Her top check is also useful (and in combination with the brainstorm’s heal, can potentially let you know what multiple cards on the bottom of your deck are, though the flip side of that is that it could also end up as a significant amount of clean damage). But there’s also the simple fact that she provides an efficient form of selection, and in particular can grab events (and climaxes, if they end up in your clock — particularly useful given that the brainstorm can’t heal them off). Since the combo has fairly limited selection, and you tend to only have one brainstorm on stage, and both of them can only get characters, it’s nice to have this supplemental selection available, even if it’s also limited.
Other Possibilities
This level 1 Methode feels like it’s meant to go in this deck, swinging big and having twin drive, but its other ability feels a bit backwards from what this deck wants.
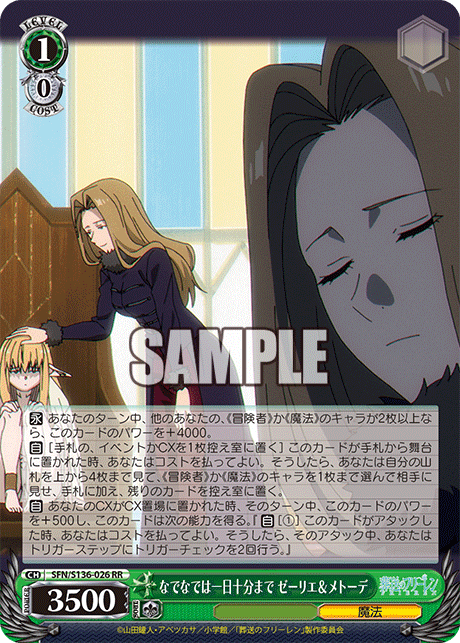
It lets you ditch an event or climax to check 4 for a character, but both the combo and the brainstorm get characters (with quite limited selection in the combo’s case), whereas neither gets events or climaxes (and since the aim is to heal with any extra bar triggers, you don’t necessarily end up with that many climaxes in your hand). So you’re more likely to have a character that you don’t care about and be looking for an event or a climax, than to have an event or climax that you don’t care about and be looking for a character.
This Linie could be a decent attacker to go with the level 0 combo.

In addition to swinging big and thus being a good target for the on-reverse ability (though you might have to watch out for stuff like memory kick backups on earlier attacks), it also has a reasonable chance of surviving, and getting you an extra hand that way. However, it doesn’t work very well with the JC (which removes the full board condition if you use it), and in general the other lanes aren’t necessarily big enough to not crash (though of course that depends on the matchup, and if it comes down to it you could potentially side). And if it does get answered, then you basically just spent a stock for nothing (or for a power pump, effectively, if you needed it to get a reverse the previous turn).
And then this Himmel almost works very well with the level 0 combo, except for being off-trait and checking for an off-trait choice combo.

I originally put in this level 0 Frieren that lets you clock a character to check 4 for a card, as a blue card that lets you clock yourself during main phase.

I think I’d just forgotten about the Himmel ruijerd, honestly (though the Frieren is «Magic» trait, at least). It’s kind of nice that the Frieren provides some deckspeed, and can grab climaxes or events, but ultimately I suspect the selection from the Himmel is more important.
Another (quite similar) blue card that might be worth running is the hand-to-stage Fukaziroh:

Like Kanne, this can provide a bit of filter with the potential to grab events; it can also serve as a ditch outlet if necessary, and it provides a bit of extra deckspeed. (And with 24 hits in the deck, it only has a 5.97% chance of whiffing in first deck.) It also works fairly well with the 2/0 event, letting you mill through cards you don’t want to trigger or grab a level 1 or higher card that you want in hand. Of course, the fact that it can’t get level 0s is a fairly significant limitation; in particular, that means it can’t get the Serie combo early on.
The riko fills many of the same roles as Kanne, but notably can’t set up alarms, or grab events or climaxes (though it can ditch climaxes to the waiting room).

It might make sense to do something like a 2-1 split between the Kanne and the riko? But if I’m running a 1-of riko, it’s probably as a ditch outlet, and the level 0 Wirbel already fills that role (though that said, it’s easy for a 1-of to not be available). The riko is also off-color, which isn’t a big deal but could come up, particularly when looking for something to level.
I initially wanted to run the double adachi that also bonds to the 2/0 event, but I just didn’t have room.
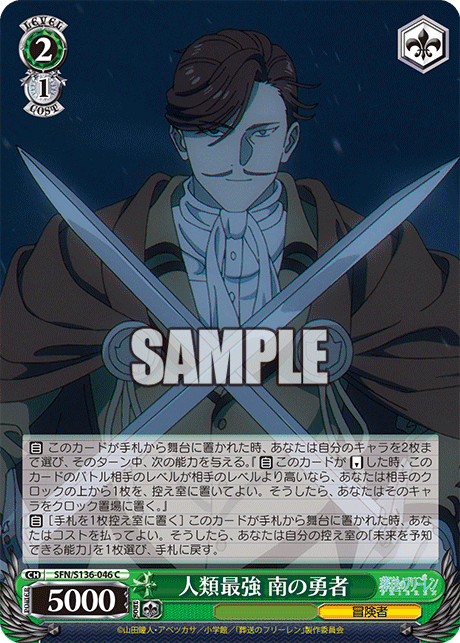
This card is also off-trait for the level 0 combo, I suppose.
Event Topend (Plus Fern)
This deck was prompted by the interaction between these three events:
Specifically, the idea is that you start off your finishing turn by using the green event (future sight) to see what the top 3 cards of the opponent’s deck are. Then, depending on whether or not you see a climax, you either use the yellow event (barrier removal) to remove it, or the blue event (Zoltraak) to deal 3 guaranteed damage. And then, ideally, you do it again.
If you run out of future sight events, you can of course just use the others blindly; if you see 3 clean cards but don’t have a Zoltraak you can just go to attacks and save your resources; and if you see a climax but don’t have a barrier removal event you can either use Zoltraak just to get rid of that cancel or potentially do something else to try to remove it (like stockshuffling).
My goal here is to go into the finishing turn with 1 Zoltraak and 2 each of the other two events; if you use all of them, that’s a total of 5 hand and 6 stock. This means that the finisher combo needs to be both cheap and light on sculpting (and light on deckspace, since you need to run a lot of events that are complete bricks before level 2 and often not used before level 3). While the TD finisher is somewhat tempting here (being very stock-light and able to dig into events), that does have some deckspace and sculpting requirements, as well as needing hand. So instead, I went for the new Fern pants combo.
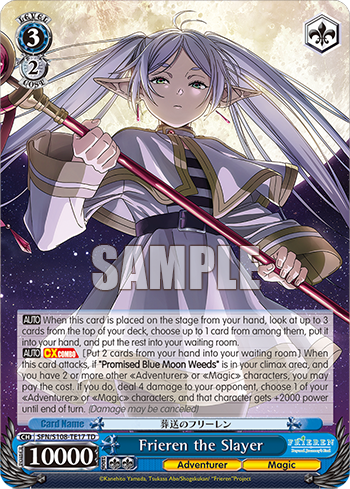

Since it sacs the climax, you can only use one instance of the combo anyway; that means that not only do you not need to sculpt into more than a single copy, you don’t even need to run 4 of them. Only needing to play one level 3 also makes this finisher extremely cheap; and the combo itself is either free (for the front-row option) or close to it (for the back-row option, which requires an extra hand but only uses stock that you generated during the attack phase, which of course the events don’t touch).
The combo can technically be early played, with another copy of itself in clock; this isn’t too likely to come up, but it does mean that it’s possible to do all of this at level 2.
I’m also including a copy of the off-combo moca, which can also heal in a pinch (though you’d generally prefer to use the draw 2/drop 1 option, I suspect).
Besides just being a finishing option that you can grab off a brainstorm, it also works fairly well with the future sight event (which can let you know when you should attack with it, and perhaps if you should side).
Since the endgame is primarily composed of events, the focus level 1 combo is the natural choice for this deck. This means that it’ll be quite similar to the first two decks in this post.
In particular, it’s similar to the 8 focus deck in terms of needing a lot of sculpting (and deckspace) for its finisher. Its events don’t have alarms, but it’s more flexible in what you need going into your finishing turn, being able to at least do something with a wide variety of combinations of finisher pieces (in contrast to the focus finisher, which at minimum needs a finisher combo, its climax, and the 3/15 event to do anything past 3-0). This deck doesn’t have as much reach, though; a lot of what it’s doing is confirming damage (or making it more likely), rather than adding additional instances.
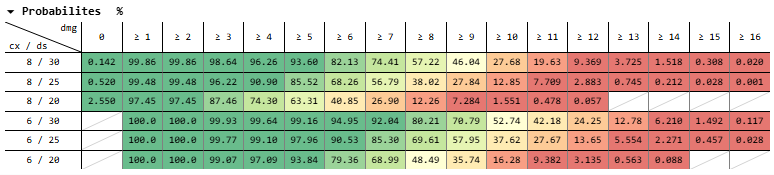
To more directly compare this finisher to the focus finisher, I used the probability calculator to calculated the expected damage for this deck’s ideal setup (2 future sight events, 2 barrier removal events, 1 Zoltraak, and Fern combo in the back row, costing a total of 8 hand and 8 stock, plus attackers):
And here’s the focus finisher’s expected damage from 3-0 (so the “≥ 7” here could be compared to anywhere from “≥ 7” to “≥ 10” in the previous image):

Unsurprisingly, this deck is better at killing from level 3, but not as good beyond that.
(You can also add the Himmel EP as a third attacker for the focus finisher in the case where you want to kill from level 3, which makes a difference but not a huge one.)
Though that’s also with an ideal setup for this deck; if we remove one of the future sight events and one of the barrier removal events, for example (this time costing 6 hand and 7 stock), it’s more like this:
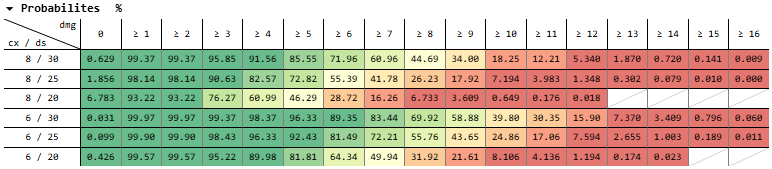
Really, rather than focusing on a single finishing turn, it might be better to try to do some of this earlier on (though probably not Zoltraak, given how expensive that is). In particular, using the future sight event on earlier turns (rather than multiple times on the same turn) can let you take better advantage of the information on your own deck, and you can still use the barrier removal event if you see a climax on top of the opponent’s deck.
The deck name, “I See a Burn 3 in Your Future”, references the future sight event and the goal of seeing three clean cards with it to have a burn 3 that’s guaranteed to stick.
At any rate, here’s the deck list:
Deck Log: 1ETFR
EncoreDecks: 6C0K2VOlD
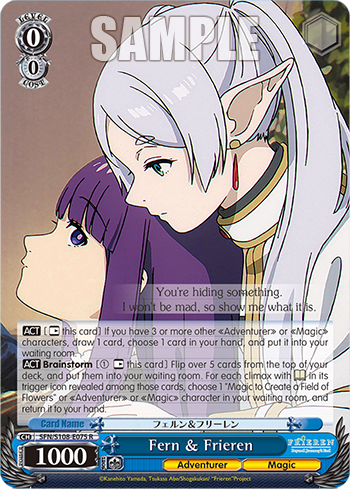
I’m running 1 copy of the RR Fern brainstorm from set 1, with the idea that this deck wants a double brainstorm backrow to help loop the level 1 combo, and it’d be nice to have two different ones (but the one that lets you play events without color is more important).

Since the finisher is on pants, I cut the climax search event down to 1 when looking for deckspace.
I’d ideally like to keep it at 2 — even with pants triggers, you can easily end up not having a climax in hand — but it’s a lower priority than it might be otherwise.
Like in the TD topend deck, I went with 2 yellow rikis and 1 green one.
Both of their second abilities could be quite useful in this deck: there are 11 level 2+ events that are easy targets to ditch at level 0 or possibly level 1 for the yellow riki’s ability, and swapping events could easily be useful on the finishing turn. In particular, the event swap could let you decide whether to use Zoltraak or the barrier removal event even if you only have one of them in hand; for this reason, it might be good to lean towards holding onto Zoltraak over the barrier removal event, since Zoltraak’s higher stock cost means that it’s less likely that you can afford to swap into it. (Though on the other hand, you’re probably happier to see a second 2/2 event than a second 2/4 event.)
While the cleancut giver is generally a nice plussing 0, it also has a neat interaction with the finisher, where you can choose whether or not to cleancut her based on whether you need to do 2 or 4 damage (so long as you have an empty slot and can get a reverse, of course — and given that you may well not be attacking with any other level 3s, getting that reverse might be pretty difficult).
Other Possibilities
I initially tried running the 3.5k that can potentially go to stock in this deck, since the high number of events means that it’s actually favored to hit (57.8% in first deck).
While it’s not a bad card, I feel like the cleancut giver works better with this deck (and there isn’t room to run both). I’d be more tempted to put it back in if I was running a different finisher.
8 Book
This next deck was also occasioned by wanting to take advantage of the future sight event.
In this case, the idea is to combine it with the new book level 3 combo, to shuffle the opponent’s deck when you know they’d cancel otherwise (but not when you know the damage will stick).
The goal here is to be able to do this multiple turns in a row, with the book level 3 combo as the primary topend; and at that point, I also wanted to try out the book brainstorm and the new support card for it (as well as an old card that works well with it):

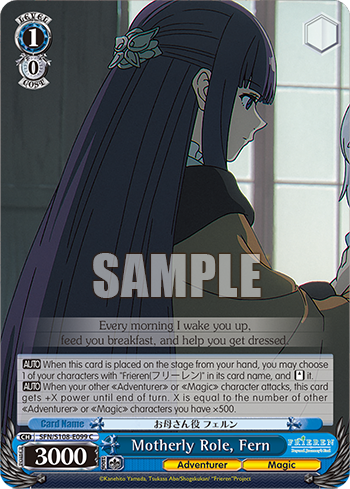
The idea here is that at level 2, you have a double brainstorm backrow and probably a level 1 Fern, letting you use the brainstorm’s abilities at least 3 times, with the future sight event helping you determine which ones to use and in what order. (It’s also nice that the event converts hand to stock, since the brainstorm is likely to convert stock into hand.) Though you also want to use the future sight event to confirm the top check for the level 3 combo, so you might not want to use it immediately (unless you have multiple, perhaps).
Of course, using this brainstorm means that the deck pretty much needs to be 8 book; and since the new early-game book combo is pretty bad, I’m just sticking with the old one.

Notably, since the Frieren that can be sent to stock with the brainstorm is a level 0, you’re guaranteed to be able to grab that off the level 1 combo if it’s in the waiting room, which lets the combo effectively give you both hand and stock (if you can find an opportunity to use the brainstorm’s draw/drop ability afterwards). And since the level 3 combo doesn’t require any sculpting outside of the climax, it’s not much of a problem if you can’t salvage higher-level characters.
The deck name, “Past & Future Sight”, comes from the fact that the level 3 climax is “Himmel’s Memoirs”, which is a way of seeing into the past, so to speak, in contrast to the green event that’s about seeing into the future.
Here’s the deck list:
Deck Log: 6F5EB
EncoreDecks: UZR-yPdcd
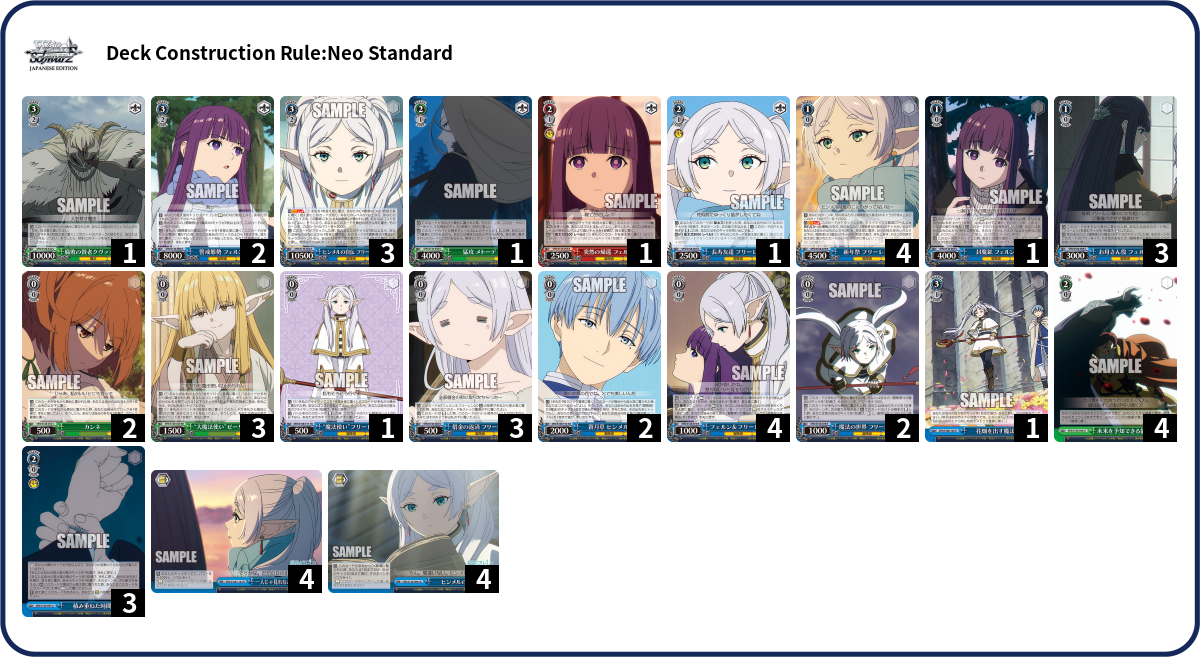
I originally had 4 of the level 0 Frieren that goes to stock and 2 of the level 1 Fern that stands a Frieren, but after trying it out, I realized that having a standing brainstorm can easily end up being more of a restriction on getting stock than having the level 0 Frieren in hand, and so I adjusted the counts to 3-3.
One important card that didn’t come up in the introduction to this deck is the blue 2/0 event.
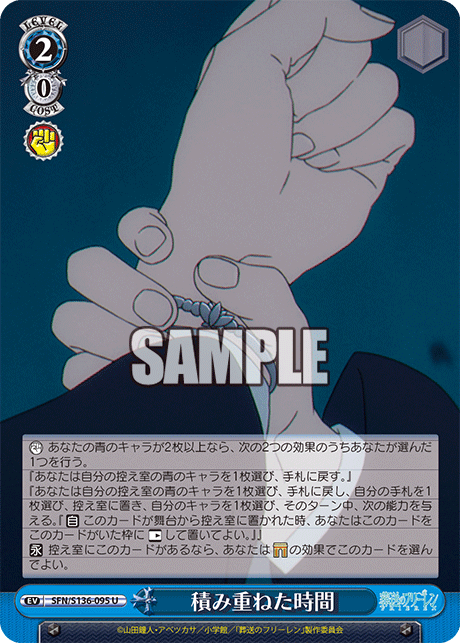
This event can help you keep the level 3 combo around (so it can shuffle back more cards on the next turn), in addition to providing some selection. You need to have at least 3 blue characters in order to play it, which was pretty much a deal breaker for the decks above, but is practically trivial for this one.
Since this event can only salvage blue characters, this deck is definitely playing the blue climax swap.
(Incidentally, this is another event, like the green one, that doesn’t have “magic” in its name, not that that matters for this deck.)
The deck being 8 book also lets it run the heal/bounce Fern as an actual EP.
I’m not sure how useful it is, but it could be nice as another attacker alongside the combo, and the bounce could potentially help you avoid being antichanged (or let you start with a swing for 4 if the opponent left a deck of 1 clean card).
Since the level 3 combo doesn’t actually add any damage, I’m also including a couple off-climax finishers.
The Qual is a very straightforward burn 3, which can use stock generated during the attack phase. Meanwhile, the Methode is likely to be a burn 1 (though can never be more than that), but potentially the more important thing is that she mills 5 cards out of the opponent’s deck. This can give you cards to shuffle back if they just refreshed, or potentially get them down to a low deck where shuffling cards back is very impactful, for example if they’re 3 in 9 and Methode mills out a climax or two and maybe pings off another with the burn 1 and her attack (for 1 or 2), leaving only 1 or 2 cards in deck.
However, she does need to get a reverse, and on a level 2 or higher character, so she’s not always going to be useful; and perhaps worse, she needs you to have a climax in your climax area, which means that she doesn’t work on any turn where you used the level 3 combo. This means that you’re probably only using her at level 3 despite the fact that she’s level 2 (though it’s possible to use her on a later turn at level 2 if you brought out the combo on a previous turn and were able to keep it around). Still, the milling feels like it has a lot of potential, and so I think she may well be worth running even just for level 3.
Both of these cards are 1-ofs; perhaps the count should be higher? This deck does have quite a bit of selection, though, with its brainstorm, so it’s reasonable to find them even as 1-ofs. It does mean that you can never go for double Qual, for example; this deck isn’t necessarily going to have a ton of resources, but at the same time it doesn’t have too much else to spend them on, at least when it comes to finishing power in a case where shuffling back cards isn’t super impactful. Still, I’d say the normal gameplan isn’t to build up too many resources for the finishing turn; if you have extra resources in the midgame, you may well prefer to spend them on EP heals to try to have more turns of pushing damage with the combo at level 2, for example. I could see putting in a second Qual, but I don’t think it’s essential.
I went for green off-finishers since this deck already needs green for the future sight event; it’s not running the brainstorm that lets you play events without color, since it’s running the book brainstorm instead (and likely wants to use both of its abilities fairly often, which pushes against running two different brainstorms). For green fix, this deck is running mono-green rikis (rather than a split with the yellow one); it also has 2 of the Kanne (which is already a nice card, since it can grab events, as well as providing top deck information that the brainstorm can take advantage of).
Since the brainstorm can grab the stockshuffle event, I do in fact feel comfortable running that as a 1-of in this deck (unlike in the focus decks).
This is the only one of these decks where I’m actually running an antichange; I’m also running the memory kick backup.
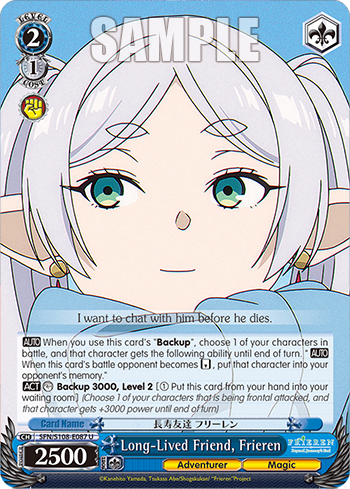
This deck would quite like to keep its combo around, so these backups can help with that; and if you play the EP healer as well (or have two turns of combo and the first one survives), and thus have two level 3 characters on board, you’ve got a good chance of being able to use these backups productively. And you don’t necessarily need to save up a lot of resources, so the antichange backup may well be worth it (especially if you have a small third lane as an easy sac target).
Other Possibilities
I kind of wanted to include the stock cleaning event, which can get the level 0 Frierens out of the bottom of stock to let you reuse them (as well as just being a hand-to-stock on its own, that’s usable at level 1), but ultimately it didn’t seem that important.

If you run out of level 0 Frierens, hopefully that means that you already have quite a bit of stock; and if you don’t, you might end up paying them out normally anyway. This deck also isn’t great at finding events, so this event would likely need to be run at a fairly high count if you want to actually see it.
TD Topend with Focus on Book Combo
This last deck is effectively a variation of the first deck in this post; I wanted to focus a bit more on the potential for pushing damage at level 2, running more of the book combo pieces (and a second climax swap) and more of the barrier removal event, to make it more likely to be able to use both of them if the opportunity presents itself.
I also worked in the future sight event, so you can do a similar thing to the 8 book deck above, determining when to shuffle the opponent’s deck based on if and where you see a climax, and/or determining whether or not to play the barrier removal event (like the event topend deck aims to do).
Deck Log: 2TTXH
EncoreDecks: 0z0OFqY2E
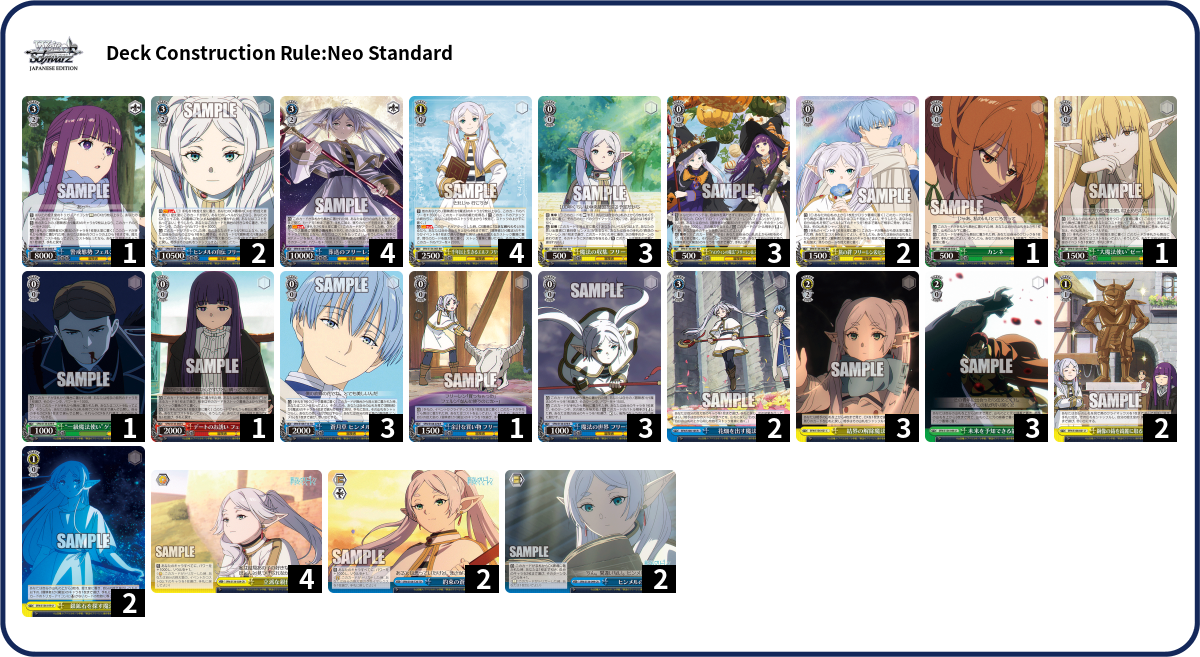
Fitting in all of this means that I had to make some cuts, of course; my thought was that this deck cares less about looping the focus combo, since it’s more likely to go into the book combo, so I cut the backups, as well as the 1-of event counters, which are more nice-to-haves than strictly required. You’ll likely still want to loop the focus combo if the opponent leaves a fresh deck, though (or potentially just has a moderate-sized deck where shuffling cards back doesn’t seem too impactful); and this deck can still do that, of course, just not as easily.
It’s a bit awkward that this deck kind of wants three different brainstorms: the new yellow brainstorm means you don’t have to try to fit in more green for the future sight event (and deal with a 3-color level 2 game), the TD brainstorm is important for the finisher, and the set 1 Fern brainstorm would be nice to give you a bit more control over your top deck (for soul triggers and ensuring the combo can hit at the point it wants to attack), as well as letting you confirm the combo’s top check even if you don’t have the future sight event specifically (and unlike Kanne, not making you give up the draw from the climax for that confirmation). Ultimately, though, the set 1 Fern just feels like the least essential, and so I’m only running the other two.
There might be an argument for running a different finisher, but there aren’t many others where I’d feel very confident about being able to find a 2-of finisher climax, and it needs to be able to work with fairly low resources and sculpting, since the idea is that you’ll often be dedicating a turn at level 2 to pushing damage, spending resources rather than generating them. It still needs to be a decent finisher, though, since you might end up in a more normal “loop the level 1 combo into the finisher” flow if the opponent doesn’t leave you a good deckstate to shuffle cards back into.
Honestly, I’m not quite happy with this deck — in particular, I’d like to have more ability to confirm the top check in the case where you don’t have the future sight event. Still, this was meant to be a “first drafts” post, so I might as well include it, since I did make a list of 50 cards… though that does mean that I need to come up with a name, I suppose. Its focus is the barrier removal event and the shuffleback combo, I guess, so maybe just “Removing the Barrier to Shuffleback”.
Other Possibilities
There’s also the option of running the 2/1 choice combo from set 1 instead of the new book combo, since that also shuffles back cards.

That doesn’t need to hit a top check, and also makes the climax easier to find, since it’s yellow and so can be searched with the 1/1 event. On the other hand, you have to select into the 2/1 itself, and ideally multiple of them (since a single combo only shuffles back 2 cards); you also have less control over how big you’re swinging, since the climax is a normal 1k1.
Conclusion
Overall, I’m pretty excited about this set, particularly the focus level 1 combo (as is probably clear from the decks I made). I didn’t even get around to trying to make an 8 choice or 8 standby deck, or a deck with the RR pants finisher from set 1, which all seem somewhat interesting as well. I’ll probably end up mostly playing some sort of focus level 1 deck, but I’m still not sure which topend I like the most. The focus topend is quite powerful, but also has the biggest potential to completely fail (either because you didn’t find a piece, or because of a defensive counter from the opponent). The event-based topend is probably the most unique, but I do feel like it’s less efficient than the others. And the TD topend gives you a lot of leeway and lets you focus more on the midgame, but the finisher is a bit weaker as a result. Of course, meta considerations could come into play as well; in a meta with a lot of tap counters, for example, I might lean towards the TD topend and away from the focus one, or if antiburn is a significant consideration then the event-based topend looks more attractive.

Leave a comment