I suppose it’s been a while since my initial Kaiju No. 8 post, but I’ve got another deck build, this time using the door level 1 combo.


(Translations can be found on Weiss Tea Time; I suppose this post is late enough that they’re already in the archive.)
This combo package just has a ton of random upsides. It’s not just selective, but selective in main phase, meaning you don’t have to guess what you’ll want next turn; it removes any (targetable) level 0 backrows the opponent might have, every time you combo; you have the option to remove a (cost 1 or lower) front row, instead of salvaging; if you triple combo, one of them works from the back row (and you can even quadruple combo); and the combo swings at 10k against level 2s and 3s (really, level 2 or higher), with the option to swing at 13k by playing a second level 0.
All of this means that this level 1 combo is very easily loopable (the combo tends not to crash, and so is usually available in the waiting room to be salvaged by the event, and you can often keep one in the back row) while still providing good selection for your finisher once you want to go for that, and generally providing selection throughout the game. So while the built-in disruption is a big draw for this combo, my goal is for this deck to be a solid, respectable deck even if the opponent doesn’t care about that at all.
Table of Contents
Deck List
Deck Log: 4808U
EncoreDecks: LdV7hMdGI
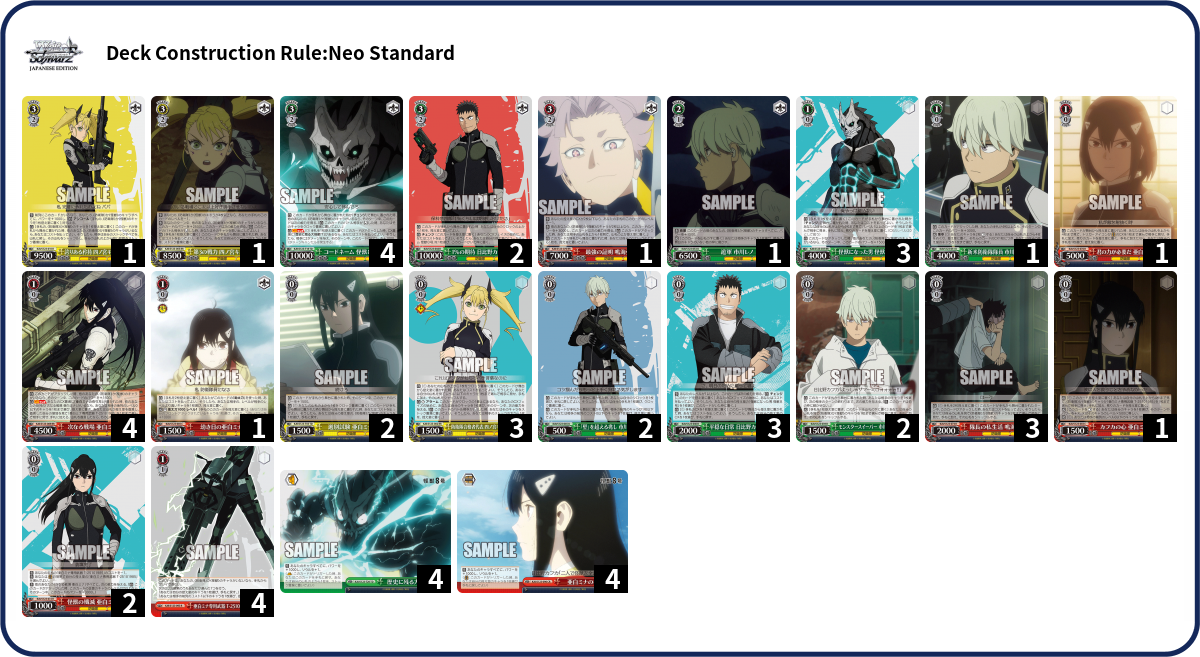
(Since this deck probably falls under the category of “anti-fun”, the deck name, “Funの殲滅”, is based on the name of the level 0 support: instead of obliterating kaiju, you’re obliterating your opponent’s fun.)
Comparison to 8 Door
It’s not surprising that this level 1 combo is used in the meta deck, though my understanding is that the door topend is the go-to; I went with the bar level 3 combo instead, for a couple reasons.
For one thing, I suspect that looping the level 1 combo is often better than going for the early play door combo.


The early play combo seems like it wants you to hit level 2 in first deck and then start cancelling: since the level 1 combo gets you events that then salvage during the main phase, you probably need your actual combo pieces to be in your waiting room when you’re looking to play them at level 2, and you also want to have good targets in there to salvage off the combo. So you probably don’t get much clock compression, unless you’re already close to level 3; and additionally you don’t heal or have any other sort of way to reduce damage. But you need a second turn of this combo for it to really start gaining resources (and for that matter, you need at least one early play to survive into that second turn). On the first turn, each combo requires you to spend a stock and a hand (in the form of playing the 2/1), and gets you 2 hand back. So you’re gaining net 1 hand for 1 stock per combo; you’re also likely only doing double combo rather than triple. So if you only have one turn at level 2, the level 1 combo costs less stock while likely getting you more hand overall. And sure, it’s not unreasonable to have two turns at level 2 (or perhaps you get hit to 3-0 but don’t expect your opponent to be level 3 and/or be set up with their finisher next turn), but it’s not something I’d necessarily expect. You also might need to spend resources protecting the EPs, whether that’s by playing backups or by playing down the assist ahead of time (or both). Or if you want to remove both of your opponent’s backrows on that second turn, you might end up playing over an EP that survived anyway.
The EP combo does have the advantage of being able to remove backrows of any level, or annoying cost-2 frontrows (or lower cost frontrows without spending an event on it), but that’s generally not a huge advantage. The level 1 combo can still beat over a lot of boards even if it doesn’t directly remove them, and there are some options for messing with higher level backrows, by trapping them in the back or moving them to the front (possibly after opening a lane with the event, though admittedly that costs 2 hand, so you probably need to be in a pretty good position to do that).


The EP combo also has to worry about antichange counters, so you may well end up either leaving the opponent’s back row alive because you’re removing their front row to prevent backups, or leaving their front row alive by siding it. Of course, you can choose the option that you think is least beneficial for them, but in many cases, the level 1 combo would have just taken out their entire board. Though in those cases, I suppose you still have the option of pivoting to the level 1 combo even if you’d normally go for the EP combo; and being able to threaten both combos might stop the opponent from playing a backrow in the first place. So I’m not sure how likely this is to actually come up, but it’s at least a possible issue.
So perhaps the thing is that including the EP combo simply gives you more flexibility; but then, it also takes up deckspace (and likely a significant amount of it), which must remove either other forms of flexibility or some consistency.
Overall, looping the level 1 combo seems better in a fast game (which is not unlikely) and in general against decks where you don’t benefit from the broader removal (which are fairly common, and likely the norm). The biggest benefit of the EP combo is probably the additional pressure it puts on the opponent, where they can’t feel safe putting anything in the back row, regardless of level; but that’s true to some extent for looping the level 1 combo as well.
The other reason I like the bar combo is simply that it’s on a bar. This level 1 combo can generally get itself back trivially with the events, but finding the climax again can be trickier. Triggering a bar means that it’s then just a matter of playing a climax swap.
Honestly, I briefly considered running empty pants despite the set not having blue — probably with 1 of the level 3 door, since the level 3 Soshiro can salvage it — but the other thing about bars is that they can avoid getting stuck in stock; this deck doesn’t have much in the way of stock outlets, so it’s nice to not have to worry as much about that.


I’d initially thought that I’d lean into the koume to find doors, but I ended up not really using it much.

The thing is that stage space is already very limited, so it’s not often that you have room to just attack with the koume; and with it being on-death, you have to play over it if you want to use it during main phase. There’s no guarantee (usually) that it’ll actually get you the climax, and it’s quite likely that you can’t afford to lose that hand if it whiffs (since of course that means that you don’t have your combo). On the other hand, if you triggered a bar last turn, you can just grab a climax swap and get the door (so long as there’s one in your waiting room). Even if you end up playing over it, you know ahead of time that you’ll be able to make that hand back with the combo; you’re never going to play over the climax swap when you don’t already have a bar in hand.
I suppose if you go for the door topend, the level 2 Soshiro can dig for a climax on play, but even though you’re not playing over it, you still had to commit it to the stage, so it can still be awkward if you don’t find the climax.
After all that, I haven’t actually talked about the finishing combos themselves, so I guess I should touch on those a bit.


The bar combo can get more instances of damage, and can guarantee damage with the clock kicks, while the door combo has more potential to just blow the opponent out with shufflebacks or stockswap, or just by sticking a 4 or two. The door combo is also all but guaranteed to have its climax and is a bit cheaper overall, though the bar combo is at least still a clock kick without its climax, and in really rough games can just do single combo. The bar combo’s clock kicks can be denied, but in some cases it can be nice to have hard removal if the opponent survives. The opponent can aim to leave a fresh deck or 1 card to minimize the effect of the door combo’s shuffleback, but the stockswap can likely help in those cases.
Honestly, I think both combos are fine, which is why the trigger ends up being a significant deciding factor.
General Gameplan
While in many ways the gameplan is quite simple and standard (looping the level 1 combo until you’re ready to go for the finisher), there is one notable difference from most decks, which is that this deck generally doesn’t have a brainstorm on board, or any other way to repeatedly convert stock into hand. This means that the longer the game goes on, the more likely you are to end up with more stock than you need but not enough hand; it also means that cards that go to stock tend to stay there, even when they were triggered on the last attack.
So this deck, even more so than most, really wants to be doing its level 1 combo every turn, since that’s how it maintains hand. (It also wants to do the level 1 combo every turn to ensure that the opponent is never able to safely play a level 0 in the back row.) But more specifically, it wants to do triple combo (or quadruple, though that’s just a bonus if you can manage it). The reason for that is simple: because of the requirement to have another copy of the combo in the front row, doing double combo requires both combos to be in the front row, meaning that next turn you have to use the two events you got from the combo to get those two combos back, so you don’t have the flexibility to grab anything else (for example, a climax swap). But with triple combo, you can keep one combo in the back, letting you use that third event to salvage whatever you might need (or remove a character) and still have triple combo. To this end, most of the level 0 lineup is geared towards (or can at least help with) finding the level 1 combo. It’s also likely worth it to hold onto 2 climaxes if you draw them at level 0, particularly since this deck has a decent number of ditch outlets if you end up drawing more, though of course that depends as well on what the rest of your hand looks like. All that said, the deck does have a 1-of brainstorm, so you can use that if necessary. There’s also the potential to use rikis or 3-stock encore, if it comes down to it. Or depending how much hand you had to begin with, you can maybe afford to just lose hand for a turn if you don’t have a climax, and look to make it up on the next turn.
Individual Card Notes
Level 3
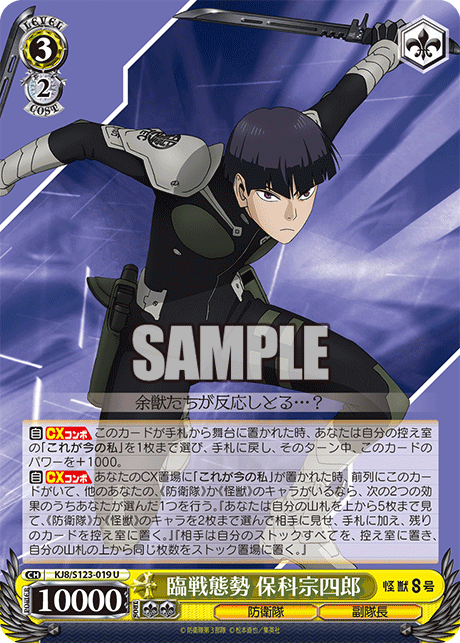
Level 3 combo:
As the finisher, naturally this is a 4-of. I went over why I went with this finisher above; as far as the finisher itself goes, it’s mostly just a generically solid and reasonably costed finisher. There’s some potential for the opponent to deny the clock kicks, but it’s still just a burn 2 in that case; or on the other hand, if you don’t have the climax, it’s still a clock kick. This deck generally doesn’t have much trouble selecting into the finisher, due to the nature of the level 1 combo, but in some cases it can have trouble having enough hand (whether that’s because it’s using hand elsewhere or because it wasn’t able to get a good level 1 combo loop going). Double combo can still be respectable if you don’t need to kill from too far, though. The finisher is not the focus of this deck, but it’s nice to have something reasonably powerful if you need to go for it, while also still being able to do something in the bad games or the games where you focus hard on the board denial aspect of the deck.
Changer into the level 3 combo:
In a deck like this that can significantly pressure the opponent’s resources, it’s very nice to have a healing finisher, because in some cases the opponent might just not have the resources to properly threaten a kill even from low level 3. While the bar level 3 combo doesn’t heal on its own, this changer basically adds that on; you just have to be careful about not refreshing before climax phase (at least without getting the finisher into your waiting room afterwards). The main downside is just that it takes up deckspace, which is why it’s just a 2-of. Two heals feels like enough to be impactful (and is the same number as the door topend, incidentally), without taking up too many deck slots.
Stockshuffle:

The set’s main decompression tool. It’s a bit awkward that it’s yellow, but there are at least some good yellow level 0s that make it somewhat reasonable to have the color. I think it’s important to have it available, but in general the finisher isn’t horrible against compression, so you mostly only need to have it available for extreme cases. It can also be nice when you only have 6 stock rather than 7, and thus can’t afford triple finisher (though double finisher + clock kick is another option there). A 1-of tech card.
Early plays:


One of the EPs is off-color, and the other has a 2 or less condition, so you’re not guaranteed to be able to play either one at level 2. I still think it’s important to have the option to EP heal, though, if you’re expecting the opponent to go for their finisher next turn, and so I run 1 of each. They can also just serve as color fixing; if it comes down to it, you can level the red one at level 1 (or clock it), and the yellow one could potentially give you color for the stockshuffle. They also both have other abilities (memory kick and moca 1) that can be nice, though are fairly minor overall.
Level 2
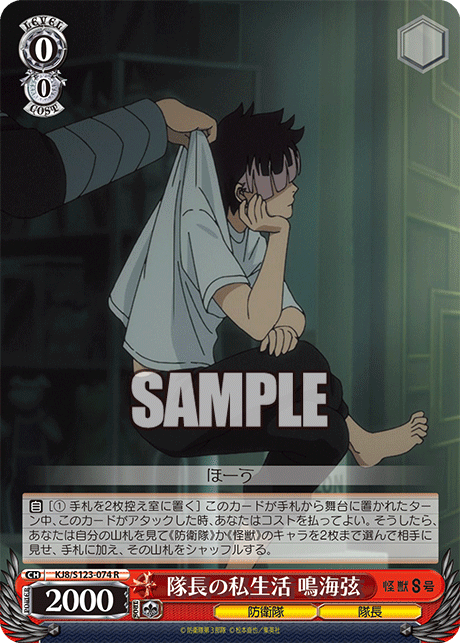
Grappling hook:
The only level 2 card in the deck. I’d like to run more than 1 of it, but can’t quite justify that, since it’s not useful until level 2 and it does cost a stock and a hand to use (so isn’t something you can necessarily spam). If the opponent leaves an empty lane for whatever reason at level 2, or if you have the leeway to spend an event on opening a lane, this card can let you get rid of backrows that are higher than level 0. That’s certainly not something that’s going to come up every game, but it can be nice when the opponent is already struggling, or against stuff that seems particularly important. And at level 3, you can use this card to pull up a backrow as a clock-kick target (though that only works if they have a backrow to begin with, of course). Alternatively, it can help you get clock kicks just as a 1.5k assist (or help the level 1 combo get over something that’s a bit too big otherwise, like a 7.5k level 1, if you have room in the back row for it).
Level 1
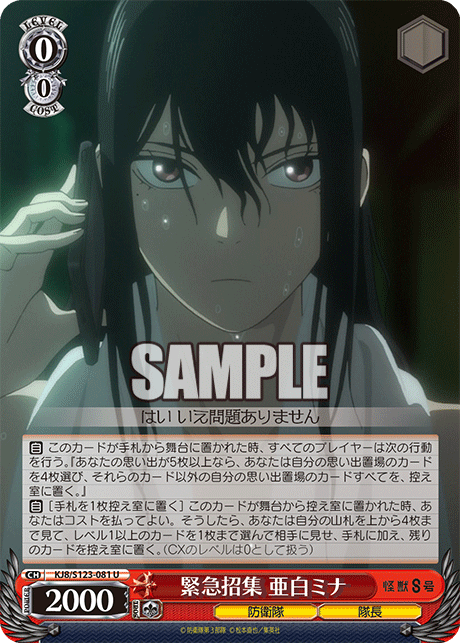
Level 1 combo:
The core of the deck; obviously a 4-of. You want to see three of these by level 1 if possible, so you can have two in the front and one in the back, and have an extra sculpt available next turn beyond just salvaging back the combos themselves. Ideally you’d just play down all 4, though that’s definitely a highroll. Generally I have one of these sitting in the back pretty much all game, if I can.
Event:
Another part of the core of the deck, and obviously a 4-of. I suppose the deck would still be playable with only 3, but you’d have to worry a lot more about them getting stuck in stock or clock (or occasionally that’s just the only option to level for red), and of course quadruple combo would no longer be an option. Plus it’s just a very nice card to naturally draw into (less so at level 0, but it can still be nice to hold onto one if you can). While this card gives you a lot of selection, it’s limited to the waiting room, which can be awkward if you just refreshed. Still, you can generally at least salvage the level 1 combo, since that likely just went into the waiting room at your opponent’s encore step. (It can be very awkward if you refresh off of drawing for turn, though; for this reason, it’s best to aim to end your turn with either a very small deck or a decently big deck.)
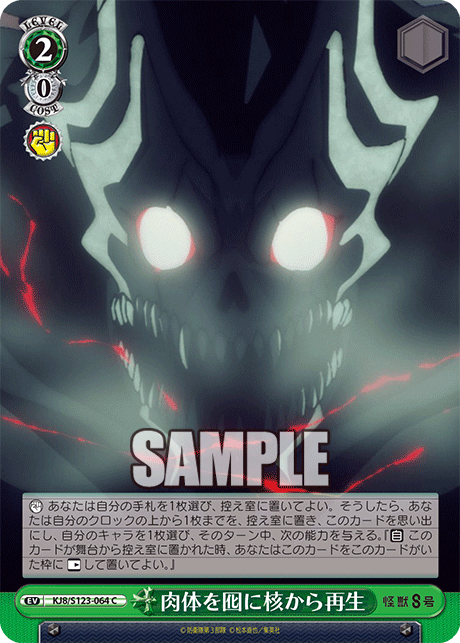
On-play fuka:

A 3-of to have a good chance of having it in the waiting room to be changed into. Perhaps you could get away with only 2, but it’s a good level target for green, and it can be a decent card to throw down if your hand isn’t great, providing a bit of selection and mill along with a ditch outlet. (This deck has quite a lot of green, so it’s pretty likely that you can hard-play it at level 1 if you want.)
Door koume:
I touched on this above, when talking about the benefits of the bar trigger. It’s not as good as I’d initially thought it’d be, largely because you generally have to commit to either attacking with it or playing over it before you know whether or not it’ll actually find you a door. I still want to include it as a 1-of, though, since there are times where it’s guaranteed to find a door, or you have hand to spare, or you need another attacker. And of course, the nature of the level one combo means you have a decent chance of being able to grab it in those cases.
Antichange backup:

Being able to threaten an antichange counter (and a level 1 one at that) fits well into the “anti” nature of this deck. If the opponent only has one EP, they can potentially just side your non-combo lane (which you may well end up playing over next turn anyway), so it’s mostly just useful against gameplans that focus more heavily on EPs. The game also has to be going reasonably well for the cost to be affordable. So cutting this is definitely an option if you don’t expect to run into matchups where it’s a significant boon, but I do think it’s good to have it available as a threat. It’s a 1-of as a tech card.
Brainstorm:

With the back row ideally already being filled by the level 0 that makes the event costless and a copy of the level 1 combo, this deck doesn’t really have much room for a brainstorm. It often doesn’t even have much room in the front row, to play the tap-2 brainstorm. (It’s a bit ironic that, while a big draw of the deck is that it doesn’t tend to let the opponent keep a brainstorm around, it also doesn’t get to run one itself.) At first I didn’t run a brainstorm at all, but I decided to put it in as a 1-of, with the idea that you can potentially play it in the back when you’re expecting to go for the finish next turn, and get two turns of brainstorming in. Or in a longer game where both players are cancelling well and building up stock, it might end up being a better back row than a copy of the combo, because you expect to be able to use it to grab back the combo anyway, while converting some of your extra stock into hand. I still went for the level 1 tap-2 brainstorm rather than the level 0 tap-self brainstorm since that seems better in the case where you do want to use it at level 1, perhaps because you randomly ended up with a small compressed deck and want to be able to avoid triggering all your climaxes but still want to get some benefit out of them.
Level 0
Event enabler:
This card is of course essential for the deck, since otherwise you have to spend all your stock on the events. I’d like to run it as a 3-of, but ended up cutting it to 2 for deck space, since often you only need to actually find one all game (though a second can still be nice for the power). And if it comes down to it, you can spend a stock on one event to grab it and have it available for subsequent events.
Climax swap:

Since this deck wants to loop its level 1 combo and has a level 3 combo on a bar, it’s pretty common that it wants to climax swap. The nice thing about this climax swap in particular is that it can change into a decent attacker (that also gives you a bit of deck speed), so if you’re up against another deck that mostly loops its level 1 combo, you can repeatedly climax swap without having to worry about either playing over it (and thus losing a hand; the same applies if you use an event to open the lane) or leaving a level 1 alive (possibly a combo or another useful card). There’s also a bit of synergy with the tap-2 brainstorm, since you can get an extra rest by changing; that’s not too likely to come up, though. And while you’d of course prefer to change, it’s not strictly necessary; if there’s no change target available, it just means that you have to spend an extra hand after all. Or conversely, you can change without climax swapping if you just need the deck speed. There’s also the option to attack with the climax swap itself, if you have a bar but don’t need to swap it immediately, or if you expect you’ll trigger a bar. This is a 3-of because you often want to see it multiple times a game. You can grab it off the event when you need it, of course, but that requires it to be in the waiting room; one awkward thing about the fact that it changes is that if you refresh during your attack phase or your opponent’s turn, it’ll go back into your deck, rather than going to your waiting room at your opponent’s encore step. So having 3 of them makes it more likely that at least one will be available (and, of course, it makes it more likely that you’ll have drawn it naturally and don’t need to spend a sculpt on it).
Deck helmet:
This card gives you deck access; it’s a good card to hold onto for the case where you just refreshed and your events don’t have much selection, or you can grab it off an event if it’s in your waiting room but the card you’re looking for isn’t (one notable example being that it lets you do double grappling hook, if you think it’s worth the resources). It’s also a ditch outlet, in a pinch. And it can prevent a card from moving, multiple turns in a row if need be (and if you can afford to spend a hand each time). Between this and the level 1 combo being able to contest level 2s and 3s, I feel like this deck tends to have pretty good matchups into standby decks. This is a 2-of because it shuffles itself into your deck, meaning that once you use it, it’s no longer available to be grabbed off the event (and may well end up being triggered or something, and not be available next turn either). So having a second copy makes it a lot easier to use it multiple times. It’s also just another card that can help you set up your level 1 combo. But it does cost a hand to use, so it doesn’t feel worth it to run more than 2; while it’s nice to have it available as an option, you’d still prefer not to use it most of the time.
Clock swap:

Similar to the deck helmet, this card gives you access to cards in your clock, which you can’t grab directly with the event (though unlike the helmet, it’s not limited to characters). It can also help fix colors if necessary. As a tech card in a deck with a lot of selection, it could just be a 1-of, but having 2 makes it a decent level target for green, and reduces the chance that both it and a card you want are stuck in your clock; it also increases the chance of being able to play it turn 1 going second, as a minor bonus.
On-death search riki:

This is the primary plussing 0 and source of early-game selection (which is generally for the level 1 combo). It’s just generally a good card, though you do have to be careful about hard removal. If you need to, you can play over it on your turn to get the search (and/or clock up). The alarm ability doesn’t normally come up, but it does give you a hard removal option; particularly with the level 1 combo being able to contest level 2s and 3s, it’s certainly possible for that to come in handy. And if necessary, you can use the clock swap to put it into clock. You very much want to see this turn 1, and two of them isn’t bad, but it’s a 3-of simply because it’s not the only card for any of its roles (and it’s not especially useful later in the game).
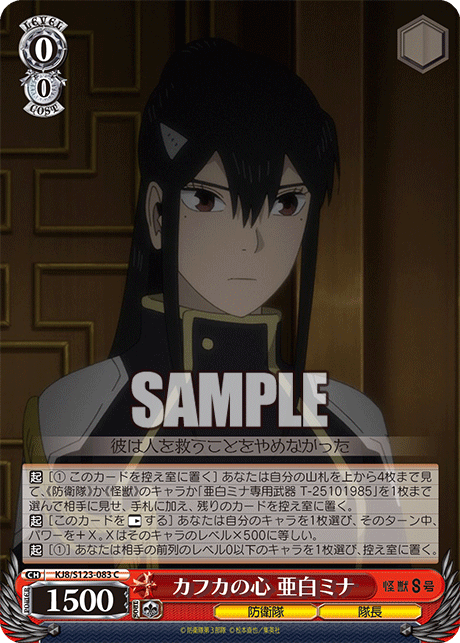
Salvage riki:

This card fills a lot of the same roles as the search riki, but the fact that it salvages rather than searching means that it has less selection early on. However, it also works on-play (in addition to on-death), which is nice when you need to use it in main phase, and it swings at 3k, which makes it a bit better as an attacker at level 0. And it salvages any traited character, making it notably better for clocking up to level 3 (in addition to the fact that you can clock yourself twice with the same card). And even if you don’t need to clock up, you can play it and play over it to gain a hand (and a sculpt) for the cost of 2 stock and 2 clock; it’s not the most efficient thing to do, but it’s still a way to convert stock into hand, which this deck doesn’t have much ability to do otherwise. A 2-of because it’s mostly supplementing the search riki; between the two of them, the deck runs 5 on-death rikis.
Double drop search:
This card gives you a lot of selection, with the additional benefit of sometimes being able to pay door triggers out of stock (and/or ditch extra climaxes from hand). It doesn’t work turn 1 going first, but even if you get hit straight to level 1, it can still be useful to play it then. It’s also just a decent level target for red. A 3-of since it’s something you’d like to see on turn 1 or 2.
Sac-self check 4:
The idea behind including this card is to have something you can grab off the event for some on-demand mill that costs stock rather than hand, for the case where you don’t have any extra space available on stage and so would be playing over it regardless. And it can grab level 0 characters, unlike the fuka (while still being able to grab the one event that this deck runs). It also has a power pump (being based on the character’s level, it’s pretty minor for the level 1 combo but more significant for the finisher), and the ability to spend stock instead of an event to remove a level 0 in the front row (which is probably useful against 8 standby hololive and not much else). A 1-of as a tech card (you do often need to mill, but ideally most of that is done more efficiently).
Cards Not Included
Fukaziroh:
I initially included this card to have a bit of extra deckspeed at level 0 (meaning it doesn’t take up any stage space at level 1), but replaced it with the double drop search because that’s a lot more selective while only milling 2 fewer cards (and without the chance of milling a climax).
Shinobu:

I included this at one point, largely to have a green card that doesn’t feel bad to level, but ended up cutting it for higher counts of other level 0s (in particular the double drop search again). It’s a 4k attacker at level 0, in addition to being a plussing 0 (though if your other lanes have on-death abilities, you don’t necessarily want to use it that way); but it’s perhaps most useful at level 1, to help loop the level 1 combo and free up an event for selection (while also converting a stock to a hand). It’s also nice that it can deny a reverse (particularly with Gakumas being a large part of the current meta), and it’s helpful when the opponent has hard removal, to prevent them from using that to deny your on-death abilities (or at least make them have multiple lanes of it). But at the end of the day, I think I’d prefer to just have more ability to sculpt into the level 1 combo to begin with.
Antiburn healer:

I like the idea of playing down a couple of these if you hit level 3 before your opponent, to give you a chance of surviving their finishing turn from 3-0. I’ve considered not running a finisher combo at all (well, maybe a 1-of stockswap combo), with this as the primary finisher for the deck, and the 2/0 event to keep it around and heal even more.
But if you want to do triple burn 2, it’s quite expensive without being especially powerful, so it kind of forces you into that defensive gameplan, and you could end up in a bad spot if the opponent doesn’t care about or can deal with the antiburn. And trying to run both this and the level 3 combo just takes a lot of deck space. It’s also a bit awkward that if you have 2 of these in the front, you can’t use the level 1 combo alongside it (technically you could have one in the front and one in the back and do single combo, which could be worth it to remove a level 0 backrow I suppose, but costs you a hand even if you already had a combo sitting in the back). And only being 10k can be awkward if the opponent has a decent-sized board, since of course the antiburn doesn’t matter if it crashes (and encoring it eats into resources you probably need for the followup turn).
Ax event & Konomi:


This event could help with deckspeed without taking up space on stage, but it’s off-color. This deck doesn’t necessarily need green at level 1, but it can still be helpful; and perhaps more importantly, the fact that the level 1 combo is red means that it’s difficult to hold onto or select into these events at level 0, since it’s possible that they’ll end up as bricks on your first level 1 turn. If you end up dropping them in mulligan or at level 0, then they don’t help too much with deckspeed anyway. (Plus, of course, they just take up deckspace.)
Spammable check-3 brainstorm:

This can be a source of deckspeed and a way to dig for climaxes, and the fact that it can go to stock if the opponent plays a climax means that it doesn’t necessarily even cost a stock overall (it could even be used to clean out stock if you triggered a door). But of course, it does take up a stage slot, and if you play it at level 1 or later (which is where you’re most likely to want to dig for a climax), it’ll probably need to side to have a chance of refunding the stock. I could potentially see this as a replacement for the koume, but I suspect that the koume is overall better.
Closing Thoughts
Obviously, the big draw to this deck is the potential to mess with the opponent’s back row; against unprepared opponents or certain matchups, there’s a possibility for that to effectively just win you the game on its own, and in general it tends to make the opponent have to play a bit differently. The ability to easily trap the opponent’s cards in the back row and contest high-level characters also makes this deck feel pretty good against standby decks. Though if it isn’t able to disrupt the opponent’s gameplan at all, the deck does start to feel fairly average. While it’s still a perfectly competent 1k1 deck, with quite a bit of selection and repeatability in the level 1 combo, it relies a lot on finding climaxes, the lack of built-in deckspeed can be troublesome, and the fact that you need to keep the level 0 on the stage (and select into it to begin with) is a notable downside — stage space is a fairly precious resource, after all, particularly in the back row. The finisher combo is also nice but not amazing: it’s not especially explosive and not especially cheap, though it still gets you a decent amount of finishing power for a reasonable cost, at least if you have reverse targets. So I’d say that while disrupting the opponent’s gameplan and/or draining them of resources isn’t the primary win condition of this deck, it is still the primary differentiator. And of course, it’s quite a significant one.

Leave a comment