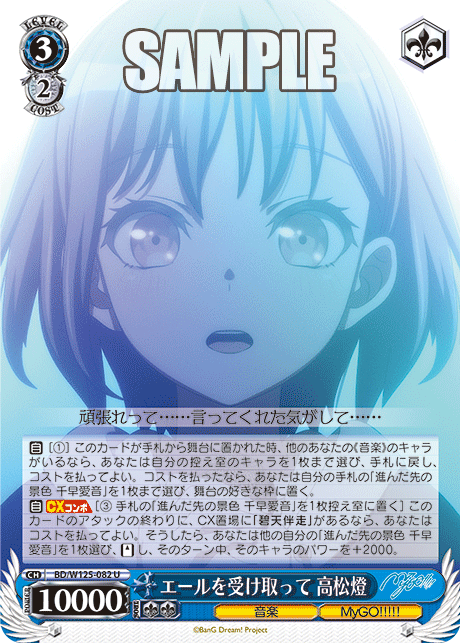
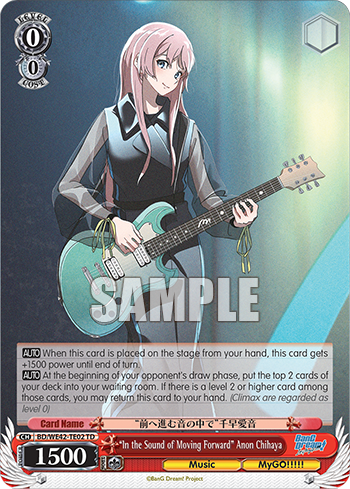
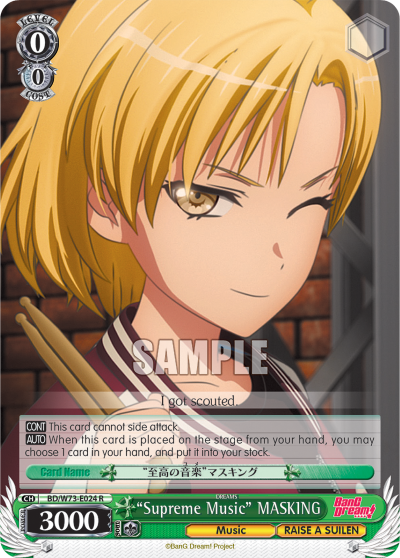
After making decks with the RR Tomori finisher and the RR Doloris finisher, the next finisher I want to look at is the Anon + Tomori finisher:

(Again, you can find translations for cards from the new set on Weiss Tea Time’s spoiler sheet archive.)
Table of Contents
- Level 1 Combo
- First Draft (+ Deck List)
- Additional Thoughts
Finisher Combo
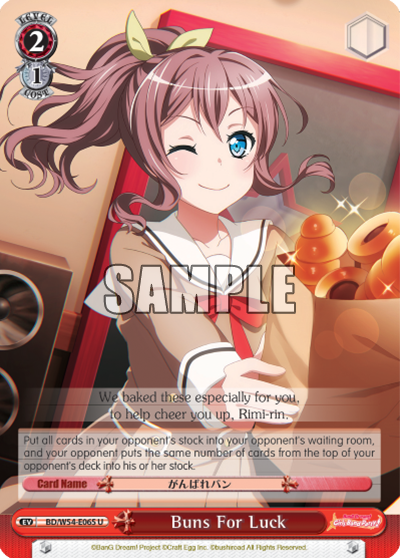
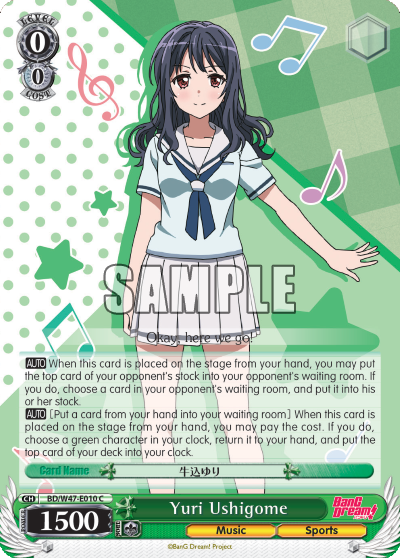
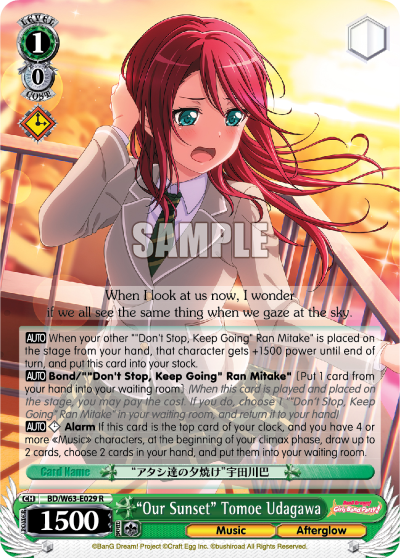
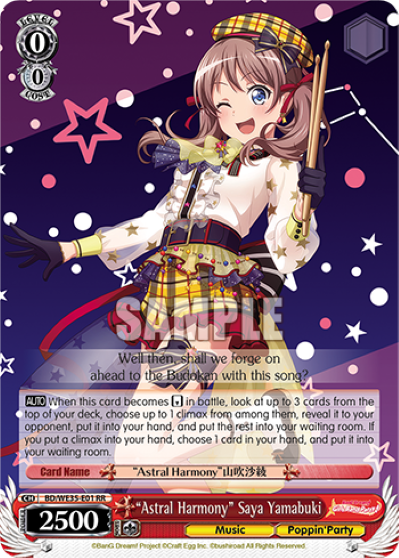
The first thing that caught my attention with this combo is how easy it is to do: in particular, if you combine it with the 2/0 event that gives something on-reverse salvage, then the only other hand you need in order to do double Tomori + Anon is one copy of the Tomori and the climax, since Tomori can salvage Tomori can salvage Anon, and then with the event, Anon can grab a copy of herself for Tomori to drop, twice. (Side note, the last part of that sentence kind of makes me wish it was a Taki or Soyo rather than a Tomori.) Of course, if you don’t have them in hand, then you do need a Tomori and 2 Anons to be in your waiting room.
This 2/0 event technically gives on-reverse salvage to both your character and the character facing it, so if you have to tie the first lane, the opponent can potentially grab a backup for the next lane. That doesn’t apply to the other two lanes, though, since it assigns the ability at attack phase. (On the other hand, if for some reason you don’t clock kick and then you swap a character that’s still standing into that first lane and tie or crash with that, that also lets them salvage.) It shouldn’t come up very much, but it’s something to be aware of.
There’s also a 2/0 event that gives something on-reverse search, which can let you grab an Anon out of deck, and also gives you more control over your triggers, which can help the Anon not end up swinging too big (or alternatively, help her swing bigger multiple times); keep in mind that soul from soul triggers (or direct attacks) lasts until the end of the turn, so if Anon triggers a soul trigger on the first attack, she’ll keep swinging for 4 on later attacks (or more, if she triggers again). The on-reverse search event doesn’t really replace the on-reverse salvage event, though, since with just the search, you have to have 2 Anons in deck/hand in addition to the one that’s attacking, and if they’re in deck you have to worry about triggering them. You also already prefer a small deck and large waiting room on account of the Tomori salvaging.

So, the combo being easy to set up and requiring very little hand is quite nice, but that’s also pretty true of the RR Tomori. What really made me want to make this deck is the fact that you can very easily completely deny backups (and potentially events) on your finishing turn, by only ever fronting with the Anon, and giving her the ability to prevent backups (and maybe events).

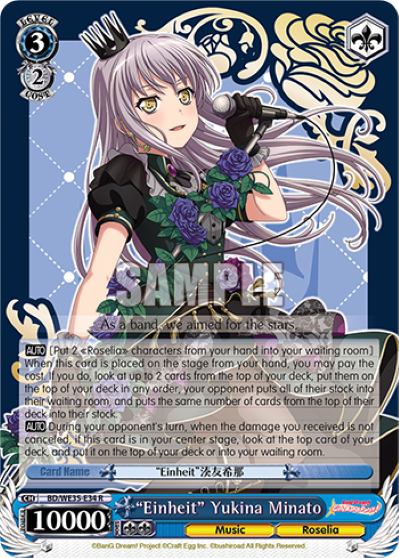
And then I realized that this deck also works quite well with stockswap + fumio: you naturally end up directing with the Tomoris* and thus swinging for 4 or 5, so if you pump a soul to the Anon, then all 5 of your swings are for at least 4. If you get all 3 clock kicks, this means that the opponent has to cancel every one of those to survive from 3-0, or 4 out of 5 to survive from 2-3. Double Tomori + Anon costs 6 stock up front, so that’s 7 stock for stockswap, 8 stock for fumio, or 9 stock for both; quite reasonable numbers. Of course, running those in the same deck means that it runs afoul of the Japanese banlist, so this will be a deck built in preparation for the English release, meaning it can’t use any Japanese-exclusive promos. If you want to play it in Japanese, you could potentially use the Yukina stockswap instead of the event, I suppose; that’s more expensive and requires you to have Roselia characters to drop, but it’s also salvageable off the Tomori.
* That’s the plural of “Tomori”, of course, not a secret Ave Mujica member. Or maybe it should be “Tomories”?
Here’s the probability calculator calculation for 4-soul Anon + double Tomori, including taking triggers into account:

And for 3-soul Anon + double Tomori:

Looking at those, I suppose pumping Anon to 4 soul is only really helpful when you specifically need to do a multiple of 4 damage (not counting clock kicks), even at 6 in 30 compression (which is pretty reasonable compression with stockswap + fumio in the picture).
But what happens if we assume that Anon doesn’t trigger any soul triggers? Being able to choose your trigger from the top 2 doesn’t guarantee that, but makes it a lot more likely, so for simplicity let’s just look at that case.
4 Soul:

3 Soul:

For the 4-soul case, it looks like avoiding triggers is mostly just better, except for the specific case of wanting to do 1 more than a multiple of 4 damage (outside of clock kicks), and of course in that case you probably wouldn’t choose not to trigger those soul triggers. The 3-soul case is similar, just with the specific case where it’s worse to avoid triggers being an exact multiple of 4.
So I guess it’s probably better to run the Soyo brainstorm than the O-Tae bounceback, even for the finishing turn.

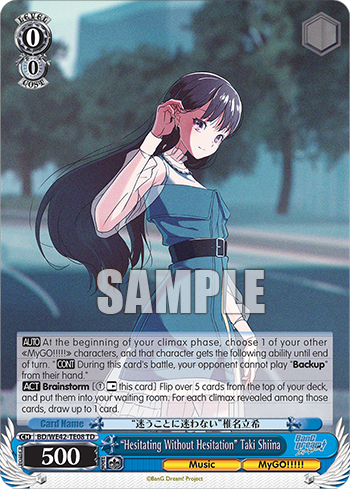
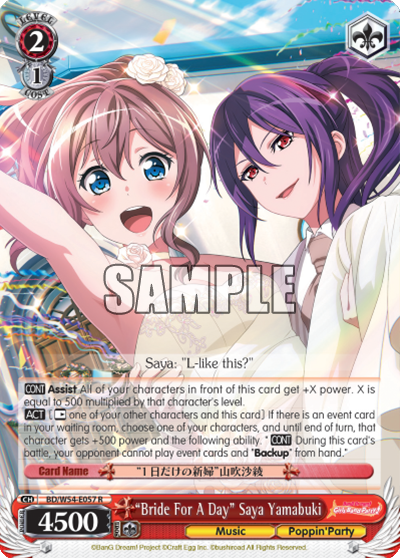
I guess one thing that these calculations don’t take into account is that you can potentially side with a Tomori before swapping Anon into that spot (or front, if you don’t care about the clock kick or are crashing, and aren’t worried about defensive counters). So that could potentially let you only have one swing for 4, if you’d prefer to swing smaller. I guess if you only need two clock kicks but have 3 targets (like if they’re 3-2 to start with), you could also opt not to clock kick the first character, letting both Tomoris side or possibly front. And you could potentially use both the Saya level assist and the Taki brainstorm to let both the Anon and a Tomori front without fear of backups (or even play over the Saya and salvage it back, if things are going particularly well). You also don’t need to worry about tap counter on the second Tomori, since it doesn’t stand the Anon until the end of the attack (though I suppose the flip side of that is that you do need to worry about memory kick).
One more set of calculations: the case where the opponent has empty lanes (with Anon at 3 soul and avoiding soul triggers):
One empty lane:

Two empty lanes:

Three empty lanes:
![]()
This is the main downside of this combo, I’d say: you need to stop the opponent from crashing or otherwise leaving too many empty lanes (unless they’re super decompressed, I suppose, perhaps on account of leaving a deck that’s vulnerable to a debilitating stockswap).
Level 1 Combo
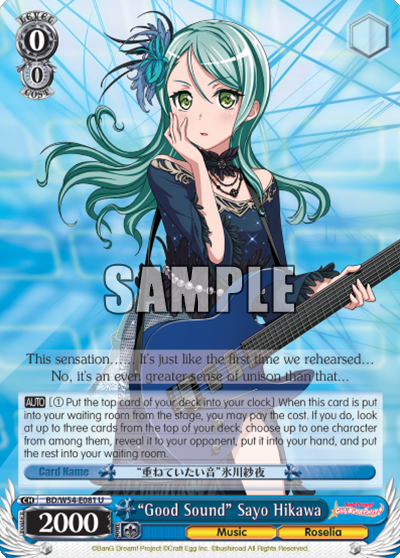
For the question of which level 1 combo to use with this topend, I’m basically just thinking I’ll go for this Sayo:
Ideally you loop it until you expect to want to go for the finish next turn, and then generate stock, but it can also deny crashes if necessary. On that pre-finish turn, it might make sense to give 2 lanes the bounceback ability and 1 lane the stockgen ability, since one single direct lane is not nearly as bad as three.
It’s probably a bit awkward if you face a wall deck where using the bounceback option is awkward even early on, but I’m thinking that you can just generate stock with the combo and then lean on brainstorms to maintain attackers; the ability of the finisher to work with very low hand also helps a lot in this case, I imagine. I brought up the O-Tae bounceback that pumps soul when talking about the finisher, but I actually initially thought of it as a way to help this combo side if necessary. (Also I guess I use the term “bounceback” for both of these quite different abilities; hopefully it’s reasonably clear from context.) It might still be nice to include that O-Tae or some other way to pump soul (a couple options below), but I don’t think it’s an especially high priority. Another option is the shuffleback that lets a Roselia character side without soul penalty, though that does need to shuffle back Roselia characters.


The fact that the combo requires another Roselia character could actually come up in this deck, since it’s mostly not Roselia cards, and in particular the backrow cards we want to run don’t have that trait. There isn’t even a great generic Roselia-traited brainstorm; the topend is on door, so that eliminates the 5-card tap 2 brainstorm; the combo doesn’t really benefit from hand encore, so there’s not much reason to run the Ako draw brainstorm; and I don’t particularly want to try to make the 3-card brainstorm work (at least if I’m not planning to run the O-Tae bounceback; there could be something there with that top 2 rearrange, I suppose).

Of course, you’re aiming for triple or at least double combo anyway, which already takes care of the condition, and then the Yukina riki can help with the case where you only have single combo (or maybe where you have double but the opponent has a wall and a memory kick counter or something).

The more notable downsides of this combo are that it doesn’t provide any selectivity (except into itself) or milling. So we need to find those elsewhere.
The fact that the level 3 combo requires very little selectivity means that the level 1 combo not providing it isn’t as much of a downside as it’d otherwise be; and if you naturally draw into more than just a single Tomori, the level 3 combo even provides selectivity, so we only really need to worry about it for the midgame. There’s also some selectivity from the salvage brainstorm and door triggers, but ideally we want a bit more.
The obvious thing to use for selectivity in a deck that doesn’t need much hand is the helmet. I’d also like to have a riko as an option to get level 0s, particularly the climax swap (I’m planning to use the Taki climax swap, of course, since hand is less important for the deck than stock). So the riko could be a sac target for the climax swap, or just an attacker if necessary; there’s also one with the Roselia trait, so it’s a bit of extra insurance for the combo in that respect. I’m thinking 2 helmets and 1 riko, though honestly it might be better to just go for 3 helmets, since the split only really comes up if you have multiple of them in hand, or I guess are grabbing it off a riki because the card you want is in the waiting room rather than the deck, or off a brainstorm or something because you specifically want to ditch a climax, or if you specifically need that extra body on board… ok, maybe there are actually a decent number of use cases.


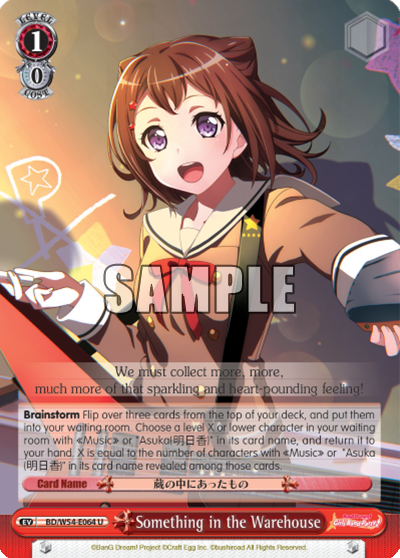
I’d normally go for the warehouse event to provide selectivity and mill, but it can be awkward when it’s a different color from the level 1 combo, particularly since the riki doesn’t clock from waiting room. (There’s also a cigarettes event that can grab the level 1 combo, but it can’t grab much else.) So I’m thinking of trying the torch event instead: it’s less selective, but it’s blue and it mills 4 cards. It’s also potentially better on the finishing turn, since you naturally have waiting room access there, meaning that some amount of the time, all you really care about is accessing cards that are still in your deck. Of course, these events aren’t mutually exclusive, but when the deck already wants to run some 2/0 events, there are definitely deckspace concerns.


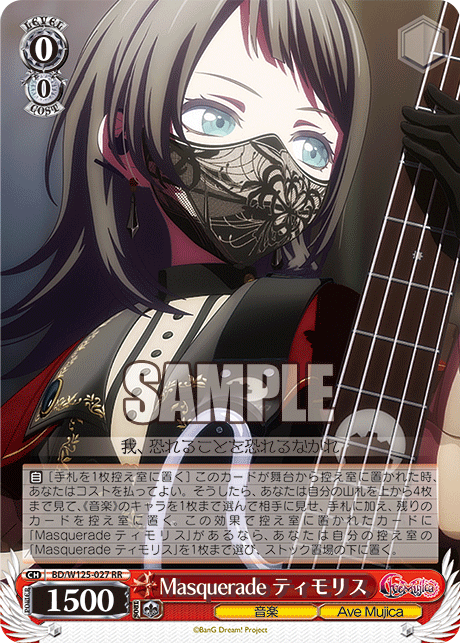
My other go-to for early-game mill is the Rimi riki, as a plussing 0 that mills and can potentially help set up the level 1 combo (and is also 2.5k, which is honestly a respectable power line). I’d also like to try out the Timoris chiyuri, with that potential for free stock in addition to some mill and selection. Another option there is the Tsukushi fuka, which can help select into events; early on, though, it’s probably better to be able to get level 0 characters.

The 5-card draw brainstorm that I already want to play can also help with deckspeed; at one point I was thinking I might just want to have that be the primary brainstorm for the deck, but that was before I ran the finisher calculations and realized that I want to run the Soyo brainstorm anyway. So my thought is that those two brainstorms will be what you aim to have in the back; it feels a bit weird to run a double brainstorm backrow in a deck that doesn’t care too much about hand, but of course you do still need to maintain attackers throughout the midgame, and this helps provide a fallback when you’re not able to rely on the combo for that, in addition to providing a decent amount of on-demand deckspeed.
Speaking of the draw brainstorm, that can also help to some extent with drawing into the level 1 climax, which is the main thing you need to find each turn when you’re able to use the oboro mode of the combo. The fact that it’s a pants also helps with that, though if you have one copy of the climax in the climax area, that means you need to trigger a second copy and have a third copy in the waiting room, so it’s fairly limited. I at least want to run the level 1 koume to help dig for the climax; that also happens to be a bit of extra deckspeed, and potentially a power pump.

First Draft
This post is a bit different from my previous ones in that I actually did most of the initial deckbuilding, including getting it down to 50 cards, ahead of time (mostly in the airport, where I didn’t have access to my computer). So I’ll go ahead and put that list here. Deck Log won’t actually let me create the deck because it’s not a legal Japanese deck, so it’s just on EncoreDecks for now (with screenshots from Deck Log). [Update: now that the set is out in English, I put it in the English Deck Log.]
Deck Log: 53VJ6
EncoreDecks: 3GKjuyZ-h

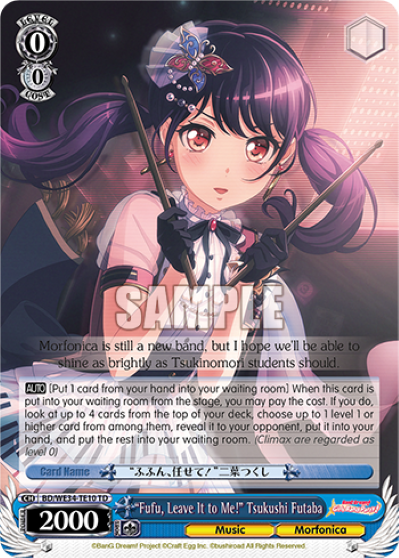
I’ve already gone over most of the cards there; I think the only ones I haven’t are the Kanon level 0 and the EP, both fairly standard cards. The Kanon is of course a way to convert hand to stock, which this deck definitely wants… though it’s perhaps more accurate to say that it’s a way to convert selection to stock, because of course you need to get the Kanon into hand to begin with. There’s potentially an argument to run the Chu² level assist instead, which you only need to select into once, but the thing about that is that you don’t actually want to get rid of your brainstorms even on your finishing turn, so there’s less of a guarantee that you’ll have good targets to throw into stock, and you don’t really have room in the back row to begin with.
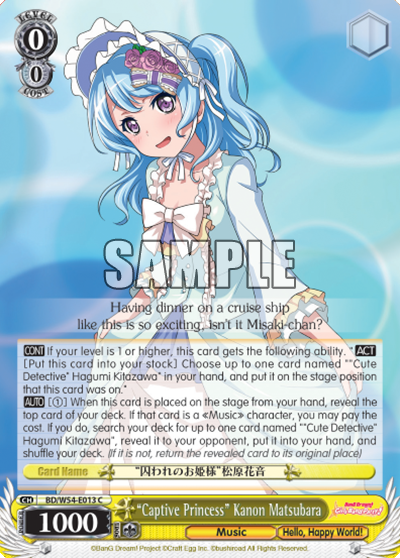
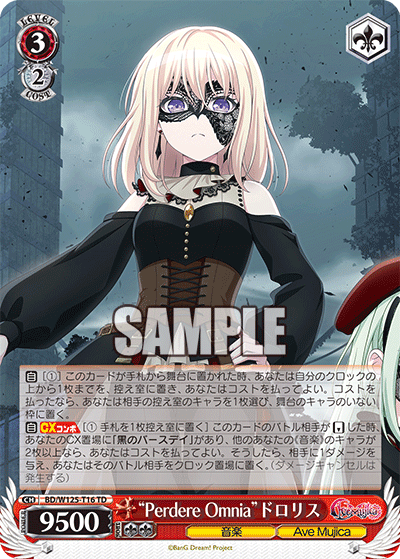
I initially wanted to run the EP as a 2-of, but cut it down to 1 for space. I do want to have at least one healer in the deck, for the case where you’re 3-6 with low deck, since it’s highly likely that you can grab that healer with the level 3 Tomori. I suppose another healer option could be the TD Doloris, which can also pull a character out of the opponent’s waiting room to serve as a reverse target, if for whatever reason that’s necessary. I’m inclined to think that saving a stock and having the option to EP is better, though.

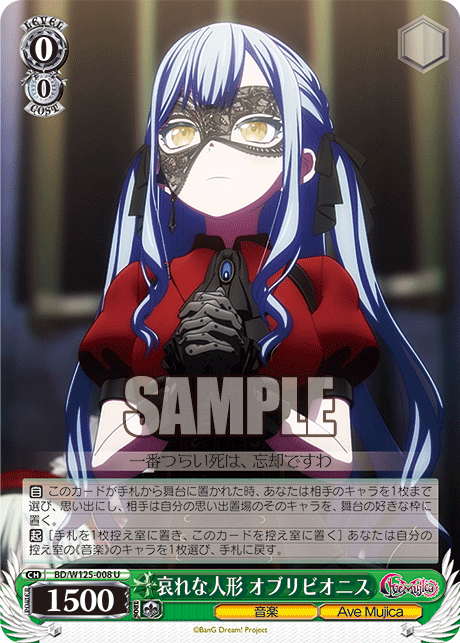
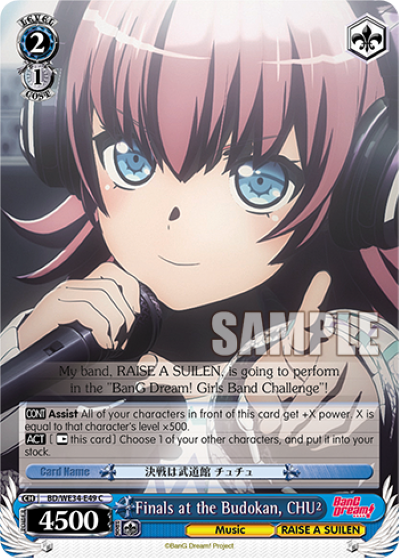
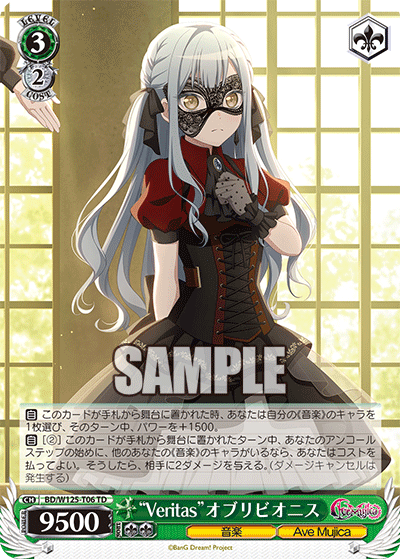
I’d kind of like to include the TD Oblivionis, as a way to add an extra instance of damage if you don’t need to decompress the opponent or just have a lot of stock, but this deck doesn’t have much green, so it’s hard to justify the slot. I suppose it also requires playing over one of the brainstorms.
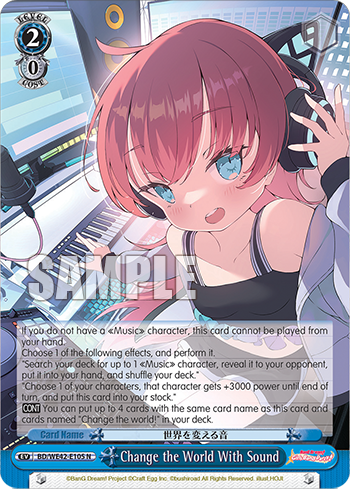
I also thought about including the Change the World event instead of the 2/0 on-reverse search event, since if you also have the on-reverse salvage event, you only really need to search out one Anon anyway, and this gives you the option of searching out something else that you can use during main phase (or of just getting a stock), but I ended up just not having room for either of those events.

In general, deckspace is (as usual) pretty tight; I’d like to be able to run more events, or more copies of the events I have; I’d like to run 4 of the chiyuri to maximize the chance of free stock; I’d like to run more of the Kanon to have a better chance of getting that to hand and being able to convert it to stock; I’d like to run at least one of the brainstorms at 3 copies to make it less likely that I need to spend selection on them; I’d like to run the koume as a 2-of since the deck kind of needs a climax every turn; I’d like to run 4 of each of the finishers to make it more likely to naturally draw into them and thus have extra selection on the finishing turn, and less likely that they’re not available in the waiting room. But to start with, these are the numbers I ended up on.
For the name, like with my RR Tomori finisher deck, I opted to riff off of the name of the climax. In this case, that’s 碧天伴走, which means something like “running together through the blue sky”. I like the “blue sky” imagery for this deck, to reflect the idea that neither the opponent’s compression nor their defensive counters can do much to obstruct the finisher. So I just changed one character, using 撃 for “attack” to make 碧天撃走, aiming to evoke the concept of attacks flying unimpeded through the sky.
Miscellaneous Thoughts and Updates
After testing a bit, one thing I’ve realized is that if you have one Tomori and an Anon in hand, it’s a bit awkward because even though the Tomori can salvage another Tomori that can then salvage something else, you then want to use that second Tomori to play the Anon for 1 stock, which means that, if you have both brainstorms in back, you then have no room to play the character you just salvaged without playing over something. (The same is true if you draw a character you want off the Anon’s on-play ability.) The climax swap is particularly awkward since you have to play over one character and then sac another; though I suppose if you have an extra stock that you could have used for a stock-costed climax swap, you can just hard-play the Anon after climax swapping. So ideally you want to sculpt into 2 Tomoris up front, so you can then at least have one character that you can salvage, play, and then play over.
Another sort of awkward thing is that a lot of the time the level 1 combo is only swinging at 5.5k, since its power condition also relies on the Roselia trait; if you don’t have triple, or double + riki/riko, you don’t have the condition.
It can be pretty rough trying to get Anons to hand if you don’t have the 2/0 event, but you do have a decent chance of triggering a door; in particular, if you have one Anon but need another, then with the Soyo brainstorm, that gives you 6 cards to find a door to get the second one: 4 attacks, 2 of which can check 2 cards before triggering.
The Anon’s ability to swap on reverse is cross-turn, which is kind of funny. If the deck had any backups, you could theoretically save 2 or even all 3 lanes with a single backup (the power lasts until the end of the turn), though of course that relies on the opponent attacking in the wrong order, or else having 2 Anons and one Tomori (which I guess is a reasonable option for a finishing turn if you only have 4 stock).
I’m thinking I should run at least 2 climax swaps, since the nature of having the level 1 combo but not the level 3 combo on pants means that it’s not unlikely to grab the wrong climax. But I have no idea what I’d cut… I guess there are some climax swaps that also mill 2, so I could try putting in one of those instead of one of the milling cards? Though I guess milling also just helps you have the right climax in the waiting room to begin with; maybe a single climax swap is fine.


I’m a bit conflicted about whether to attack with the card with the check 2 ability from the Soyo brainstorm first or last: on the one hand, it’s quite difficult to pay out the first trigger, so it’s nice to be able to avoid triggering a climax (or potentially an important lategame card) and having it stuck in stock; but on the other hand, it can also be nice to wait until the last attack and potentially try to trigger a climax, particularly a pants if you don’t already have a climax in hand. (I generally end up attacking with it last, and just accepting it if I trigger a climax on the first attack.) I guess that’s a case where Kanon or the riko can be helpful, letting you know if there’s a climax (or something else you don’t want to bury) on top of your deck.
I’ve found that I don’t often use the torch at level 1, so I’m thinking of changing it to something else. I’d kind of like to just bump the Rimi riki and the Timoris chiyuri to 4-ofs, but I also want to keep a useful level 1 or higher card for the Rimi riki to grab besides the level 1 combo (and also keep the chance of whiffing it to a manageable level… though I guess even with 22 level 0s, it’s still just an 11.2% chance to whiff in first deck: noticeable, but not huge). Perhaps an alarm would be a good option there; I’d kind of like to put in the draw 2/drop 2 alarm as a way to dig for events & climaxes, and of course there’s the stockgen alarm.
Though the awkward part of getting an alarm off the Rimi riki is that you might also want to use the Yukina riki next turn, which doesn’t work well with alarms. I suppose if I’m cutting down on events, I could potentially go for the Nyamu aqua riki instead of the Rimi; that mills a bit less, but has a chance of getting you more hand. With 5 events, it still has a 53.6% chance of seeing 2 characters. Still, I don’t really like the idea of reducing the chance of finding the stockswap event and the 2/0 event. (I guess I could just run both this and the Rimi riki, but 9 rikis feels a bit rough on stock.)

Of course, the other option is to just switch to the warehouse event, and accept that you sometimes don’t have color to play it at level 1; it’s still quite useful later on.
And Rimi doesn’t necessarily need to find something that’s immediately useful, particularly if you also have the chiyuri alongside it, and can use that to immediately filter out whatever you grab. So there’s also the option of just bumping up some counts of other level 1 or higher cards, like the koume or the 2/0 event or the finishers.
I guess the other thing the torch does is just be a blue card that’s fine to level; this deck has quite a bit of blue, but that can still be a bit awkward sometimes. That’s a pretty minor thing, though.
Hmm, I forgot that this card existed:
It’s mostly just an aqua riki that never gets 2 cards, but it has Roselia trait and it mills 1 more card… yeah, it’s probably not worth it.
I also forgot that there was a level 0 koume; it needs to get reversed, which is pretty bad because it means it doesn’t work during main phase, but it’s still a decent attacker at level 0. And I suppose if the opponent sides it to deny the mill, there’s no need to play over it with the level 1 combo, unless that lets you kill a character you wouldn’t otherwise be able to (or if you need another Roselia trait, I guess).
After all that, though, I think I still just want to go for 4 of the Rimi riki and Timoris chiyuri, and then a second level 1 koume (to keep the count of level 1 or higher cards somewhat reasonable; the koume specifically is also potentially a playable character at level 1, though you do need red). My thought is basically that I tend to drop events in mulligan (at least ones that I’m not confident can convert into a level 1 combo), so they’re less likely to help with milling in first deck; I’d prefer to just have more good turn 1 attackers that mill, and these are already the ones I want the most. Maybe I could go for a 2/2 split between the Rimi and the Nyamu? With the idea being that one of each is likely better than 2 of one of them… though I’m not sure if that’s actually true. If the opponent has a bomb or other source of hard removal, they’re then able to choose which one you get; and if you’re choosing between them, the only really relevant information is how many events have come out.
I guess I’m just worried about the chance of whiffing the Rimi riki, so I’m thinking of mixing in Nyamu to reduce the number of times I roll those dice. Nyamu can whiff as well, of course, but with 5 events the chance of that is just 6.63%, just a bit more than half of the chance of Rimi whiffing with 22 level 0s. Though I guess when I put it that way, the number of whiffs avoided by replacing half the Rimis with something that whiffs half as much is just a quarter of them, and it’s not like they’re common to begin with. Perhaps I could replace Rimi with Nyamu entirely, and then put in the event koume alarm as my way to find events instead; that’s also some extra milling itself, without taking up any hand or stage slots, and doesn’t conflict with the Yukina riki since it happens at the beginning of main phase. It seems a bit weird to put in an event koume after cutting events, but I guess that’s fine. (I’m also cutting the only other character with Anniversary or Afterglow trait, I suppose, but I wasn’t expecting the other ability to be anything more than a costly way to mill 4 anyway.)
So in this case, I’d replace the 3 Rimi rikis with Nyamu aqua rikis, and the 3 torches with 2 event koumes (3 of those feels like overkill to me) and either a 4th Nyamu or a 4th Timoris. Or maybe that 2nd climax swap I was thinking of earlier? I think it’ll be the 4th Nyamu, since I’d ideally like to have 2 of those to insure against one of them getting hard removed (or just get more hand; while the finisher doesn’t need much hand, I’ve come to realize that this deck does still want a decent amount of hand early on, so that you can afford to hold onto the level 2 events and a climax for next turn).
So that gets me to:
Deck Log: 6U722
EncoreDecks: 3aW1QHQeV

Further Thoughts and Updates
Now that I look at it, I suppose this deck just has 12 soul triggers, so you’re not especially likely to trigger them on the finishing turn anyway; it’s mostly just the pants that you’d actually expect to be in deck at that point. So there’s an argument that the Soyo brainstorm isn’t that important for the finishing turn, though of course it can still be relevant, and it’s generally nice throughout the game. I guess I’m not going to cut it, but it makes me feel a bit better about playing over it on the finishing turn if necessary. Perhaps there’s an argument for running the Saki brainstorm for a bit of extra mill, though. (Of course, if you play a climax, the Soyo brainstorm can also mill 1.)

I’d kind of like to have some level 0s that swing bigger than 2k; perhaps the Amoris zero two or the Anon mill 2 coinflip or the Pareo cleancut?


These are mostly competing with the aqua riki and the chiyuri as openers. I’m thinking that the aqua riki is often just a stock for a hand, with about a 50% chance of getting an additional hand, so maybe it’d be better to run something that has a 50% (or better) chance of getting a hand for free. The Anon coinflip has a 49.4% chance of hitting with 14 level 2 or higher cards, so is also very close to 50%; the zero two has a 73.5% chance of hitting with 5 events. So the zero two is probably just better there. Benefits of the coinflip are: working turn 1 going first, milling an extra card, getting around hand limit, being somewhat repeatable, and having MyGO trait; I don’t feel like any of those are worth that significant reduction in the actual chance to hit. Meanwhile, the cleancut instead depends on the opponent’s characters for whether or not it can plus, so it’s harder to compare. It does only have that same 73.5% chance of swinging at 3.5k, though; otherwise it’s just 2k. One small benefit of the cleancut is that it’s a good target to level for blue. It’s a bit awkward that it doesn’t mill at all, though.
Hmm, I just realized that the zero two is very nice going into the finishing turn, since it can let you generate stock with the combo and then just remove it from the board, while sitting at 500 power itself on the opponent’s turn, meaning that it’s normally impossible to crash into it if you play a 1k1 climax, for example. So I probably want to play that, probably as a 4-of. I had been thinking I might go for a 2-2 split between a couple of these options, but that utility later on makes me inclined to go all-in on the zero two, to maximize the chance of naturally having one in hand at level 2. It’s a bit awkward if you sac the chiyuri, though, since if you whiff, you then end up also milling that event or climax with the chiyuri (if you want to use it) and having at most 3 options to choose from. I’m kind of wondering if I should cut the chiyuri instead of the aqua riki… or maybe go for a 2-2 split of those, and only run 3 of the zero two. It feels a bit weird to only run 2 of the chiyuri, since that means you’ll almost never get the free stock from it, but I suppose that’s fine; it’s primarily there for milling and selection.
Another card I was thinking about in terms of increasing the power line of the level 0 game is a 3k Masuki that can put a card from hand to stock; that could be nice to enable multiple rikis/brainstorms in the first 2 turns going first, or one on the first turn going second. It could potentially replace one or both of the Kanons that go to stock on their own; it’s of course less efficient when you don’t need a character on board (and doesn’t give you that bit of top-deck information), but is a better attacker at level 0, and can get you stock at level 0 (so can help you clock up to level 1, for example). Still, I feel like I’m more likely to clock the Kanons early on rather than attack with them, so I probably won’t go with this.
One last card that I want to throw out as an option is this Aya that can grab a character from clock, as insurance against a tech card or finisher piece getting stuck in clock on the finishing turn (particularly if it’s buried where you can’t just heal it off, though this also saves a stock compared to a heal). It could also be useful earlier on as well, of course, as a form of cheap (but limited) selection or a ditch outlet. It’s a bit sad that you’re almost certainly not going to fulfill the power condition; that’s not super important, but it does make me less inclined to spend a slot on it, since that means that if you don’t need the ability, it’s just a 4k attacker that you’re not even guaranteed to be able to play at level 1.

Updated deck list:
Deck Log: 6XC2E
EncoreDecks: cGzq10l3V

Additional Thoughts
Comparing this deck to my other two, I do think that this one is the best suited to take advantage of the decompression tools in the set; in particular, it’s more comfortable holding onto the stockswap event from early on, on account of needing less selection and/or hand for the finisher. I kind of feel like that means it’s got the best topend overall, but that’s hard to really judge; and it’s certainly not like the other decks can’t use those tools as well, or like this one always has the leeway to do so. This deck also feels like it relies on that decompression a bit more, since it’s only presenting 5 instances of damage; then again, you likely only need a couple of those to stick. (And once again, I wonder if I could work in the TD Oblivionis; putting in that alarm does make it a bit easier to get green. But it’s an extra 3 stock and a sculpt, and it replaces one of the brainstorms, so it doesn’t feel like it’d be relevant often enough to be worth the slot.) Like the Doloris deck, this deck doesn’t really want to refresh on its finishing turn because some of its pieces are likely in the waiting room; though in this case, once you’ve salvaged any cards you want to salvage, you only really need a single Anon in waiting room, and you can potentially spend a sculpt to just grab it to hand; having one in stock likely also works.
On the other hand, this deck probably has the worst early/mid game, though that maybe speaks more to the other decks having fairly good midgames. While the Sayo level 1 combo is good at looping itself, that’s not something that the other decks have a ton of trouble with either (Oblivionis with its changer, and double salvage brainstorm in the back; or the 2/1 Uika obviating the need to loop the level 1 combo), and this one isn’t quite as good at looping the climax (while still needing to do so). Sayo also swings quite small, while also caring a lot about power. The fact that you can easily end up siding with the level 1 combo, combined with the pants triggers and relative lack of deckspeed, means that this deck often ends up behind in damage, I feel. That’s not necessarily a bad thing, since the deck is pretty comfortable killing from level 2, but it does likely make bad games worse. The lack of selection from the level 1 combo can definitely come up as well; sometimes you don’t even find a single copy of the level 3 Tomori.
One sort of weird aspect of the deck is that you really don’t want to crash your level 1 combo early on (so you can bounce it back), but you do rather want to crash it later (so you can get stock without letting the opponent crash and leave direct lanes); that means it’s awkward in different ways against combo loop decks and wall decks. The worst matchup, I suppose, would be a deck that walls up early but then plays over that with small characters; luckily, that’s not something people tend to do naturally. Probably more likely would be a deck with a lot of level 1 reversers or cost 0 bombs, or one that threatens backups on lanes that are 5k or so; you potentially need to just get stock from the combo early on in that case, and then go from there.
I suspect this can be quite a frustrating deck to play against, since it tends to let the opponent do what they want early on, maybe even siding a level 1 combo and giving the opponent a better than normal game, but then that just ends up not mattering: they built up compression just to get stockswapped and/or fumio’d, or healed down just to eat a couple 4s, or held onto defensive counters that they can’t use. (Though of course, that’s assuming things go to plan for this deck; maybe you don’t have the resources for all the decompression since you needed to brainstorm a lot to manage your deckstate earlier, or you need to put effort into milling something out of deck on your finishing turn to be able to salvage it, or you just never found the stockswap event. And on the other hand, I suppose the deck doesn’t always leave the opponent’s early game entirely unimpeded, either; it does have blink and anti-move stapled to a couple of its cards, and can deny reverses.)
So overall, it’s very much a finisher-focused deck, and I think it does that quite well, in particular in its ability to avoid defensive counters, and deal with or take advantage of a wide variety of opponent’s deckstates. And while the midgame isn’t the most powerful Bang Dream has to offer — particularly in terms of, well, power — it’s still a solid engine.

Leave a comment