I got top 8 in Sacramento BCS with stocksoul/choice Chainsaw Man (CSM) with the Power topend, so I figured I’d make a deck profile.
Table of Contents
Deck List
Deck code: 2K1EG
Concept
The core idea of the deck, in my mind, is pretty similar to that of the stocksoul/bar build (though my stocksoul/bar list was a bit different from the standard). Essentially, you want to play stocksouls starting from level 0 to push damage early while building stock & compression, then finish with a low-sculpting, hand-light, but nevertheless potent finisher.
I actually switched from Aki to Power before the banlist; when CSM first came out in JP, I was pretty big on icytail-style finishers, but I’ve since done a bit of a 180 on that. There are two main reasons: first, while you can use decompression tools to make fixed-damage finishers more effective into compressed decks, there isn’t really an equivalent to make icytails more effective into uncompressed decks (though admittedly Aki is better than most in that regard). And second, icytails tend towards either doing a lot of damage (when they hit climaxes, thus dealing more damage into a less compressed deck), or not doing much damage at all (when they whiff, thus vanilla swinging into a more compressed deck). But if you don’t need to do a lot of damage, just a normal amount, all that really means is that it has a higher chance of failing to kill, compared to a standard finisher with the same average damage.
Of course, that still leaves the question of whether Power is actually any better; and on its own, the answer is probably “no”. It’s a perfectly serviceable finisher, and extremely cheap, but you really want to either have off-finishers alongside it, or do something else impactful with your resources, to make it actually good. When CSM first came out, I briefly tried going for 2 of the red level 3 Power alongside the assist that assigns twin drive, but I gave up on that pretty quickly (and the colors don’t really work with the stocksoul anyway). I ended up still using the red level 3 Power in this deck, but more importantly the 3/4 toast event. That event does a lot: it’s a straight-up burn 1, of course, and often lets you guarantee another burn 1 from the red level 3 Power. Perhaps more important, though, is the control it gives you over how big you’re swinging: it can pump soul in every lane if necessary (if you count the bounce), in addition to letting you know your triggers. These can be pretty impactful things in a deck where the finisher sacs its 1k1 climax (thus losing the soul in at least its own lane) and the other climax has a 2-soul trigger. And of course, if the opponent has at least 4 non-climaxes in their waiting room (and more than 1 card in deck) and you have the 9 stock to play toast and then do the combo on the first attack, you can 100% guarantee the 4 damage, which then lets you plan the rest of your attacks with that in mind. But I don’t think it’s at all necessary to do that (in fact, I only did it once in Sacramento out of nine rounds, though my opponent was almost always already at level 3 anyway). A burn for 4 with 3 stacked on top is still likely to go through, and the toast is still plenty good as well (and can sometimes let you swing for 4s in other lanes if it makes sense, which can be a bit of insurance if they do cancel the burn on 4). Delaying the combo to the last attack lets you do toast + combo for 7 stock (6 if you have the red level 0 Power or know you’ll trigger a choice), or toast + red level 3 Power + combo for 8 or 7 stock (and the red level 3 Power can likely just search out the red level 0 Power, so that should be 7 more often than not).
The upshot is, alongside the toast event (and red level 3 Power), I do think the Power combo is better than Aki — and outside of needing to hold onto or dig into toast, it doesn’t even require more sculpting (important given that the stocksoul combo is not selective). It also costs a comparable amount of stock, since there’s no need to play Easy Revenge. And the combo alone, without toast, is absurdly cheap (you can do it with 2 or 3 stock), meaning that even in fast games you can spend resources in the midgame on EPs or fumio/bounce if it seems like a good idea, while still threatening that probable 4 damage on the followup.
There are 2 big downsides to the Power finisher, though: the opponent has to have cards in their waiting room, and you have to have 5 or less clock (meaning you need to be able to heal if you’re 3-6; and just in general, you’re reducing your chances of surviving if you fail to kill, since you clock yourself). Honestly, calling the second one “big” might be a bit of an exaggeration, but it definitely does come up. I basically just think the benefits make up for that downside; the main thing I’d say is that it pushes the deck towards going for the finish over sandbagging a turn if you’re in any danger of getting hit to 3-6 or 3-5 (maybe even 3-4 if you expect to both clock and refresh), and towards waiting a turn otherwise.
The opponent’s waiting room being empty is mostly only an issue if the opponent is already at level 3 (if they’re at level 2 and they don’t level up and dump 6 cards into waiting room before you do your combo, you’re probably not presenting lethal to begin with, so it’s likely better to not bother with the combo and just hope to survive another turn anyway). I’m running the Chainsaw Man icytail to help with that case, though I never actually ended up using it in Sacramento (the one time I went for it, I didn’t factor in the fact that it requires an extra stock during attack phase, so ended up not being able to do it anyway; perhaps there were other cases where it would have been helpful, but I just didn’t go for it). And of course, there’s always the possibility that they’ll cancel an earlier attack not on the first card, putting a non-climax or two into the waiting room, and worst case it’s still just a burn 4. And if they’re already at level 3, it’s plenty possible that you don’t even need the 4 to stick.
Outside of the finisher, one notable difference from last season’s CSM lists (which was also a difference between my stocksoul/bar list and others) is that I run 4 of the Makima sac brainstorm. I generally keep one of these sitting in back row, and aim to have at least one more in hand; I hardly ever use the Himeno combo’s spammable brainstorm. If you don’t need to pay out stock or hand, the sac brainstorm is almost strictly better than the spammable brainstorm if you hit (either way you go hand neutral, though the sac brainstorm can go hand positive if you hit multiple; and the sac brainstorm doesn’t cost stock), and if you whiff, the only difference is whether you pay with stock or (effectively) hand. And that’s not even considering the case where you would have played over the thing you sac’d regardless, or get a useful ability out of it that you otherwise wouldn’t have bothered with. Though to be fair, you do have to commit the sac brainstorm itself to the stage, whereas you’re playing the spammable brainstorm anyway, so there’s an initial hand cost. I sac brainstorm about once a turn on average, though, so I think it easily makes up for that.
The Power topend does take more hand than Aki, but it’s still primarily limited by stock, so I don’t feel particularly bad about spending hand to brainstorm. And often I’ll use the salvage brainstorm and then sac it for the sac brainstorm, which means that hitting 1 climax in 8 cards is enough to make it match the spammable brainstorm in terms of raw resources, with any additional climaxes representing plusses.
Once you’ve used a sac brainstorm, it then becomes natural fodder for a second sac brainstorm, meaning that if you whiff the first brainstorm but have another in hand, you can simply brainstorm again into your now more compressed deck; if you were compressed enough to begin with, this means that it’s often less risky than it seems (though it’s best to make sure you can still attack 3 times if you whiff everything, of course). This can also let you do stuff like refresh multiple times per turn; I had one game where I clocked myself up to level 3 from something like 2-2, refreshing twice and rikiing twice if I remember correctly (to be fair, that was a game that went unusually well; but of course, it’s exactly those sorts of games where the opponent is likely to try to trap you at level 2, or where you just cancel naturally when you’d like to be level 3). Or you can refresh in order to get a card into deck to search out with the red level 3 Power, or dig through your deck to find the toast event.
Individual Card Notes
Level 3
CSM/S96-E016 Battle of Wits, Power

Mostly covered by the discussion of the deck concept above. A 2-of because you only need one over the entire game, but you really want to have that one (so it’d be too risky as a 1-of).
One minor thing to keep in mind with this finisher is that the card you put into clock is probably not going to be accessible if you end up having another turn, so you ideally want to make sure that’s a card that’s no longer useful (as opposed to finishers that ditch cards to waiting room, where you can just ditch things in increasing order of value). So if you’re grabbing stuff with the red level 3 Power, you often want to take a random junk card to hand, and if you’re ditching for toast, you generally want to drop your second-least-valuable card rather than the actual least valuable.
The combo doesn’t work if you have 6 cards in clock, but it does work if you have 5 cards in clock and 1 card in deck, so if you’re at 3-5 with 3 cards left in deck, you can effectively replace the last attack with the burn 4. (This also works with fewer cards in deck, but at that point you’re replacing 2 attacks or even all 3, which is less likely to be worth it — though may still be, depending on the situation.)
The climax being choice is, I think, notably worse than Aki’s bar: this is a deck that doesn’t use a lot of stock over the course of the game, so bars not getting trapped in stock was very nice; the nature of the stocksoul combo means that you’re more likely than most decks to be triggering immediately after refresh, where choice generally whiffs; and of course, climax swapping bars into stocksouls helped with looping the combo. On the other hand, choice is certainly not a bad trigger; when you do have a waiting room, you can grab finisher pieces off of it, and you can get stock if you’re already at hand limit (or just aren’t worried about hand), among other things.
CSM/S96-TE08 Best Toast
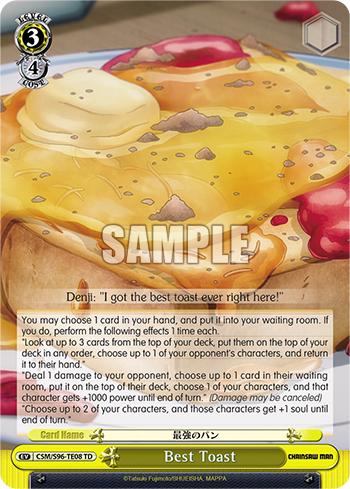
Again, mostly covered by the earlier discussion, and also a 2-of because you only need one. I’m thinking of bumping it up to 3, though, since it’s more difficult to access on account of being an event. In both of my top cut games I didn’t find it; I only won my top 16 game through a stroke of luck (2-soul trigger for lethal) that likely wouldn’t have been necessary if I’d had toast, and having toast may well have won me my top 8 game (there was once again a 2-soul trigger, this time making a swing that was otherwise lethal cancel).
Keep in mind that you have to do all the abilities in the order they’re written, and the burn 1 is mandatory (particularly relevant if the opponent only has 1 card left in deck). Also remember to play any characters that you might want to give soul (or power) to before playing the toast.
CSM/S96-E074 Moment on the Way Home, Power

The deck concept discussion already covered how this plays into the finish, but didn’t touch too much on the search ability. Being able to grab any 3 characters you want from your deck is quite powerful, of course; it’s also effectively a 1-stock 2-soul character, and compresses your deck by 4 cards, making brainstorms more likely to hit (if you need to dig for the choice or the toast event, for example), and making you more likely to see a climax to trigger for the burn 1. Needing to drop 3 cards can be tough though, depending on how the game’s going. Even if you already have the finisher combo in hand, it can be good to check if the other copy is going back into the deck when refreshing, so you know if you can drop the one in your hand and then search out the one in the deck, for example.
I used to have this as a 2-of, but I swapped out the 2nd copy for the icytail. It’s still fairly easy to get the one copy by level 3, though, so it feels fine as a 1-of to me, given that it’s not essential to the finishing turn. On the other hand, there were several times that I saw multiple climaxes in the top 3 cards, so I think there’s something to be said for going for 2 of these if you have 9 stock, at least if you need to kill from level 2.
You could potentially prioritize grabbing this over the finisher, since it can then get you the finisher, but I still tend to prioritize the finisher since there’s no guarantee it’ll be available in deck.
CSM/S96-TE17 Devil Hunting Devils, Chainsaw Man
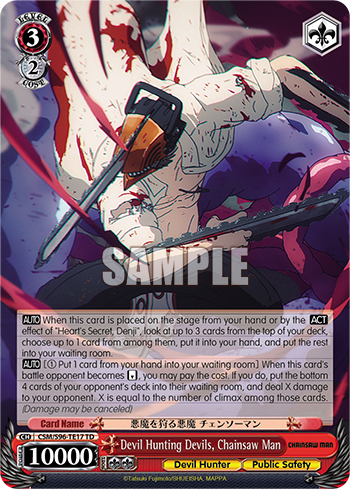
As I mentioned above, I didn’t actually use the icytail ability in Sacramento, but I do think it’s good to have available for the case where the opponent is level 3 with no waiting room, to get 3 non-climaxes into waiting room and ensure the combo is at full power. (And if you mill 4 cards into the opponent’s waiting room and less than 3 of them are non-climaxes, that’s probably fine too.) It’s fairly expensive — 3 extra stock, given that you want to attack with it before the combo — and needing a reverse means that it’s not always an option (though toast can help a bit by pumping 1k and potentially bouncing an assist or something), but on the other hand the check 3 ability can be quite nice (particularly when your deck is small enough that you don’t really want to brainstorm). A 1-of since it’s basically a tech card for a specific situation (and the red level 3 Power or salvage brainstorm can likely select into it).
CSM/S96-E002 Public Safety Devil Extermination Special Division 4, Power

A 4-or-more EP healer. It’s very important to have some sort of heal in the deck since the combo doesn’t work at 3-6, and being able to EP heal is a good option to have in general, particularly since you can often afford to spend the stock. The sac brainstorm even means you can efficiently play 2 of these on the same turn.
The ability to pay 1 salvage 1 when it reverses a level 2 or higher on your turn doesn’t come up a lot (and even when you have the option, you don’t necessarily want to spend the stock); often when the opponent has level 2 or higher characters on the board to begin with, they’re bigger than 11k anyway. But that’s fine; I don’t care too much beyond it being an EP heal with a 4-or-more condition. It’s still nice that it swings at 11k, though; there certainly are cases where that lets you kill stuff that you’d otherwise have to crash into.
This is a 2-of since it’s primarily there to ensure the finisher is live, but is also useful earlier in the game. I’m thinking of putting in another, though, since healing twice can be a pretty powerful play when you’re at high level 2 but not ready to go for the finish, and while the finishing turn might get a bit worse compared to not spending the stock, you’ll almost certainly still have something meaningful.
Level 2
CSM/S96-E015 New Objective, Denji
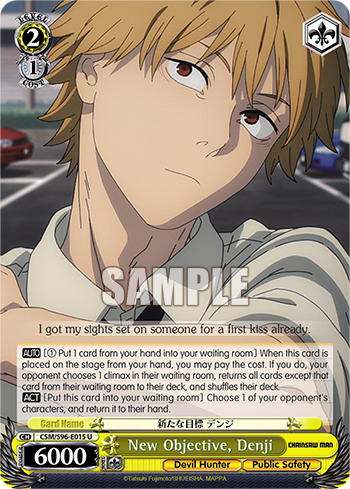
This is the only level 2 character in the deck, the fumio/bouncer. Both abilities are very nice (particularly being available starting at level 2), but also quite situational, so it’s a 1-of; the salvage brainstorm being able to grab this from either deck or (potentially) waiting room means it’s still pretty accessible. Combined with toast, this can also make it quite easy to bounce 2 lanes on your finishing turn.
Level 1
CSM/S96-E095 Reward for Work, Himeno

This level 1 Himeno saw a decent amount of play in stocksoul/bar decks; I’ve never been a big fan of trying to get a reverse with a 6.5k, but it’s blue, there are plenty of decks that won’t deny the reverse, and honestly 6.5k is still bigger than most of the other cards in this list. Generally you just rest the combo, but sometimes that’s not an option (perhaps you’re attacking with it) and needing that rest can be a bit awkward. This card has some minor synergy with the red level 0 Power, since if you start with this and get the reverse, you can guarantee that you’re not trapping a climax underneath it when the Power puts it into stock. It also has the potential to drop an extra climax, if you need to do that. I tend to default to salvaging the sac brainstorm and the salvage brainstorm off of this, allowing me to put off the decision of grabbing tech cards until main phase (and brainstorms are just generally pretty efficient). I often drop this during mulligan, but it might be better to keep it to be able to clock it for blue (or hold on to it for level 1 otherwise). A 3-of because it’s not necessarily useful past level 1 (or even at level 1 against some decks), and the need to rest a character means you can often only use 1, but you could certainly bump it up to 4 for a bit more blue.
CSM/S96-E059 What a Pitiful Home~ Power

The other level 1 card in the deck, this level 1 Power fills a similar role to the level 1 Himeno as a decent attacker at level 1 and an off-combo plus. It notably doesn’t require stock or a reverse, but of course you generally don’t want to accelerate once you’re past (low) level 1. It’s also a little bit of extra deckspeed. Being red can be a bit awkward, with the combo being blue and the EP being yellow, but it’s generally not a big deal. A 3-of for much the same reasons as the level 1 Himeno (you generally only want to accelerate once, and only at level 1); in a sense, it’s just “6 level 1 characters”.
Giving the opponent’s characters 2-stock encore is mostly a fake downside (though not entirely — one of my BCS opponents did actually use it!), but I still try to make sure my opponent knows that it exists; it’s one thing for the downside to be fake because the opponent never wants to use it, but quite another for it to be fake because they don’t know that it’s an option in the first place, because that doesn’t even leave the possibility of it becoming real.
Level 0
CSM/S96-E086 Break Time, Himeno
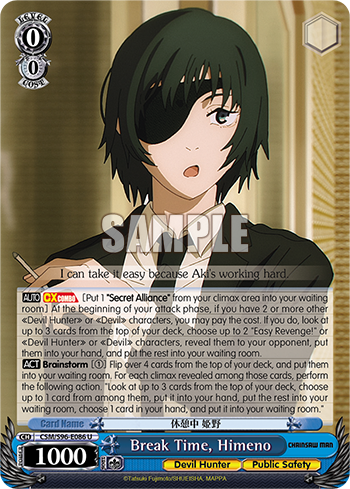
As mentioned in the deck concept section, this combo is the core of the deck. You only need one of them, so you can realistically start comboing as early as turn 1 (though that’s definitely not an every game thing; you still need the combo, the climax, blue in clock, and 2 other playables), and you don’t need to worry about sculpting into multiples. It can stay in back row so you only need to find the climax to loop it each turn, or it can attack if you don’t have other attackers or want to cleancut it or just expect to go into your finisher next turn. It sacs the climax at the beginning of the attack phase, so you don’t need to leave a card in deck to get the climax into refresh, and it’s on a stocksoul so you don’t lose soul doing that and you get an extra stock each turn (because you should be doing this combo every turn, pretty much). This is a 4-of because you want to see it as early as possible, and you don’t want to have to worry too much about getting it back if you need to attack with it. I mostly ignore the spammable brainstorm part, but it can be nice to just have that available if you really need it.
CSM/S96-E061 Sudden Confession, Makima

I already talked a lot about the sac brainstorm in the deck concept section; in my opinion, it’s a really good card in any deck that isn’t looking to set up a fixed board and sit on that. A 4-of because I’m quite happy having 1 on stage and the other 3 in hand; I’d run more if I could.
It can be helpful both for milling through an uncompressed deck (if you can afford the hand), and for taking advantage of a compressed deck. In particular, since the combo mills and you don’t generally want to trigger stocksouls, you don’t really want to go into climax phase with a small, compressed deck; if it’s in the 5~10 card range, I tend to want to use the sac brainstorm to mill through it while having a decent chance of plussing (ideally down to 3 cards, to get the stocksoul you’re playing into refresh, though of course that doesn’t work on the lower end of that range). Above that range, there are enough cards left to probably be able to take advantage of that compression for cancels, and of course below that the brainstorm doesn’t get the climaxes into refresh. And if your deck is in the 8~14 card range but not especially compressed, it can be nice to brainstorm to avoid the possibility of leaving a glut of clean cards for your opponent to swing into. If you hit, then you can mill down to refresh, and if you whiff, then you’re that much more likely to still have climaxes left after attacks, or depending on the exact deck size perhaps you just aim to mill at least one off the combo rather than triggering it.
CSM/S96-E045 Slice of Everyday Life, Aki Hayakawa
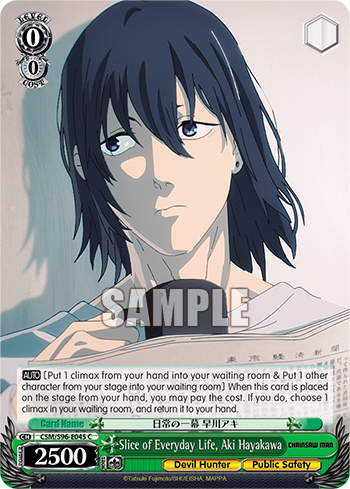
The green climax swap is the one I’d generally prefer to use, being on-play and not costing stock, so I run 1 of those for the cases where it’s an option (like getting it off the salvage brainstorm, or searching it out with the red level 3 Power). It might not actually be worth the slot, though, since it’s mostly just saving 1 stock in a relatively small number of games.
CSM/S96-E088 Morning Routine, Aki Hayakawa

This deck has a severe lack of blue — quite a problem when you’re looking to play a blue climax at level 0. So I run 4 of the blue climax swap, with the idea being that you don’t feel bad about holding it in mulligan but you also don’t feel too bad about clocking it for blue (as a rule of thumb, I’ll clock it if I’m going second and have at least one of the combo or the stocksoul); and as both a reasonable level 0 attacker and a utility card, that 4-of count doesn’t feel unreasonable. And there’s certainly something to be said for running 5 climax swaps: sometimes you go looking for one and realize you already have one in hand, for example. Being on-death is awkward, but generally not a deal breaker, particularly with the sac brainstorm sometimes letting you use it efficiently during main phase (though of course that only really works if you already have the climax swap and the wrong climax in hand before you brainstorm, rather than getting one or the other off of the brainstorm, unless you sac the climax swap without a climax in hand, either because you have another climax swap or because you’re confident you’ll find a climax of some sort). Like with the level 1 Power, I try to make sure my opponent knows that their characters have 2-stock encore, even if it hardly ever comes up.
CSM/S96-E067 How Delicate~ Power
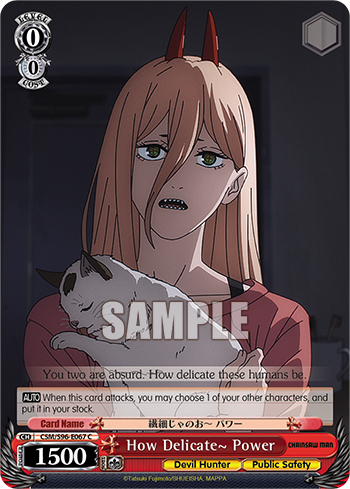
A pretty ridiculous card, basically just representing guaranteed free clean stock (I guess the opponent could memory kick your other characters, but… sure). The main downside is that it only swings at 1.5k and leaves a direct lane open, so it’s generally better later in the game when you’re more compressed and likely to be crashing regardless. It’s a 2-of for that reason, but it could certainly be higher.
CSM/S96-TE02 Devil Hunter, Power

In the early game, this is both a good attacker and a source of selection: as a stock bomb, it can take out opponent’s level 0s (and potentially deny on-death abilities), and as an on-death salvage riki it serves as a plussing 0, replacing the hand you spent to play it, while also giving you a bit of selection (particularly if you’re level 1 by the time you salvage). It can also help with colors a bit. The salvage can be denied by hard removal, since it needs to go to the waiting room, but there are ways around that, to some extent: being a stock bomb means it can crash effectively (though using the salvage on your own turn likely means less selection, and a bit more worry about hand limit), or the sac brainstorm can let you use it efficiently during main phase. If you’re not too worried about hard removal, this card can let you attack with a card you normally wouldn’t (like the combo), by letting you salvage it back after it dies. A 3-of, but could easily be a 4-of; you don’t necessarily feel bad about opening 2 of these, and they’re nice for clocking up to level 3 if necessary; on the other hand, they’re not especially useful at level 1 or level 2.
CSM/S96-E057 Devil Covered in Blood, Chainsaw Man

This is a crazy card, being a level 0 that swings at 9k, effectively has clock encore, and has a soul trigger on top of that. Of course, it’s largely a dead card later on because the “clock encore” is mandatory, though you can still use it as sac fodder, or attack with it and then throw it into stock with the red level 0 Power (so long as it’s not crashing), or if you’re desparate just take the clock. It also still swings bigger than either of the level 1 characters, so it can be nice when dealing with stuff bigger than 6.5k (though you do have to be wary of backups). Can be denied by hard removal; this feels particularly bad when it also gets reversed, since you still have to clock yourself in that case (though that hasn’t actually happened to me yet). This is my go-to card to throw in stock from a choice trigger (and for that reason, I generally don’t put it in stock with the stocksoul). A 2-of because you don’t want to see too much of it; it’s effectively sharing the “plussing 0” slots with the Power riki and the cleancut.
CSM/S96-E033 Contract with the Fox Devil, Aki Hayakawa
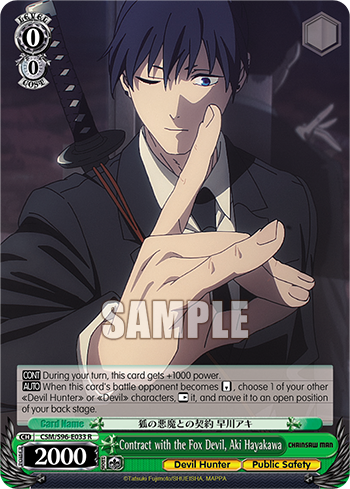
Speaking of which, the cleancut; this is a free plussing 0 that lets you attack with your backrow cards (of which there are at least 10 in the deck) — and even if you cleancut something that you don’t want to either keep in back or attack with, you can likely just sac it with the sac brainstorm. This can also let you reuse the red level 0 Power, or avoid clocking yourself with the level 0 Chainsaw Man if you’re past the point where that’s helpful. On the other hand, it’s green, the one color the deck doesn’t use, and of course you need a reverse target. This tends to be my go-to card to put in stock from the stocksoul (along with the level 1s later on, and potentially the combo or blue climax swap); it’s generally pretty useless past level 0, though occasionally it can come up. A 2-of, part of the plussing 0 suite, though I could see cutting it, particularly since it’s green (my main concern is that I’d still want to keep the count of plussing 0s fairly high; you want to be able to attack 3 times at level 0 as much as possible). On the other hand, I happened to go first in all but one of my games in Sacramento, so this card didn’t have much chance to shine; I might be undervaluing it at the moment as a result of that.
CSM/S96-E028 Devil Hunter, Himeno

The salvage brainstorm. Unlike with most decks, this doesn’t tend to sit in the back row (since that’s taken up by the combo & the sac brainstorm), but instead is generally sac’d for the sac brainstorm. Though sometimes there’s room in back because you don’t have the other backrow cards yet, or because you’re attacking with the combo (maybe you expect to go for the finish next turn, or you have another one in hand, or you just wanted to sac something else for the sac brainstorm and thus ended up with 2 rested characters).
The other ability is also very good, giving you easy access to 1-of level 2 or higher cards in your deck, though it does make the salvage brainstorm itself inaccessible.
A 2-of because you don’t generally need it early on, but could be nice to bump up to 3 since you tend to want to see it regularly.
CSM/S96-E066 Unforeseen Incident, Denji
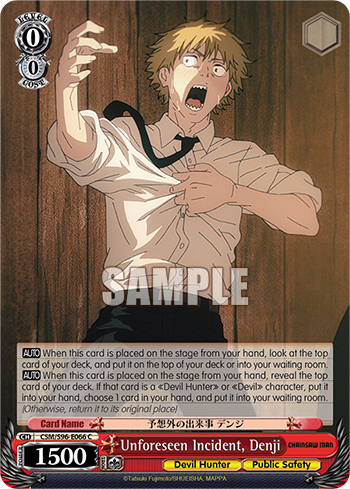
This card is nice because it can dig 2 cards towards a climax, e.g. to help hit a brainstorm (so long as the console doesn’t reveal an event). If I already have a brainstorm, I generally start with the console and then do the top check afterwards, since that gives you access to the top card if it’s not a climax but the next one is. Otherwise, I’ll start with the top check to try to maximize the quality of the filter.
It can also be useful as a ditch outlet if you have an extra climax in hand and more than 1 card in deck, though there is the possibility of whiffing. In that role, it’s competing with the riko; I went with this instead in large part because of the color, but also because this actually tends to be more selective on turn 1, while later on I value the dig towards a brainstorm hit more than better selection in its own right. (Though perhaps I shouldn’t? The riko can just sculpt into another brainstorm, after all.)
A 2-of, as a card that you generally like to see but don’t particularly need to see. Honestly, I could see cutting it; while it’s kind of meant as a sac target for the sac brainstorm, I’ve moved towards the salvage brainstorm for that instead. My main concern would be still having a costless ditch outlet, and still having enough red.
CSM/S96-E011 Last Night’s Drinks, Makima

This card is just there in case you need a bit more stock for your finishing turn; the idea is that you can often grab it off the red level 3 Power. There’s also some potential to use it in cases where you’re running into the hand limit (e.g., because of hitting a bunch on brainstorms), or else to dig for a climax or the toast event (or just a character, if you don’t have a better way to find it). It also swings at 3.5k, which is nice (assuming you have 2 other characters and it attacks last).
Cards Not Included
Some other potential inclusions that I decided against.
CSM/S96-E003 The Devil Hunter Feared by Devils, Chainsaw Man
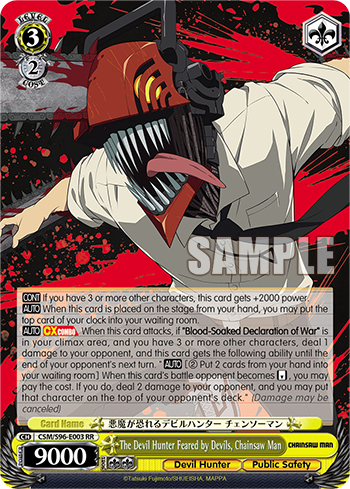
The Chainsaw Man finisher. Not so much a “potential inclusion” as a different deck entirely, really, but still something I want to touch on. The big thing that makes me avoid this finisher is the fact that it requires a reverse to be impactful; there are too many ways for the opponent to deny that or at least make it difficult. (Slime in particular is good at that, and is one of the decks people expect to be a large part of the meta, though there weren’t a lot of them in Sacramento. On the other hand I did happen to play against three 8 standby Ayakashis, which also seem rough for getting reverses, though that wasn’t because there were a lot of them; I just had an Ayakashi-filled day I guess. But the point is that there are decks like that out there.) While the opponent can refresh and leave no waiting room to attempt to play around Power, that’s just reducing the chance of the burn 4 sticking (and not necessarily by a huge amount — there’s a decent chance that a cancel puts 1-2 non-climax cards into waiting room), rather than actually removing instances of damage.
I also don’t think Chainsaw Man is much more powerful as a finisher than Power, once you factor toast (and the red level 3 Power) in. (Perhaps you could run toast alongside Chainsaw Man? But I feel like people generally don’t.) Comparing triple Chainsaw Man combo with 2 reverses (one on the last attack) to Power combo on the last attack with toast and red level 3 Power (and cards in the opponent’s waiting room), they both have 2 burn 1s, one of which is guaranteed, and then Chainsaw Man has a 3rd burn 1 and two burn 2s, while Power has a burn 4 with 3 clean cards stacked on top; those are roughly similar when it comes to dealing 2-3 damage (you can compare them using this handy damage calculator: Chainsaw Man, Power). Power does need to see a climax in the top 3 cards to get the second burn 1, but also has more control over the size of the attacks. Here, Chainsaw Man costs 7 stock and 8 hand (and 1 other character; the Pochita brainstorm changes that to 6 stock, and 9 hand if you didn’t already have it on stage); Power costs 8 stock and 6 hand (and 1 other character; the red level 0 Power changes that to 7 stock and 7 hand, unless you already had it on stage); overall they’re very similar.
The main reason I could see to run Chainsaw Man combo over Power combo is that it heals rather than clocking you, but I just don’t value that that much (though it’s certainly not nothing).
CSM/S96-E054 First Taste, Makima

When you only need a single copy of your advantage combo, the benefit of a search riki decreases significantly. The on-death salvage riki can generally fill its roles just as well: it’s not especially unlikely that 1 of the 4 copies of the combo will be in the waiting room, and the sac brainstorm can let you use it to efficiently clock up during main phase. And while you have to wait until turn 2 to play the search riki (unless you also open the yellow level 0 Makima), you can attack with the salvage riki turn 0, and it’s a stock bomb to boot.
CSM/S96-E030 Devil Hunter, Kobeni
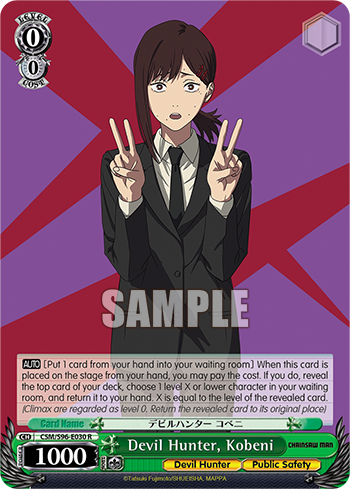
The riko. I talked a bit about this in the section about the level 0 Denji; in my mind, it’s basically competing with that for the “climax ditch outlet” role. The Denji helps the brainstorms more, and is better turn 1 (when your waiting room probably just has stuff you mulliganed anyway; I suppose you can mulligan something with the intention of getting it back with the riko, but that kind of locks you into playing the riko, which you might not want to do if you draw into better attackers). Also, the riko is green, which is the one color the deck doesn’t use, and with a 2-color level 1 game and 3-color level 2 game, it’s important to have a decent amount of all 3 colors. And most of the time I just feel like I’d rather attack with other cards, and I’d rather grab other cards when I have a choice (e.g., off the level 1 Himeno).
CSM/S96-E007 Start of the Battle, Denji

Another option for a level 1 attacker. It’s nice that it swings big, but it’s not especially likely to get you the extra stock, and when it does, sometimes that’s because you’re compressed enough that you don’t want to take the blind stock anyway. And at level 1, hand is likely more important than stock; you need to be able to maintain attackers.
CSM/S96-E089 Last Cigarette, Aki Hayakawa

The freefresh backup is a blue card that could be useful (particularly since the deck has choice triggers), but I just don’t expect to have the board to be able to use it effectively. Even when you’re not just crashing all lanes, there’s a decent chance that you’re throwing a character into stock with the red level 0 Power, or at least attacking with a level 0 in some lane, making it easy for the opponent to side and still push damage into your current deck before you can freefresh.
CSM/S96-E093 Honest Question, Himeno
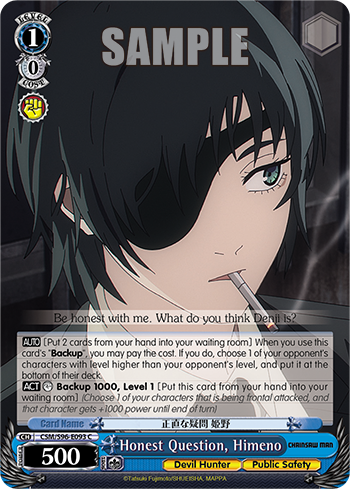
Like with the freefresh backup, I don’t expect to be able to effectively use the antichange backup. The deck also tends to run pretty light on hand, though that can vary a lot from game to game; there’s a decent chance that you just can’t afford to actually use it. So while the threat of antichange can potentially get you hand by making the opponent side your characters, it’s the least effective when you most need it (i.e., when you don’t already have a healthy hand size).
CSM/S96-E082 Devil Hunter, Aki Hayakawa

The fukaziroh. When looking for decent blue level 0s, this would be a good contender, but in a deck with only 15 level 1 or higher cards, the chance of whiffing is over 20%. Plus, most of the cards you want early on are level 0s anyway.
CSM/S96-E075 First Indirect Kiss

There’s definitely something to be said for using this minus soul event to hedge against dying (or being hit to 3-6) from level 2; it doesn’t require you to present a board the way a counter would, but on the other hand you have to pay for it up front and then choose what to minus soul before seeing triggers.
I made a different (but very similar) deck aiming to play more into this event rather than the finishing turn, but didn’t do much with it since the expectation was that Slime would be a large part of the meta, and the Shuna + Mjurran back row completely turns off this event since it needs to choose. That’s also an argument against putting this event into this deck, of course, though it’s less impactful when the event isn’t the core of the gameplan; you could still run a couple of them and just ignore them in the Slime matchup.
Still, this event kind of competes with the toast event as something you have to hold onto and a way to use your resources, and also with the EP as a way to spend resources to help your chances of survival. It’s probably a bit better than the EP at keeping you alive, but it isn’t searchable and doesn’t get you a 2-soul body that swings at 11k. And in particular, this deck really wants to run at least one healer, so if you’re at 3-6 you have a chance of being able to grab that and heal down to be able to use your finisher combo.
CSM/S96-E063 Childlike Fiend, Power

The adachi is nice because it can likely answer 2 lanes, but it doesn’t necessarily answer them well (bouncing can be impactful but can also just let them play it down again; reversing allows for stuff like encore), and the deck already has a bouncer at level 2 with the fumio.
CSM/S96-E021 Newcomer Welcome Party, Power
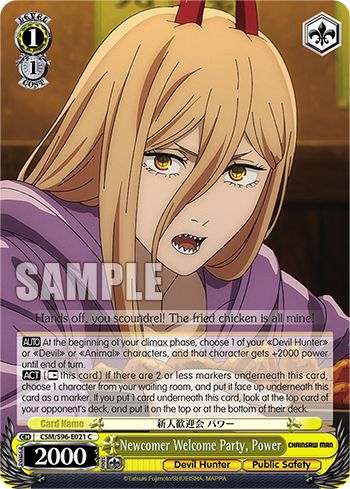
This card can let you confirm a non-climax on top to get a guaranteed burn 4 with the combo (or else move a climax to the bottom). It could potentially be useful to guarantee the 4 in games where you only have 6 stock rather than 9, or where you just can’t find the toast; but personally, I just don’t value that confirmation that much. And like toast, that interaction is only relevant when you use the combo on the first attack, which means the opponent needs to have a waiting room (but unlike toast, it doesn’t help make up for the soul you don’t get from the climax). I might be more inclined to run this if I expected to actually have it sitting in back row for a few turns, getting a couple more checks and a bit of power, but there’s no room for it.
CSM/S96-E097 Easy Revenge!
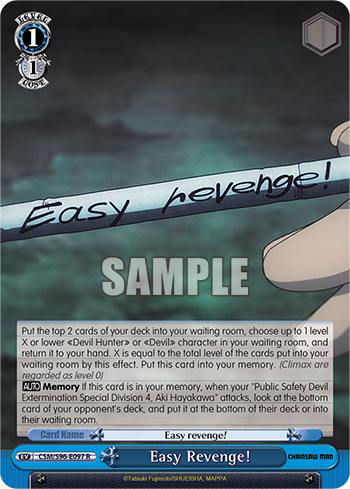
Without the level 3 Aki combo, the stock spent on Easy Revenge does nothing but turn into memory, so it’s not a particularly good event. Still, there’s something to be said for on-demand selection (with a bit of milling), even if it costs a stock; plus it’s blue. I think the salvage brainstorm mostly covers that role, though.
CSM/S96-E096 Career Advice, Aki Hayakawa
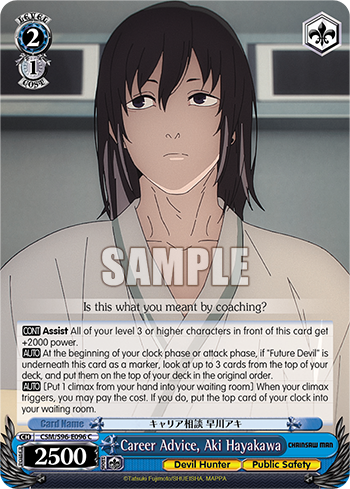
With the deck having neither bar nor pants triggers, the heal ability on the Aki assist is a lot less likely to come up, and the toast event already handles checking the top 3 cards on the finishing turn, at least. It also competes for back row slots with the sac brainstorm and the combo (and potentially the salvage brainstorm), though it’s certainly possible to push the combo up and attack with it once you’re expecting to be going for the finish next turn (or if you just have another one in hand), and free up a back row slot that way.
CSM/S96-E081 Public Safety Devil Extermination Special Division 4, Himeno
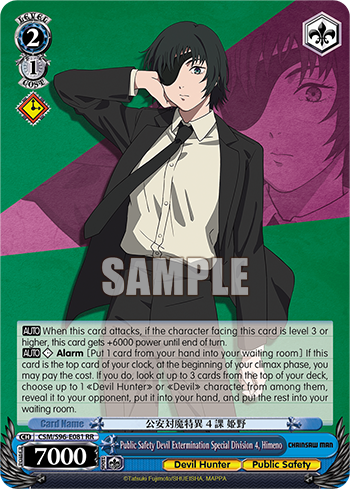
I considered this alarm just as a blue card that’s nice to clock at level 0. But at the end of the day, I’d prefer to have more cost 0 attackers instead.
CSM/S96-E105 Daily Life After a Fierce Battle, Aki Hayakawa

Another option for a blue level 0 character. Not something I’ve considered very much, on account of the deck already having check-3 brainstorms anyway, but there are some situations where this could get you something a brainstorm couldn’t.
Additional Thoughts
A big aim of the deck is to play 3 characters and a climax as early and often as possible. To that end, the deck runs 27 level 0 characters, meaning you’re quite likely to be able to find attackers (though it’s still just barely over half the deck, so you can’t rely on drawing 2 level 0s from drawing & clocking, for example, and even 1 is far from guaranteed).
I’ve mentioned cards being blue a lot in this post, and this is why that’s important; you ideally want blue in clock on turn 1 going second or turn 2 going first, to be able to play the stocksoul and maintain resources. You could potentially play the choice instead, of course, but that’s riskier; that said, there were definitely times where I played the stocksoul at level 0 without the combo, so to some extent it’s a risk I’m willing to take.
This deck often gives up board; for example, there were multiple times where I had to side a 2k level 0 because I needed to prioritize taking out other lanes, and when I played against 8 standby Ayakashi Triangle (which happened 3 times in Sacramento, for whatever reason), their 2/2s were basically invincible. On the other hand, this deck has a decent number of good attackers at level 0, between the 3.5k climax swaps, the stock bombs, the cleancuts, the 1-of yellow Makima, and of course the Chainsaw Man that swings at 9k.
I mostly just want to be able to take out level 1 combos, and maybe play an EP or two, and I think that’s fine, honestly. The bouncer is also an option if there’s something you really want to remove from the board at level 2 (though it didn’t come up very much in this tournament).
Considerations for how to adjust soul on the finishing turn
One thing to note is that since the toast event doesn’t let you choose the order that you perform the effects in, you have to do them from top to bottom; that means that you have to do the rearrange top 3 & bounce before knowing if the burn 1 will go through or cancel. You can still assign soul afterwards, so you can generally still adapt to the result of the burn 1, but it can be awkward to think about. If you have the red level 3 Power and see a climax in the top 3, it’s probably easiest to think of the two burn 1s as a single burn 2 at this point, and then adjust your plans if the burn 1 from the toast ends up cancelling.
If the 4 isn’t guaranteed, ideally you want to optimize for it cancelling, but only if the amount of damage you need to do is small enough that it’s reasonable to think you still have a chance of killing in that case.
For example, if you need to do 7 damage after the burn 1 from toast, and you have a burn 1 from the red Power, you probably want to swing 3-3-3 despite that making the burn 1 meaningless if the 4 sticks: in this case lethal is the burn 4 and any of the 3s (3 possibilities of dealing 7 damage, but effectively only needing to stick 4), or the burn 1 and any two of the 3s (3 possibilities of dealing 7 damage exactly), or all three of the 3s (1 possibility of dealing 9 damage).
If there’s a card in the opponent’s waiting room to stack on top with toast, then whether you want to start with the red Power (guaranteeing the burn 1) or something else (increasing the likelihood of that attack going through) depends on the situation. In the 7 damage example above, you don’t want to start with the red Power since the burn 1 makes no difference in the case where the 4 goes through, but increasing the chance of a 3 sticking is useful in every case. But if the opponent has a level 1 on board that you can side, and you can afford to do the combo on the 2nd attack, suddenly it becomes worth it to start with the red Power, since that means you can swing for 2 on the last attack if the 1 & 4 both stick, or for 3 if only one of them does. (As a rule of thumb, it’s probably a good idea to plan to side a level 1 when assigning soul, since it’s better to err on the side of having too much soul than too little.)
If you have the icytail, the random nature of the burn makes it hard to account for; I’d probably ignore it entirely unless the opponent is very compressed. But if the opponent leaves you a side target, you can potentially plan to side that if you get extra damage from the icytail.
Minus soul backups are important to keep in mind here (when playing against Slime or Ayakashi, for example). For minus 1 soul backups in particular, you probably just want to aim to be overswinging by 1, so they can’t use it to guarantee that they survive if it comes down to the last attack.
Potential Changes
In the course of writing this post, I decided to make a few changes to the deck, namely:
- Added a 3rd toast event, since I think it’s very important for the finishing turn.
- Added a 3rd EP, to allow for the double EP play more often.
- Added a 3rd salvage brainstorm, as my go-to card to sac for the sac brainstorm. This one is Pochita rather than Himeno, to have a bit more yellow; while Himeno’s search ability is nice to have access to, it’s not something I tend to use a lot, so having it on 2 out of 3 of the salvage brainstorms is probably perfectly fine.
- Added a 3rd of each of the level 0 Chainsaw Man and the red level 0 Power: for red, to increase the ability to use the Chainsaw Man at level 1 or later as a 9k attacker, and because they’re both just generally good cards on their own, the Chainsaw Man at level 0 (or as a choice target) and the Power later on (but also at level 0).
- Cut the level 0 Denji down to 1. I still want it as a ditch outlet for climaxes, but it’s not especially important beyond that. As a 1-of, there’s at least the potential to grab it off the salvage brainstorm or the salvage riki.
- Cut the green climax swap. It’s nice to have, but an easy candidate when I’m looking for more space.
- Cut the level 1 Power down to 2. Looking for deckspace, cutting down from 6 to 5 level 1s seems like a relatively low-impact cut. The hope is that the extra level 0 Chainsaw Man + Power or the extra EP can make up for it in terms of reasonably-sized attackers.
- Cut the cleancut. While it’s a nice card, this deck cares a lot about colors (always wanting one more than it has room for in level, until level 3), so green cards need to be exceptionally good.
So here’s the updated decklist (1169L):


Leave a comment