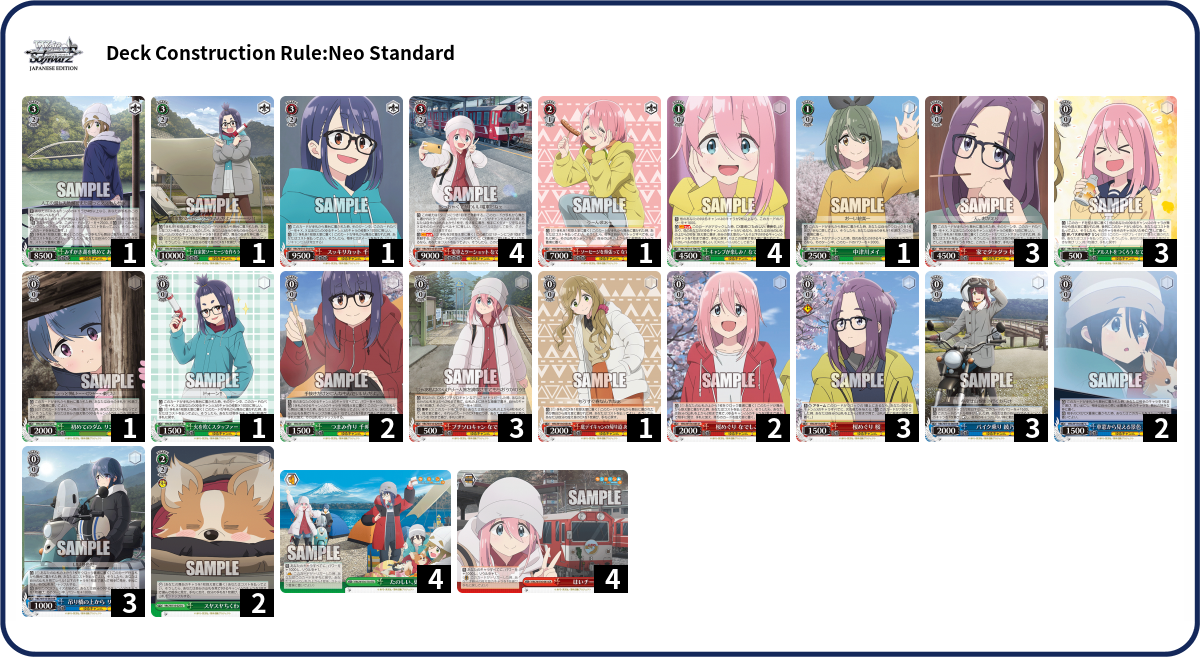
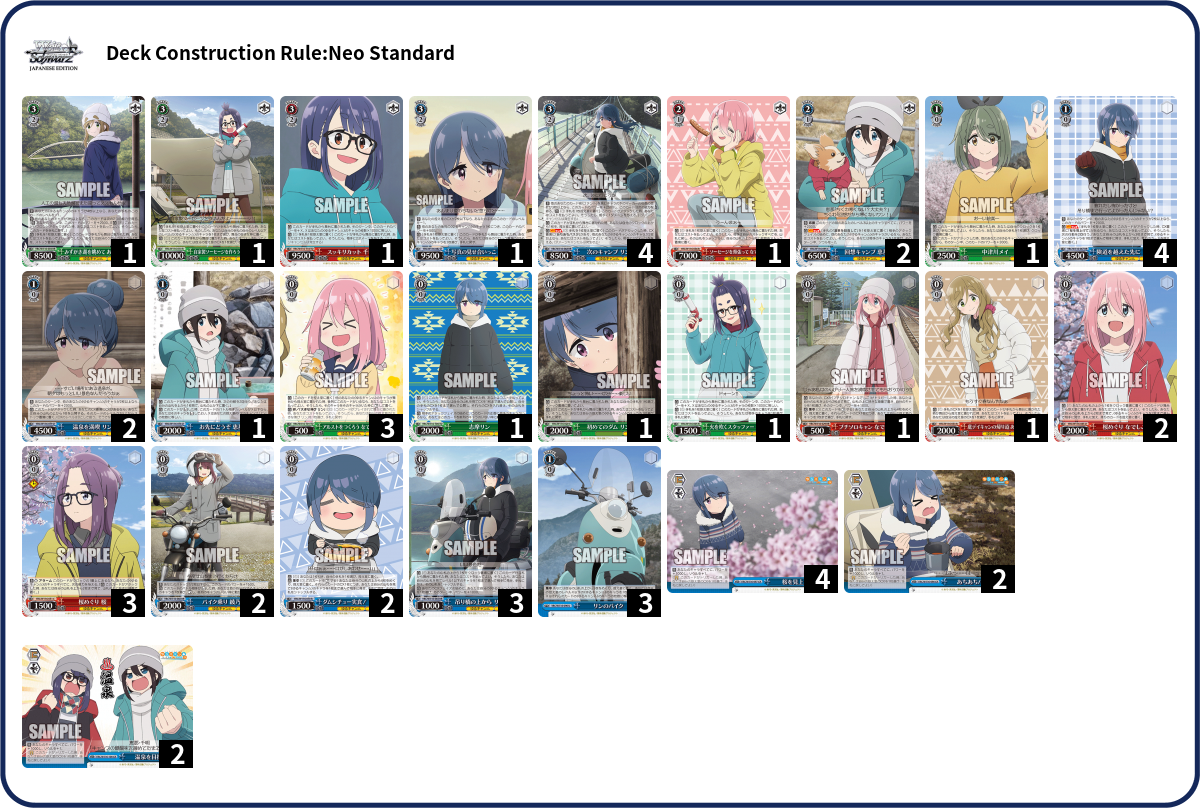
The full card list for Yuru Camp (Laid-Back Camp) just released came out earlier this week, so let’s build a deck or two!
(Card images link to the card on the card list. If you can’t read the Japanese cards shown/linked here, Weiss Tea Time has translations.)
Table of Contents
Finishers
To start with, there are only 3 finisher combos in the set: green (bar), red (door), and blue (pants).

You could also play something like standby or the EP neg soul combo and just run off-finishers, but I doubt those are particularly good; there’s not much in the way of payoff for standby, and the neg soul combo isn’t very loopable on account of needing to reverse.
Also notable: the assist that gives the bar finisher an extra burn 2, the level 3 TD Aki that can burn 2 during main phase, and the stockshuffle:


Stockshuffle being the only decompression tool is an argument for running the TD Aki, since a main phase burn can handle the case where the opponent only has 1 card left in deck.
I don’t think there’s a ton of reason to run the pants finisher; both pants and bar have a core of burn 3s, but bar takes 1 less stock. Where the bar finisher can add on a burn 2 with the assist, the pants one can add on burn 1s so long as you have a tent with at least 3 markers, which I suspect is a real condition: not only do you need to have the tent sitting in back row for basically the entire game, but you’re likely making some deckbuilding concessions to feed it markers. Now, the tents do come with their own benefits, of course, but I don’t think any of them would be my first choice for the second backrow.
The bar finisher is the easiest to run: beyond being on bar, it’s a check X, so it should be very easy to find the climax, making it the best candidate for a 3-climax split. It does need a reverse to get the burn 2 from the assist, but if you have an extra stock, you can threaten that reverse in 2 lanes, making it difficult to completely deny, so long as the opponent has characters on the stage to begin with. You could also just use the TD Aki for a burn 2 that doesn’t require a reverse.
The door finisher is a profile I quite like, a ditch-2 restander with cancel burn of some sort; I’ve played that in both Love Live Nijigasaki and Project Sekai. This one costs an extra stock, but as a result doesn’t have any condition it needs to fulfill. More importantly, it has base 3 soul; this could be nice for setting up side attacks, but means that it’s even more vulnerable to the opponent leaving direct lanes. Swinging for 4s and 5s before triggers is already stretching it; 5s and 6s seem extremely rough unless your opponent is seriously uncompressed.
So with this finisher, you really want to be able to prevent the opponent from crashing their characters before your finishing turn. Neg soul counters and memory kick backups are also a concern, but you can potentially avoid that by siding.
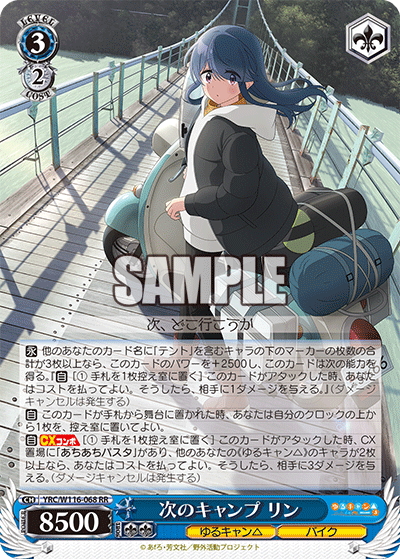
For memory kick backups, there’s also a level 2 Rin that gives everything else 1k × its soul during your turn, which seems funny with this combo (though likely not actually worth it):

This finisher takes more hand than the others, but less stock (but it also has more opportunity to trigger climaxes on the final turn, so the hand cost is generally not quite as big as it seems).
There are a few cards that can prevent crashes while also getting you hand (though they do cost stock; while this finisher takes less stock than the others, it’s still not cheap):


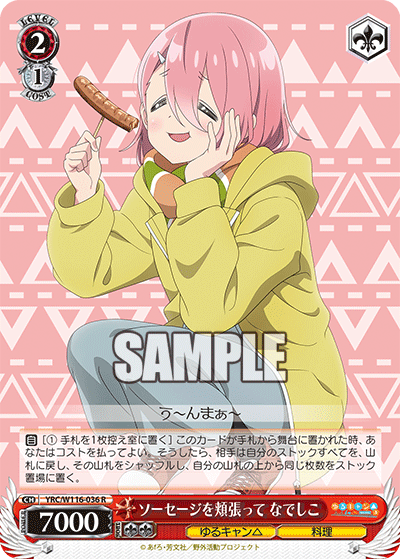
The Sakura alarm also seems very nice for this finisher in particular, giving you some control over your musashi mills:

Here’s a table comparing finishing power and cost (going into main phase) between the finishers (ordered roughly by instances of damage):
| Finisher | Instances of Damage | Cost | Sculpting | Additional Requirements |
|---|---|---|---|---|
| Triple pants, 3 burn 1s | 9 (6× 3, 3× 1) | 10 stock, 10 hand | 3 combo, climax | Tent |
| Triple door | ~9 (6× 4, ~3× musashi) | 7 stock, 10 hand | 3 combo, climax | |
| Triple pants, 2 burn 1s | 8 (6× 3, 2× 1) | 9 stock, 9 hand | 3 combo, climax | Tent |
| Double door + musashi | 7~8 (5× 4, 2~3× musashi) | 6 stock, 8 hand | 3 combo, climax | |
| Triple bar + assist | 7 (6× 3, 1× 2) | 8-9 stock, 8 hand including assist | 3 combo, climax, assist | Reverse |
| Double pants, 2 burn 1s | 7 (4× 3, 1× 2, 2× 1) | 6 stock, 7 hand | 2 combo, climax | Tent, 3rd attacker if you don’t want to attack with tent |
| Double door | ~7 (4× 4, 1× 2, ~2× musashi) | 4 stock, 7 hand | 2 combo, climax | 3rd attacker |
| Triple bar | 6 (6× 3) | 6 stock, 7 hand | 3 combo, climax | |
| Triple pants, no burn 1s | 6 (6× 3) | 7 stock, 7 hand | 3 combo, climax | |
| Double bar + assist | 6 (4× 3, 2× 2) | 6-7 stock, 6 hand including assist | 2 combo, climax, assist | Reverse, 3rd attacker if you don’t want to attack with assist |
The bar finisher mostly ended up towards the bottom of that table; it trades a bit of explosiveness for ease of use, I suppose.
Meanwhile the door finisher tends to be the most efficient; I think of it as taking more hand than the others, but that’s only really the case when you’re going for triple (though I think you should, in fact, go for triple).
Advantage Engines
Level 2 Aoi Bar Combo
During reveals, one thing I wanted to try was using the level 2 (effectively level 1) Aoi bar combo with the saver in back, alongside the Aya that gives the level 1 vanilla +1 soul and on-cancel bounceback. (We previously didn’t know it’d be a level 1 vanilla, but that was my guess anyway.)


I like the Aoi combo because it seems very loopable on account of only needing 1 copy (and being on a bar to boot); that leaves room in the other lanes to do something else, and this package providing either soul rush or additional plussing seems pretty nice, though it’s a bit awkward that you’re potentially not killing the opponent’s characters if they cancel. I suppose if there’s something you particularly want to kill, like a level 1 combo, you probably aim to attack with something else in that lane, or else just don’t bounce the vanilla even if they cancel.
Could also go for blue instead of red as the secondary color alongside Aoi; in particular, that gives you access to the 1/0 event and the stockcharger (which the Sakura alarm can make more reliable):

One big downside of Aoi combo is that it doesn’t have any built-in deckspeed, but there are level 0s that can help with that, in particular these two:
On the other hand, not milling during attack phase means that you can use the alarm to have a decent chance of leaving a climax on top to cancel with, instead of triggering it (or maybe you’d prefer to trigger it, if it’s a bar you want for next turn for example).
Another downside of Aoi combo is that you need 4 characters and a stock to be able to play it, but from playing an EP level 2 combo in RWBY, I’m not especially worried about that. The riko and hand-to-stock will likely be important, though:


You’ll also probably want some green level 1s in case you’re stuck at 1-0 (or just generally don’t have red); nothing stands out to me as something I’d definitely want as a secondary attacker, but there are some options:


The Mei is just a generally good profile that I’d play anyway.
The power pump from the Rin seems nice, and the other ability could also be useful, though Yuru Camp doesn’t actually have much ability to dig for climaxes before level 3, so I’d be hesitant to drop them; still, it’s certainly possible that you trigger 2 bars or whatever.
The teacher is because it seems like it could be nice to make the opponent have to answer 7ks alongside the 8k combo; but without any additional power from the back row, it’s probably not particularly relevant, especially since the opponent can make it smaller by not having 2 cards in their back row.
The vanilla is the bond target from the saver that I’m running anyway, so it could be nice to throw in the deck, but the bond is a stock bond, which means that it’s not necessarily helpful on the first turn at level 1 (since it’s competing for stock with the combo itself).
Of course, you could also just attack with level 0s if you don’t have red; a notable one there is the bouncer, which is likely swinging big enough to take out any normal level 1 characters anyway:
Thinking about using Aoi combo with the door finisher: on the one hand, the vanilla package seems nice on account of potentially leaving an empty lane and preventing a crash, but on the other hand, the Aoi combo works against that by being big enough cross-turn that the opponent could end up crashing even unintentionally. Perhaps it’d make the most sense to just use this with the bar finisher; even the wrong bar helps out the vanilla, and the assist lets the combo swing at 10k, which could come up. Denying a crash could still be relevant, and unlike the door finisher it only really needs the opponent to leave 1 character, maybe 2.
Level 1 Rin Pants Combo
The other combo I liked during reveals was the level 1 Rin pants combo, since it has a ton of built-in milling as well as a built-in ditch outlet in case you trigger pants/bar (or just have a bunch of climaxes in hand already). It’s not particularly good for looping, though, so you probably want off-climax level 1s to run alongside it, with the idea being that you have 2-3 good attackers each turn even if they’re not all combos; fortunately blue has some pretty good off-climax level 1s (though one has a better version in red):


My thought is that you could use this alongside a split of the level 2 Ena pants combo and the bar finisher; 6 pants would hopefully make it relatively easy to find the level 2 climax, and then the bar finisher shouldn’t have too much trouble finding its climax either.

Minus 2 soul isn’t a lot, but the hope is that it’s enough to keep you alive from level 2 at least some amount of the time (whether that’s from the minus 2 soul itself or from the opponent spending resources to bounce it). Perhaps it’d make more sense to play the pants finisher without a tent, just as a plain burn 3, because it heals, so you could heal down and threaten minus 2 soul again? That finisher doesn’t have as much of a built-in way of finding its climax, but there’s still the level 3 Aki that salvages a climax.
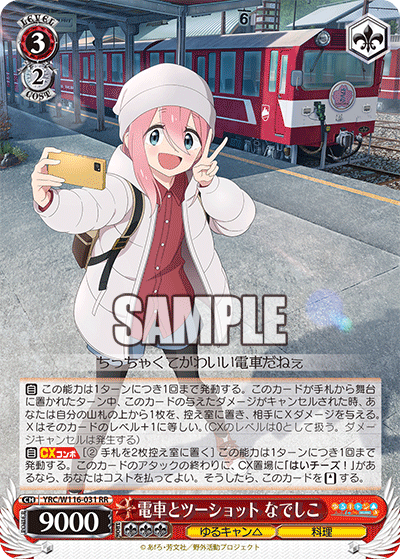
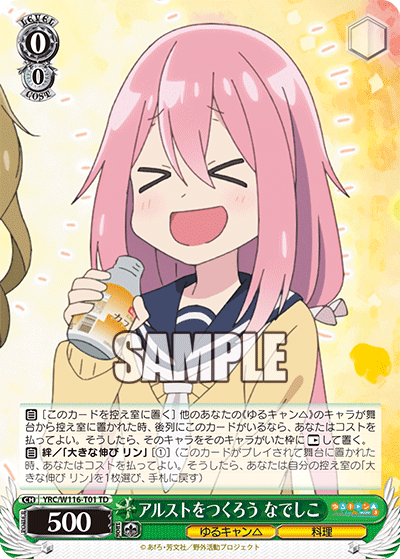
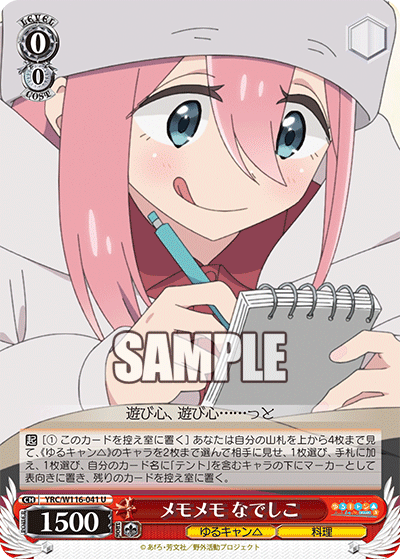
Level 1 Nadeshiko Bar Combo

I hadn’t thought too much about the TD level 1 combo before, but this card is making me give it a second look:
If you have double combo plus Sakura, with the saver in back, you can use Sakura to loop one combo and the saver to loop the other, with the option to grab the saver back off one of the combos to continue the loop, and then you still have another combo to grab whatever else (I’d probably default to the alarm). (One funny thing there is that if you don’t have a full field, bouncing back Sakura and one combo makes the other combo lose 1k since you no longer have 2 other characters; likely not too relevant, but something to be aware of.)
And if you’re facing a wall where you’re crashing in, you can instead grab the search bond (which is also just generally a benefit of playing this combo):

That Sakura is also one of the cards I mentioned earlier with the door finisher, so I think this is the level 1 combo I’ll pair with that. The opponent can crash into the Nadeshiko before fronting the Sakura, so it’s not foolproof, but it’s still a bit of built-in synergy. You can also just not have the Nadeshiko in front (whether because you crashed it in or just didn’t do the combo last turn), and instead bounce your brainstorm back to hand (or fail to find and do nothing but spend a stock to deny a crash).
Since the plan is to pay a stock every turn, you don’t necessarily want to spend a lot of stock on the event or the EP; honestly, the deck is likely to end up more stock-limited than hand-limited, since you can get hand but not stock from triggers, and if you have the stock to play down triple Nadeshiko, that’s still a decent finisher even if you only have the hand to combo twice.
Others
Other lv0/lv1 combos:


The level 1 Aki could be nice, but requiring a reverse is basically a dealbreaker for me; it’s not unlikely that you just get fewer instances of the combo than you would with a non-reverse combo, which removes most of the benefit of getting extra resources (though I guess you could look at it the other way, that getting extra resources makes up for potentially getting fewer instances).
The Nadeshiko door seems fun, but it’s not very selective (though the alarm can help with that); also, the set not having much ability to loop climaxes outside of triggers is a point against a door combo — or maybe really, pushes you towards using the pants finisher with it (since it does have a pretty good chance of finding a trigger). It sits decently big cross-turn, but not big enough that you’d actually expect it to survive with any regularity, just enough that it’s not surprising if it does.
The Aoi standby combo isn’t something I could imagine using outside of like an 8 standby deck, but it’s included for completeness.
Moving on to level 0 combos, the Aya pants combo is playable I guess, but actually getting multiple of it at level 0 is questionable, and if you don’t do that then it’s mostly just a really bad level 1 combo.
The Aki standby combo is pretty nice; I could see having a climax split where you use it alongside a 1k1 combo. Like using it at level 2 to standby out a copy of your finisher… though both the door and bar finishers have hand-to-stage abilities that are pretty useful, so they don’t especially want to be standbyed out. Maybe you could aim to use it at level 0 to grab 2 copies of your level 1 combo? Hmm, actually I could see like a 4 standby / 3 door / 1 bar deck with this and the Nadeshiko level 1, where you throw in a couple 2/2s to use as a midgame in the not-unreasonable case where you trigger a standby at level 1. (Bar finisher to maximise the chance of seeing that 1-of climax.)
There’s also the option of forgoing a level 1 combo and instead playing the vanilla 2/0 and the brainstorm that lets you bring it out early:

You could probably fairly easily get an 8k wall at level 1, but it doesn’t really lend itself to doing anything else afterwards, since of course they’re vanillas, and the brainstorm doesn’t do a lot when you’ve already got a full field (though it’s not nothing; there are cost 0 characters with act abilities or on-death abilities, at least). And 8k is not even especially big; there are multiple level 1 combos that hit that number by default.
Plussing 0s
Not a ton of options for plussing level 0 characters:


The most obvious one, to me at least, is the cleancut; cleancut is a nice profile in general, and this one has the benefit of being a decent attacker if you’re going first as well as if you’re going second.
The deck climax swap is also a runner, which is tempting, but I don’t want to run a deck climax swap without a waiting room climax swap, since it can’t get climaxes that are buried in stock (and can be awkward with the blind stock from bar triggers, since it’s possible to not know whether or not the climax you want is in deck). So I probably only run this if I feel like I want more than one climax swap.
Then there’s the aqua riki. I often end up avoiding these because they whiff on events, but Yuru Camp doesn’t have much in the way of events; in particular, the main one that I’d want to run is the blue 1/0, and I’ve ended up with a couple decks with green/red level 1 games, so I suppose I just don’t play events in those decks and then don’t feel bad about playing the aqua riki. Maybe the door topend deck plays the 2/2 event, but probably as like a 2-of. And honestly even with 4 events, an aqua riki still has a 57% chance of being a plus 2, so it’s not a deal-breaker.
There’s also a 4k oversize, which I don’t have a ton of confidence in — in particular, if you hit the opponent to level 1, it’s all but guaranteed to die.
The card that goes to stock when the opponent plays a climax isn’t exactly a plus, but is still notable as free resources.
You could also just lean on the standard riki, aiming to play non-plussing 0s like the on-attack akatsuki and then make the hand back next turn with a riki you kept in hand.
General Deck Skeleton
Some generic stuff that’ll likely be common between most decks I’ll build:
1 of the stockshuffle, and likely 1 of the TD Aki as well
3 rikis (I default to 3 rikis, as you want to see them early but they’re not useful turn 1, and you generally only use 1; maybe should be 4 if the deck doesn’t have the 1/0 event)
1 of the waiting room climax swap, and maybe 1-2 of the deck climax swap as well

A brainstorm; probably a 3-4 of for the Nadeshiko, but could be a 2-of (it’s nice to trigger the Nadeshiko brainstorm, but not especially important; and brainstorms in general get more useful later on, though they’re still nice to see early)


Some number of cleancuts and aqua rikis (probably just a 3-3 split)
1-2 EP healers, probably the Aoi since it has a better EP condition

Some number of the alarm, maybe 3 (nice to have pretty much every turn, but probably there are some turns where clocking levels you up and/or you just don’t want to clock)
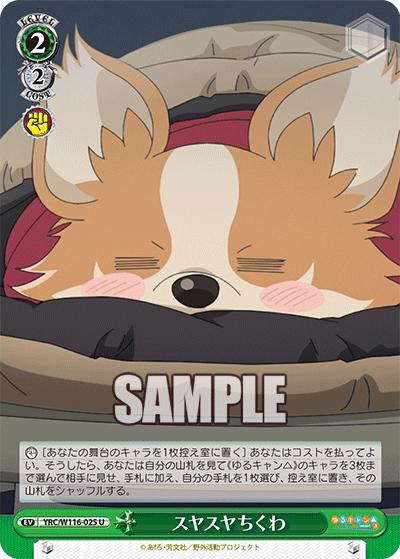
Some number of the saver, probably 3 (similar to the alarm, it’s something that’s nice to see repeatedly. It’s primarily for looping the level 1 combo, so only really useful if you expect to have another turn of that, though there’s also a slight possibility of being able to use it to loop the level 3 combo, I suppose)
1-2 helmet as a ditch outlet and a bit of extra (or delayed) selection

1 of the bouncer (could be more I guess, if you feel bouncing is important in the meta)
1 of the level 3 climax salvager
1-2 of the hand-to-stock, which can also effectively be a drop salvage, or can be an efficient ditch outlet if you’re paying stock afterwards anyway
If the deck has green at level 1, 1-2 of the Mei, which can set the alarm and is just generally useful
If the deck has blue at level 1, 3-4 of the 1/0 event, for selection (particularly into the level 1 combo) and deckspeed
That’s already 30+ cards I guess, pretty meaty for a skeleton honestly. And once you add in climaxes and 4-of combos, it’s more like 46+, almost the entire deck. So individual decks will probably end up cutting down on various counts and tech options/nice-to-haves.
Decks
All right, having gone through all the combos (and a bunch of other cards), I feel like I have an idea of what decks I want to make, so let’s try to narrow them down to 50 cards.
Deck 1: Nadeshiko Bar / Nadeshiko Door
First up, I think the door topend is the best finisher (as I said in the Finishers section), so I want to make a deck around that, with the level 1 combo being the TD combo supported by Sakura and the saver (as I mentioned in the Advantage section).
So that’s 4 each of the combos, and probably 3 of the level 1 Sakura (which you want to see fairly early but mostly only need 1 of), and similarly 3 of the search bond to the level 1 combo.
Let’s say 2 of the 2/2 event (as something you probably only want to play once, late in the game):
And a couple of the card that goes to stock when the opponent plays a climax (you can aim to play one of these before the finishing turn if you can’t crash the lane, and it’s nice early on as well):
Looking back at the skeleton:
- Sticking with 3 rikis because this deck is only going for double combo, not triple
- Probably only need 1 climax swap
- Definitely using Nadeshiko brainstorm (it can be bounced back by the Sakura)
- Definitely using Aoi EP since it’s green, plus it can deny a crash — though note that if they front Sakura first, that probably removes the condition for Aoi to bounce back (and it’s mandatory to bounce a Nadeshiko if you pay the cost for Sakura).
- Don’t necessarily need the helmet as a ditch outlet since the Sakura can fill that role to some extent, but it’s still nice if you hit 0 on the combo and want to get a higher level character
- Level 1 game is green/red, so no blue event
It might be nice to have some power pump to get the finisher out of range of a memory kick backup, but it’s probably not worth actually spending hand on that: if getting out of memory kick range costs you hand that you could otherwise have used for the combo, then you didn’t actually gain much (though it’s not nothing: if there are multiple lanes where they can memory kick, they can potentially choose to kick a combo that hasn’t yet gotten its musashi burn off, whereas if you don’t have enough hand, you can prioritize those combos for restanding). The problem is that decks with memory kick also tend to be decks where it’s hard to get out of range of memory kick, particularly given that the combo is small to begin with, so I don’t think it’s particularly worth it. And some amount of the time you’ll play 3 combos but not have the hand to triple combo regardless.
Having doors makes the freefresh backup tempting, but you generally only have level 1s on board, which are pretty easy to side, and the alarm can potentially let you just avoid triggering too much anyway.
I think I’m at 53 cards at this point (45 non-climaxes), so need to cut 3. Let’s count up levels and colors:
- 8 green level 0s (3 search bonder, 3 saver, 1 bouncer, 1 hand-to-stock)
- 10 red level 0s (1 climax swap, 3 brainstorm, 3 aqua riki, 3 alarm)
- 9 blue level 0s (2 run-to-stock, 3 riki, 3 cleancut, 1 helmet)
- 5 green level 1s (4 combo, 1 Mei)
- 3 red level 1s (Sakura)
- 2 green level 2s (event)
- 1 red level 2 (stockshuffle)
- 2 green level 3s (1 EP, 1 climax salvager)
- 5 red level 3s (4 combo, 1 TD Aki)
That’s 27 level 0s, 8 level 1s, 3 level 2s, and 7 level 3s; and 17 green, 19 red, and 9 blue. So fine on colors, and can afford to cut level 0s (indeed, probably want to cut those, because you generally want to see higher-level cards for the musashi burns).
I’m thinking I’ll go down to 2 of the aqua riki, since the deck does run a couple events and has other good turn 1 attackers in the form of the search bonder and the card that goes to stock when the opponent plays a climax.
I’ll also cut the helmet; the brainstorm also works as a level 0 to grab off of cigarettes in order to get a higher level character, as does the hand-to-stock if you want something more reliable.
Last cut will be one of the search bonder; between that and the riki, there are still 5 cards that can search out the level 1 combo, and I feel like the riki is more important.
Finally, the toughest part: coming up with a name for the deck. I guess most of the cards on the board past level 0 will likely be Nadeshiko and her sister, so maybe I just name the deck like that. What’s their last name again? Kagamihara, apparently. “Kagamihara Sisters”… sure, that works. Has a nice ring to it. (OK, maybe that wasn’t actually that tough, this time.)
So here the deck is on EncoreDecks: MXBWK4bWN
…And I guess I can’t make a compact picture there, so here it is on Deck Log as well: 5V5Q2
Deck 2: 8 Bar (Aoi / Rin)
As I mentioned earlier, I like the idea of the level 2 Aoi combo alongside the +soul/bounceback vanilla package. (There’s a bit of anti-synergy in that the combo requires 2 or more others at encore step; but I guess since you need a full field to EP it in the first place, you’ll still have 2 cards in the back row even if you bounce back 2 vanillas. It could come up on a later turn, I suppose; probably not especially likely, but something to watch out for.) The combo and the backrow are both probably 3-ofs, since you want to see them by level 1 but normally only need 1 of each, while the vanilla is a 4-of since you could play 2 of them.
To enable the full-field EP condition for the combo, I want to run the riko, probably as a 3-of… actually, there are 2 rikos, so maybe a 2-1 split between the level 0 and the level 1 (since the level 1 riko is red, so doesn’t help at 1-0). That also means it could be nice to run 1 of the drop-draw, to grab off a riko if it reveals a climax (or a character that isn’t in the waiting room) that you want.


This level 1 game has no deckspeed and may well be leaving direct lanes, so I want some level 0s that can mill; the on-attack akatsuki and the fukaziroh are the obvious choices there. The on-attack akatsuki is generally better since this deck doesn’t have the 1/0 event, but the fuka works during main phase if necessary. Then again, you can just play the on-attack akatsuki alongside the combo (maybe even after playing it the previous turn and then cleancutting it, though generally you’d prefer to cleancut a backrow for more flexibility). So I’ll start off with a 4-2 split, but could end up cutting the fuka.
Since this deck has a level 2 combo, it could be useful to have backups. The antichange doesn’t work great with the deck because you may well not have the condition on account of bouncing characters back to hand (or just crashing in the other lanes); the freefresh also doesn’t have the best synergy, since it doesn’t pay out bars (or at least not all of them), and if you’re leaving direct lanes the freefresh may come too late. But the combo giving you selection at encore step means that you can ignore them when they’re not useful and grab them when they are, I suppose. On that note, I think the 1/0 backup could be nice to grab if you didn’t find the saver and the opponent isn’t yet level 2 (or maybe even if they are), to maximize the chance of keeping the combo around for free. Though maybe it’s better to just grab another copy of the combo in that case, and accept that you might need to pay a stock.

The level 3 combo is the Rin bar, mostly by process of elimination; but since you hopefully don’t need to spend much stock to maintain hand or pay out climaxes, you can potentially build up a lot of stock and then do triple Rin combo plus an extra burn from the assist and/or TD Aki.
I’m thinking the assist and TD Aki will be 1-ofs, since they fill much the same role (and I don’t really expect to have enough resources to do both).
Looking back at the skeleton:
- The riki can’t search out the level 2 combo, so maybe just don’t bother with it in this deck; the aqua riki still works for clocking up, if it comes down to it
- Going for one of each climax swap, since the level 3 combo being on bar means that it’s fairly likely that you’ll want to climax swap
- The cigarettes backrow mostly takes the position of a brainstorm in this deck, but it might still be good to have one as a way to select into higher-level cards during main phase. Probably want the salvage brainstorm, though there’s an argument for the search since there’s less deck access in general
- Aoi EP healer since it’s green
- The deck already has rikos for ditch outlets, but like the brainstorm, the helmet could still be nice as a way to get higher-level cards
- Skipping the climax salvager since the level 3 combo is a check X
- 2 of the Mei; if you’re at 1-0, it’s an attacker with a reasonable amount of power, and if you’re above that, it can potentially get you red and/or help you meet the EP condition
- No 1/0 event because the level 1 game is green/red
Cards I’m not including:
I mentioned this climax-trigger support earlier in this post, but at the end of the day I just don’t particularly care for these sorts of abilities, and even more so when the alarm means that you can turn an extra trigger into a cancel instead. The on-attack akatsuki can also be used to ditch a bar mid-attack phase, if necessary.
The on-reverse koume is another option to help with milling. I’ve mostly ignored this card, despite the set not having much else that digs for climaxes: the fact that it’s on-reverse means that you can’t grab it when you need to dig for a climax, but instead have to attack with it the turn before; and you mostly only want to attack with it at level 0, but that’s also when it’s least useful, since you have the mulligan and all of level 0 to find your level 1 climax, compared to other turns where you just played a climax last turn and need to find another one this turn. However, with Aoi combo, you’ve got room in the front row to attack with stuff like this; on the other hand, this deck being 8 bar means it’s probably less useful than otherwise. So overall I don’t think it’s worth it; the vast majority of the time I think you’d prefer to attack with something else, given that you don’t know whether or not you’ll trigger a bar anyway.
On the subject of milling, there’s also the 2/2 alarm that can mill 3. The issue there is that it’s basically a dead card outside of that, plus you’d generally prefer to use the other alarm anyway.

It could be nice to run this level 1 off-climax searcher, but the fact that it needs to rest a character conflicts with the cigarettes backrow that needs to rest 2; plus, the deck already has a lot of level 1s.
Counting up levels and colors at this point, there are:
- 12 green level 0s (2 riko, 4 on-attack akatsuki, 1 climax swap, 3 saver, 1 bouncer, 1 hand-to-stock)
- 12 red level 0s (3 cigarettes, 1 drop-draw, 1 climax swap, 1 brainstorm, 3 aqua riki, 3 alarm)
- 6 blue level 0s (2 fuka, 3 cleancut, 1 helmet)
- 2 green level 1s (Mei)
- 6 red level 1s (4 vanilla, 1 riko, 1 backup)
- 4 green level 2s (3 combo, 1 assist)
- 2 red level 2s (freefresh, stockshuffle)
- 1 blue level 2 (antichange)
- 5 green level 3s (4 combo, 1 EP)
- 1 red level 3 (TD Aki)
So that’s 51 non-climaxes: 30 level 0s, 8 level 1s, 7 level 2s, and 6 level 3s; or 23 green, 21 red, and 7 blue. Need to cut quite a bit here.
First off, I don’t think the deck actually needs 3 backups; I’ll at least cut the freefresh, since I think that’s the least likely to be useful (likely the opponent can play around it, or it costs too much stock while still leaving you uncompressed because your climaxes are in hand).
I put in both the brainstorm and the helmet as options for when you want to get a higher level character off the cigarettes (or riko); I’ll probably just take those out, since the hand-to-stock can also work for that, just less efficiently.
I think I’ll just cut the cleancut entirely; I feel like this deck wants to be dedicating its level 0 attacks to cards that can mill.
Probably only need 1 climax swap, since the cigarettes can guarantee access to it if it’s in the waiting room, and you can potentially still plus while playing the wrong climax.
I was already thinking of cutting the fuka, though I think there’s something to be said for having it available as an option, so I’ll just cut 1 copy.
I’ll cut the antichange as well; the main case where I could imagine it being impactful is when you have the EP alongside the combo, and at that point you’re spending a pretty significant amount of resources. And some amount of the time you can just use the bouncer to deal with whatever you’d want to antichange.
Since this deck is built around the level 2 combo and the vanilla package, I’m thinking I’ll call it “Pictures of Okonomiyaki and Dam Stew”.
(The thing to imagine there is someone saying “I thought you went camping? These are all just pictures of food!”)
EncoreDecks: jzddvfg66
Deck Log: 53KJ6

Deck 3: 8 Pants (Rin / Ena / Rin)
This will be the Rin level 1 deck, aiming to be a bit more defensive with the minus soul combo and the healing finisher. Maybe play into the EPs a bit more, as well, though I still want to have enough resources to present a reasonable finisher; the defensive aspect is mostly meant to help you actually have a finishing turn, and then provide a bit of insurance if you fail to kill. So ideally you want to hit the opponent to level 3 first, survive their finisher, and then either kill them on the swingback or else be in a position to survive the followup turn, where they probably don’t have resources to do much.
The level 1 and level 3 combos are 4-ofs, of course; the level 2 combo is probably a 2-of, since you’ve got until level 2 to find it and you probably only need one (I suppose you could have 2 on board in case you end up with both of the climaxes in hand or in order to play around bouncers, but I doubt that’s worth it).
Notably, I’m not planning to run any tents, so the finisher will just be a burn 3; the assist takes up a backrow slot, and I suspect getting the markers under the tent incurs a real cost, in resources and/or deckbuilding, since most of the ways to get markers are a bit inefficent, or replace something that might be better. (For example, there’s a card that can marker a level 1 or higher that it reveals on attack under a tent; but there’s a different card that does essentially the same thing, so long as you have a climax, but puts the card to stock instead. And you’d probably prefer to play a level 1 combo over either of them.)
Plus, this deck is probably going to use its resources elsewhere anyway. More than losing the option to burn 1, the bigger downside to not having a tent might be that the finisher is very small, which could be an issue if both players survive each others’ finishers, since you don’t want to leave empty lanes and/or leave your opponent’s 2-soul characters alive; the assist helps with that, at least.
Since the combo doesn’t lend itself to looping, I want some additional level 1s to hopefully continue to have decent attackers.
In terms of supplementary blue level 1s, the stockcharger is probably the best, with the alarm helping it hit. I’ll start that off as a 3-of, as something you’d like to see a couple times over the course of the game, but not the primary level 1 play. I guess that pushes the deck towards running more copies of the level 1 or higher characters, since there’s a better than normal chance that one gets stuck in stock.
Running the pants finisher also enables the reverser that checks for the number of that in waiting room; not sure how good that is exactly, since you probably want to hold onto some amount of finishers in hand, but I’ll at least give it a shot. The double top check ability is also nice; because of that, I think I’ll run the search brainstorm, since its draw/drop ability can be used to grab a card that you want (probably a climax) if you see it on those top checks. I suppose the double top check can also help with the case where you have 5 cards in deck but want to brainstorm, to minimize the chance of the awkward scenario where you have no search targets because there was a climax on the bottom. I’m thinking a 2-of for the reverser, as more of a tech card, and probably a 2-1 split on search/salvage brainstorms, with the salvage brainstorm still there for a bit of waiting room access.

This is the first of these decks where I’m not actually sure what the other color at level 1 will be (if any). I’m thinking green, since the 4-or-more EP is green; that also gives you access to the Mei. On the other hand, the alarm is red, and red has the better off-climax searcher. I guess if Mei is the only green at level 1, you can play that and then put the alarm into clock for red; and at level 2, you’re less likely to be able to get a reverse with a level 1 anyway, so you can prioritize green. The stockshuffle is also red, but using that at level 2 is more of an edge case.
I’ll start off with 2 Mei and 2 searcher, and maybe change that after seeing what the colors look like.
Looking back at the skeleton:
- Probably play 2 of the stockshuffle because of the stock charger; it’s also just a 2-soul attacker at level 2, I suppose. Maybe 2 of the TD Aki as well, since it’s basically just as good as the 3rd combo except for not healing (and is bigger)
- With a 3-climax split, definitely want multiple climax swappers, so 1 of each
- Since this deck can actually run the 1/0 event, the aqua riki is a bit worse, but on the other hand, the level 1 combo can take advantage of getting random garbage to hand, so I’ll keep it in, just cut it down to 2
- I’m thinking I want to run both EP healers; the blue one, while it has a worse EP condition, gives a bit of selection and sits bigger on the opponent’s turn. Probably just 1 of each though, since I’m not actually looking to spend a lot of resources on them
- The level 1 combo has a built-in ditch outlet, so probably don’t need the helmet; this deck could use more selection, but I’m mostly thinking of leaning on the brainstorms for that
- Maybe 2 of the climax salvager because of the stock charger
Not included:
I considered running some level 2s as additional attackers at level 2, given that it’s fairly difficult to loop the combo. There are a few options, but I don’t really want to spend stock on them, so the main one I looked at was the level 3 killer that refunds a stock if it reverses a level 2 or higher. (The 2/0 also doesn’t cost stock, but doesn’t do much unless the opponent can’t out an 8k.) But at the end of the day, I’d probably prefer to just have more copies of the level 1s or EPs, to let them get buried in stock by the stock charger. It also doesn’t help that the assist only gives power to level 3s.


I also considered backups, but this deck doesn’t present much of a board. Plus, you tend to have to hold on to backups for a bit (at least until your opponent’s attack phase) without knowing if they’ll be useful, and I don’t really want to spend limited sculpting on that. (On the other hand, if you see one off the level 1 combo, you’re potentially holding on to it for less time than other cards… not sure how much sense this really makes, but at any rate I didn’t bother with backups.)
So let’s see what we’ve got so far:
- 6 green level 0s (1 climax swap, 3 saver, 1 bouncer, 1 hand-to-stock)
- 7 red level 0s (1 brainstorm, 1 climax swap, 2 aqua riki, 3 alarm)
- 8 blue level 0s (2 brainstorm, 3 riki, 3 cleancut)
- 2 green level 1s (Mei)
- 2 red level 1s (searcher)
- 13 blue level 1s (4 combo, 3 stockcharger, 2 reverser, 4 event)
- 2 red level 2s (stockshuffle)
- 2 blue level 2s (combo)
- 3 green level 3s (1 EP, 2 climax salvager)
- 2 red level 3s (TD Aki)
- 5 blue level 3s (4 combo, 1 EP)
52 non-climaxes
21 level 0s, 17 level 1s, 4 level 2s, 10 level 3s
11 green, 13 red, 28 blue
Definitely need to make some cuts; in particular, that’s a lot of level 1s, so let’s start there. Honestly I might be overestimating the number of secondary level 1s needed; I’d still expect to be able to loop the combo a bit, just not a lot, and I’m also planning to have an EP at level 2, so there aren’t that many extra slots to fill.
I’ll cut the red searcher; it makes the level 1 colors more complicated, and is best early on, which is when you’re most likely to have combos anyway.
Cut the stockcharger down to 2; that makes it a simple 2-2-2 for the secondary level 1s.
Cut the second climax salvager; this is an 8 pants deck, after all, though it also wants to drop a climax for the minus 2 soul and then play one for the finisher, so I definitely want to keep one copy.
Cut the second stockshuffle; at the end of the day, I don’t actually expect to stockshuffle that much, and it’s got a much better chance of being able to be salvaged off the event than the level 3s do.
Cut the event down to 3; it doesn’t work well with the aqua riki, and also isn’t grabbable off the combo (so it reduces the selection and can make the milling less flexible; it also increases the chance of whiffing a check 3 entirely, though that’s still extremely small).
Cut the second TD Aki; I guess at this point I’m just getting rid of all the extra copies of level 1 or higher cards that I’d thought were a good idea.
Cut a cleancut; there are still 5 plussing 0s, I guess.
Cut Mei and the reverser down to 1 each, I suppose, since they don’t actually get you resources (at least directly).
Double-checking the colors, that leaves 9 green, 9 red, and 24 blue non-climaxes; that’s enough, I suppose, given that there’s only 1 green level 1 left (which you’re not particularly looking to play at level 1 anyway), and 3 of those red cards are the alarm.
And I only cut 1 level 0, so still plenty healthy in that respect.
The name of this deck will be… hmm, I guess if it’s mostly based around the level 1 & level 2 combos, it could be something like “Recollections of Hard Roads”? Let’s go with that.
EncoreDecks: q9B4vz3js
Deck Log: 4S4T8
Deck 4: 4 Aki Standby / 3 Nadeshiko Door / 1 Rin Bar
The deck I came up with when considering the advantage combos I didn’t expect to use, aiming to use the Aki standby combo to select into 2 of the Nadeshiko door combo, and then use that to maybe trigger a standby at level 1 and get a 2/2 out, giving you a decent midgame for free. 4 of the standby because you ideally want to use that combo turn 1 and also trigger one of them, then 3 of the door because that’s the level 1 combo, and finally 1 bar because that’s the finisher that seems most doable with a 1-of climax.
Probably 4 of each of the combos (you only need 1 of the level 0 combo, but you want to see that turn 1), and then 2 of the 2/2 since with only 4 standby you’re expecting to get 1 out at most; the only concern is getting that 1 into waiting room, I suppose. Then again, it’s maybe just the best standby target (to front row) at level 2 as well, so I’ll bump it up to 3 for now.

Since this deck only runs 3 of the level 1 climax, I think I’ll actually run the on-reverse koume, maybe even as a 4-of. That also helps with milling to get the 2/2 into waiting room (and just in general; the level 1 combo has some milling but not a lot).
If you play/trigger standby at level 2, maybe you just standby out a copy of the finisher or a 2/2, but I’ll put in a copy of the You burner as well. Even if next turn you’re level 3 and doing your finisher combo, you could just have this as the 3rd lane, particularly if you have the alarm to help control the burn; and at 11k, it’s a bit bigger than the finisher if you standby it to the front.

The fact that the level 1 combo is big cross-turn works well with the general standby sort of gameplan, but it’s awkward that its power condition depends on the back row specifically, since that means that if you want it to be at max power, you can’t use the level 0 combo’s second ability on your level 1 combo turn, and instead have to commit something that you might end up standbying over (though you’re generally aiming to standby to the front, so that’s not especially likely), unless you’re confident that you’ll trigger a standby.
It could be nice to have a global 500 or something in the back row to try to get the power line up a bit higher, but I’ll likely just go with the saver, the same as with my other decks. (That could also be useful for saving a level 3 standby’d to front, I suppose. Though at that point you could just standby it over the saver; not much reason to put it in front unless you think the opponent will crash into it and you’ll benefit from the direct lane next turn, I guess.)
A character that sacs itself could also be a good option, like the helmet or the pay 1 sac self check 4; those might be more useful on turns where you’re playing the standby combo instead of the level 1 combo, since you can just keep them in hand (or use them immediately) rather than having them compete for a backrow slot. There’s also the fukaziroh, which can sac itself but still works if it’s standby’d over (or in general, characters with on-death abilities, though with other ones you have to actually play over them). I feel like I’m leaning towards the helmet, probably as a 2-of, since I think this deck actually wants a decent amount of selection.
(Of course, there’s also a chance that you just have a riki or some random other card in back row. Come to think of it, the riki actually has a power pump that works from back row, so it’s not the worst thing to have sitting there.)
Since I’m running the bar level 3, I suppose it makes sense to run the assist that goes with it; one neat thing about that is that you could potentially hit a standby on your finishing turn and bring it out (though generally you’d prefer to already have it, of course). You don’t necessarily want to play it down at level 2, though, since if you hit a standby you probably want to standby a finisher or something to back row; though maybe you can standby over the brainstorm instead, or maybe 12.5k is big enough to just survive (or be backup-able, at least). A 1-of because it’s not especially important; there’s a decent chance you don’t have a reverse target anyway.
This deck definitely wants to run some backups. I’m thinking 3 of the 1/0 backup to have a decent chance of being able to use it to defend the level 1 combo, and then 1 each of antichange and freefresh.
Looking back at the skeleton:
- The hope is that you’ve already selected into 2 level 1 combos with the level 0 combo, but the riki is still important; you ideally want triple level 1 combo, and of course you’re not always going to find the level 0 combo — or perhaps the riki can get you that, if you have multiple turns at level 0. So keep the riki at 3 copies
- With a 1-of finisher climax, I definitely want both types of climax swap. They’re also nice if you trigger the bar earlier in the game. Probably still just 1 of each, though; you don’t necessarily need to swap between the other 7 climaxes, since there’s a good chance you can do either combo.
- Definitely the Nadeshiko brainstorm, I’d say; the level 1 combo can benefit a lot from it, at least if you don’t have the alarm (for example at 1/0, or if you needed to riki). And even if you do have the alarm, it can still help a bit, since you can rearrange top 2 after triggering a climax to decide what to get off the next combo (or ensure you hit if you see a character and a climax), then on the next attack do the combo first and then rearrange top 2 to determine which one you’ll trigger first (which I guess is mostly only relevant when there’s another climax in those 2, but could also let you set up a standby target to be paid out by the twin drive, for example). And of course, even if the rearrange isn’t really relevant, it’s still a power pump, which can be important given that the 2/2 really wants you not to crash (since its power is based on characters in front row).
- Cleancut doesn’t work great with standby in general; the alarm could help with that (by letting you trigger the standby on the 3rd attack, after doing the cleancut as the 2nd attack), but you’re probably saving that for level 1 rather than clocking it at level 0. Still, the deck is only 4 standby, and if you’re using the combo you can probably just leave the other backrow slot open to cleancut into. (As a side note, you could potentially cleancut the combo itself, if you don’t have another attacker; it doesn’t actually need to bounce back to hand to do the combo.) So I’ll just cut the cleancut to 2 for now
- The aqua riki, on the other hand, works quite well with standby, since it can pay out the standby if you standby over it; if you have the brainstorm on stage, you can additionally make it a bit more selective by doing the rearrange first. So I’ll bump that up to 4.
- Aoi EP since it’s green. Maybe a 2-of, since it seems nice to play it alongside a 2/2 and have 2 somewhat big lanes.
- You really want to have the alarm for the level 1 combo, so I’m going to say it’s a 4-of
- And on that note, 2 of the Mei as well, mostly to help set up the alarm
- Somehow I’ve ended up with yet another deck with no blue, so no event I guess (though the level 1 combo doesn’t work well with events anyway)
Counting that all up:
- 3 green level 0s (1 climax swap, 1 bouncer, 1 hand-to-stock)
- 20 red level 0s (4 combo, 4 koume, 1 climax swap, 3 brainstorm, 4 aqua riki, 4 alarm)
- 7 blue level 0s (2 helmet, 3 riki, 2 cleancut)
- 2 green level 1s (Mei)
- 7 red level 1s (4 combo, 3 backup)
- 1 green level 2 (assist)
- 5 red level 2s (3 2/2, 1 freefresh, 1 stockshuffle)
- 1 blue level 2 (antichange)
- 7 green level 3s (4 combo, 2 EP, 1 climax salvager)
- 2 red level 3s (You burner, TD Aki)
55 non-climaxes:
30 level 0s, 9 level 1s, 7 level 2s, 9 level 3s
13 green, 34 red, 8 blue
OK, need to cut a ton (13 cards). Probably want to keep most of the green, though.
Can cut the koume, aqua riki, and alarm down to 3 each, I suppose.
Cut the cleancut entirely; ideally you’re plussing a bunch off the double combos anyway.
Only 2 of the 2/2 is probably fine.
I was thinking the climax salvager could be important because the level 3 climax is a 1-of, but the combo is still a check X, so the climax swaps should be enough.
Cut the 1/0 backup to 2 I guess; can potentially grab it off a door, or just salvage the combo back next turn.
Cut the EP down to 1.
Cut the riki down to 2.
Cut the antichange; I’m thinking this deck will mostly want to spend its resources on the finisher. It’s looking to get a cheap but effective midgame, not to put a lot of effort into winning board.
Cut the You burner. Will just need to standby out a combo or 2/2 instead.
One more… cut the helmet down to 1.
And a name for this deck. It’s based around the Aki combo (and standby in general) and the Nadeshiko combo… hmm, the door’s name has the name “Jiunji” in it, maybe I could use that somehow. Or going from a solo camp to a group of 3, maybe there’s something there. “Nadeshiko Joins Aki’s Solo Camp”. Oh, or maybe the fact that you’re searching out 2 Nadeshikos. “Solo Camp, Double Nadeshiko”. Yeah, I like that one.
EncoreDecks: D73E7t0Zd
Deck Log: 27R58

All right, that was a lot of deckbuilding (and writing), more than I expected going into this. I don’t know how good these decks will actually end up being, but hopefully this was helpful and/or interesting.

Leave a comment